Hello everybody! This will be lengthy and only part one of my tek. I will be doing an additional one with an active CLS when i have some time. They have tips on this one for the CLS. Its been over nine months since I used a CLS and this tek. I might have missed something. One last thing this does not involve CRC. My route is

The background of how I figured this out was a mind-bender that took months of note-reading and trial/error. I always had nucleation no matter what I was doing, but the occurrence started happening in less frequent rates and ultimately ended. The main culprit to the operation was a swamp cooler. In the south, I never heard of one of these so I imagined it was just some west coast AC. Eventually, one day somebody informed when they visited my house. That moment i realized i was making shatter in a rainforest. This overlooked problem took me everywhere on the whole CLS system inside and out. I couldn’t tell you how disappointed I was in myself when open blasters were getting way better results than the custom CLS i built.
My Gear
-A.I. Vac oven 1.9 (covered windows with cardboard for no light penetration)
-Vac pump: AI easy vac 7
-Solvent: 40/40/20 from eco green (a godsend for cmep pump repair)
-Parchment paper (used the brown type from Raley’s. Better than Reynolds IMO)
-Good old painter’s putty knife (plastic)
-Active custom-built dry ice sleeve CLS (put it together using xtractor depot equipment)
-Cmep pump
-
Xtra equipment than typical CLS- Condenser Coil for pre-cooling solvent feed line into the extraction column.
-Biomass-
Nutrients affected stability:
-Snowstorm by Humboldt (foliar sprayed application)
-Terpinator
Watch out for any terp nutrients. Weird things happened in the past because of terp boosters.
-Other farmers factors-
-Pesticides/mold spraying during the hardening stage until harvest.
Note: we only used dr enzymes or plant therapy.
-Biomass prep-
Get out as many stems and big leaves as you can. Brown biomass. Slightly discolored biomass is all right, but if it’s dead crispy brown I always took it out. I used a chicken mesh screen to help do this faster. They have a certain size that can catch popcorn nugs and big leaves but lets your trim fall pass the screen.
Biomass dried of water moisture. Dehydrator > Oven.
-CLS Tips-
-Your BHO extraction has to be done with precision in the CLS. Always think slow and steady.
- No rapid changes of temperatures/psi in CLS. I ran my CLS from 0-15 PSI depending on ambient temperatures.
-The temperature of the shatter platter/collector is heated past your highest temperature in the oven before closing. (BE VERY CAREFUL AT SHUTDOWN. I usually lower my temps slightly for the collection about 15 mins before the shutdown routine. I never went past 100F and typically stood around 95F. Before shutdown around 90F. You can try to push your boundaries. this is just my settings
-Placing a heat exchanger (condenser coil; etc) between the recovery tank and extraction column. If you can cryo freeze the recovery tank and have a short hose to the column then you don’t need one.
-If your feedline doesn’t immediately get frosted as the solvent is entering the column than your solvent is too hot.
-Keep everything as cold as possible and slow-moving. Very slow-going. This also means your recovery tank valve(probably this is a ball valve. Upgrade to a SS globe valve) is not fully opened. I slowly opened it up while making sure no turbulence is in the feed line or my heat exchanger. TBH I never fully opened my recovery tank valve unless it was at the very end of my fill and the tank is empty.
-VAPOR Pressure is your enemy. Rapidly moving solvent in feed lines will cause this BUT if your solvent lines are as cold or colder than your solvent you won’t create this pressure.
-Bottom feeders. Open your main discharge valve first, then after the first couple of solvent drops in the collection vessel close.
Top sprayers. Purchase a shower head to distribute the solvent evenly. (hmm CRC)
-DON’T LET SOLVENT SIT STILL IN THE COLUMN.
-The goal for dewaxing is sustaining a stable uniform temperature around your extraction column at all times.
-The typical time it took me to completely extract a 7.5lb column of biomass was 30 mins this does not include recovery time.
-Purchase a larger recovery vessel if you can not extract everything on the first pull.
-Not running your fresh tank of solvent through the CLS to collect the mystery oil it leaves.
- Nucleation will happen if your CLS is not operational longer than one day. Possibly two if you’re in a cold no humid spot. Maybe you can get away with your CLS being under negative pressure while not in use (Idk if this is safe or will damage things. I never have done it before) The reason behind this is because any oil left behind will start the nuking virus due to o2 and humidity. You can give a nitrogen blanket of 10 PSI to stop this also.
-Not pulling vacuum during the dry ice sleeve dewaxing stage. I always kept a separate pump running during the dewaxing to get any water moisture left before I started my solvent release.
-I never froze my biomass before runs. I felt any type of water moisture will be frozen on the biomass if it was not dried and stored correctly before being vacuumed sealed. This is the job of a dewaxing column. IF you have moisture you will get less yield and more impurities. (Nucleations)
-Pressure check your CLS. You can not put a price on safety.
—> SAFETY TIP: If you are not using a bubble solution in a spray bottle checking for leaks on your first run every day. Shame on you. Things can happen and this is too easy for a piece of mind. ALWAYS SAFETY FIRST WITH HYDROCARBON EXTRACTION. Life is not replaceable. If you can afford a ppm meter, this is better.
-End of CLS run-
-You NEED to leave some solvent in the BHO before collecting.
-Tip: A good point to shut off is when your BHO looks Flatline and then a new set of bubbles come from the outside walls working in the middle in the shatter platter/collection. I’ll let this happen until the main wave of bubbles hits the middle puddle of oil.
-Turn off the pump or tankless that’s heating your collection pod after the above step
-Once your CLS is done. I usually dismantle everything that takes me about 5 minutes. Open the Bleeder valve very slowly. I mean very slowly. To quickly than you punch the outside air into your precious oil and you will make things harder but not impossible.
-MAKE SURE YOU HANDLE PARCHMENT PAPER WITH GLOVES during collection and tray placement. The oils from your skin can stay on the parchment paper. If it’s still there and you swipe your BHO than you might cause an outbreak or if you accidentally hit the BHO with your skin at any time.
-Using a putty knife for scooping out BHO was the only choice I had. This is a skill that will require time to not have agitation. I use to go in a circular motion scooping from the outside of the platter to the middle. It’s a single scoop to a single swipe on the tray. Very light pressure with the swipe. * I can usually get around 1/4 lb on a tray and fill every slot in my oven. Make sure the BHO has minimal agitation.
-OVEN TEK-
-Make sure all your trays are spotless on both sides. The oven should be spotless inside also. Clean after completing runs. Wax left on any parts will give uneven heat to your BHO–
-Preheat Oven: 88F with trays inside for at least an hour. (Takes time to be completely heated even if the temperature aren’t fluctuating on gauge)
-Air discharge valve, Closed
-Pump valve, Closed
–One Hour–
-Trays are loaded from the CLS and immediately brought to the oven
-Loads trays from bottom to top for easier placement in ovens.
Tip: Parchment paper is nice and tight to the trays. Parchment paper is flushed with sides of the tray. Parchment paper cannot overlap the sides of the oven wall. The BHO bubble will be controlled don’t worry fam. You will get better with BHO scooping and placement.
-The oven is fully loaded. Close oven door.-
-Open-air discharge valve by a couple of cranks. NOTE: If the outside air around the oven is hotter than your oven temperature eventually it will backflow into your oven.
HOT======>COLD_____OR____ More energy ======> Less energy
-The pump valve should be still closed.
-Let oven restabilize to 88F. (Wait an hour if you’re unsure)
-You can tell when the oven is stabilized when the bubbles will stop because it’s not degressing, but still looks uneven when sitting still. These are your preliminary bubbles.
Increase temperature by 1 degree and wait 15 mins.
Note: Keep increasing your oven by 1 degree and wait until you hit a point where the primary bubbles show. They will look different than the preliminary bubbles when you first put your BHO into the oven. They are very formed and aesthetic looking. You found the BHO viscosity solvent release temperature. RECORD THIS NUMBER. This will be the highest temperature in your Oven. All strains are different, but this is your calibration method for every strain. Usually, they are around 96-98. Highest I had was 102.
NOTE: this is a slow process at first, but once you have an eye for it, then you will find it easier by how the BHO is reacting after you close off the oven door. Your primary bubbles shouldn’t be popped when you first find your temperature.
-After finding the temperature- Close the air discharge valve.
-Pull vacuum with the pump valve closed
-Slowly open your pump valve. Once your bubbles are about to touch the top of the tray above it IMMEDIATELY close your pump valve.
-Turn off the pump
-Wait for the bubbles to settle and flatten down. Could take 15-20 mins
-Repeat this process. Until you hit 29.5. It will take about three or four times. Be patient.
-Once you’re hitting close to 29.5 and you know the bubbles won’t hit the top, then decrease your temperature by 5 degrees. (You will increase the temperature a degree per flip later on) If you BHO viscosity solvent release temperature was 95 you go down to 90
NOTE: You NEVER want outside air to come inside your oven once you close it off. Never open the air discharge valve during your pulls. Only when you need to release a vacuum for the flip. You would be super soaking the BHO with moisture causing your nuke if you open it up to “contain” your bubble.
-Vac @ 29.5. Let it run in between 12-26 hours. This is critical and will take time to figure out when it’s time to flip. The rough estimate is because If BHO stops bubbling, or is only bubbling in a few spots this will cause nucleation. Don’t let your BHO stay inactive under vacuum.
-Have one separate tray in the freezer for a few minutes before the flip.
-Turn the vacuum valve close.
-Turn pump off.
-Slowly open Air discharge valve. Very slowly
-Once opened enough for PSI to hit 0 (reference: vacuum door can open) wait five minutes. Your door should be closed.
-Remove the tray at the bottom first. Make sure no air circulation is happening in the room. (fans off & A/C off)
-Close oven door
-Take your frozen tray and flip it upside down. The flat surface is facing towards you.
-Take your parchment paper with the BHO and set it on top of the frozen tray. Wait 30 or fewer seconds.
-Take a fresh piece of parchment and flip the BHO on to it.
-Using the tips of your fingers places them at the top right corner of your flipped BHO. Apply slight pressure. Use your other hand to start peeling back. Use a rapid motion of pull and stop where your parchment paper looks like it’s vibrating. This will take time to master.
-If this successfully removed all trays. The bottom tray gets the least amount of pull throughout your entire oven. (At least in AI) so if BHO can be removed on this one than the rest will be easier and guaranteed.
-All valves Closed.
-Place your bottom tray to the very top slot. (THis is key for all trays to be done at the same time whenever you flip and remove) You’re placing the BHO exactly on another side of the oven slot. Make sure you close the oven after every tray insert. Don’t leave your oven door open if you’re not removing or adding trays.
-Close the Air discharge line
-Continue flipping using fresh parchment paper. You will only need a fresh paper on your first flip. The frozen tray could have added water moisture in your paper and that’s all it will take for nuking.
TIP: Make sure you examine the BHO and look for a fog color. If you see this remove this area after the flip and a 1/2 inch around it. This is nucleation before it shows as sugar.
MAKE SURE GLOVES ARE ON FOR ALL BHO & PARCHMENT HANDLING.
-After trays are loaded up and all valves should be closed. Increase your temperature to your previously recorded highest viscosity solvent release temperature.
-Wait until your slab looks 100% glossy. Any dull texture than the heat hasn’t reached that point. If you’re not sure to wait 15-20 minutes.
-Turn vacuum pump on.
-Slowly open your pump valve. Once your bubbles are about to touch the top of the tray above it IMMEDIATELY close your pump valve.
-Turn off the pump
-Wait for the bubbles to settle and flatten down.
-Repeat this process until you hit close to 29.5. This should only take once or twice.
-Bring your temperature 1 degree higher than your last pull. If it was 90 now it’s 91.
-Flip trays every 6-12 hours. Again, if your BHO is Flatline or minimal bubbling is happening you will need to flip.
NOTE: You will continue to do this whole process except you no longer have to bring it up to your highest BHO solvent viscosity release temperature every time you flip trays. You only need to do this on your initial and first flip. Make sure your BHO is glossy before every pull. Once you hit your viscosity release temperature make sure you pull on both sides of the slab. To know if your slabs are done after you remove it and wait 10-15 mins they should have no resistance on the paper when you pull the slab from the paper. If so in very rare cases increase your temp by 5 degrees and pull both sides.
-After your shatter is done, remove from the trays and place in a cold (65-70F) & dark area. Let your BHO sit for 12 hours minimal. Do not touch it or play with it.
Polish Tip: I’ll probably get some heat for this one, but after your BHO settled. Take a heat gun and bring it to around 600f, and about a 1/2 foot away from your BHO. Make a continual circular motion applying heat to your BHO you will see a glossy texture. Flip the BHO slab and do it again. Now your BHO should have a transparent clarity.
I hope this tek helps out. I will try to post as many pics as possible for any reference and of my final product. I will post my active CLS tek soon because this is a key part of a stable shatter. If any of the procedures were already claimed I’ll add you to that particular section. At the time I was doing this I didn’t read any sop or tek. This was just from note-taking, trial & error, and applying my previous education. I’ll try to answer any questions to the best of my ability. I know my grammar is horrible and hard to understand, but ill try my best to elaborate on anything that may seem confusing.
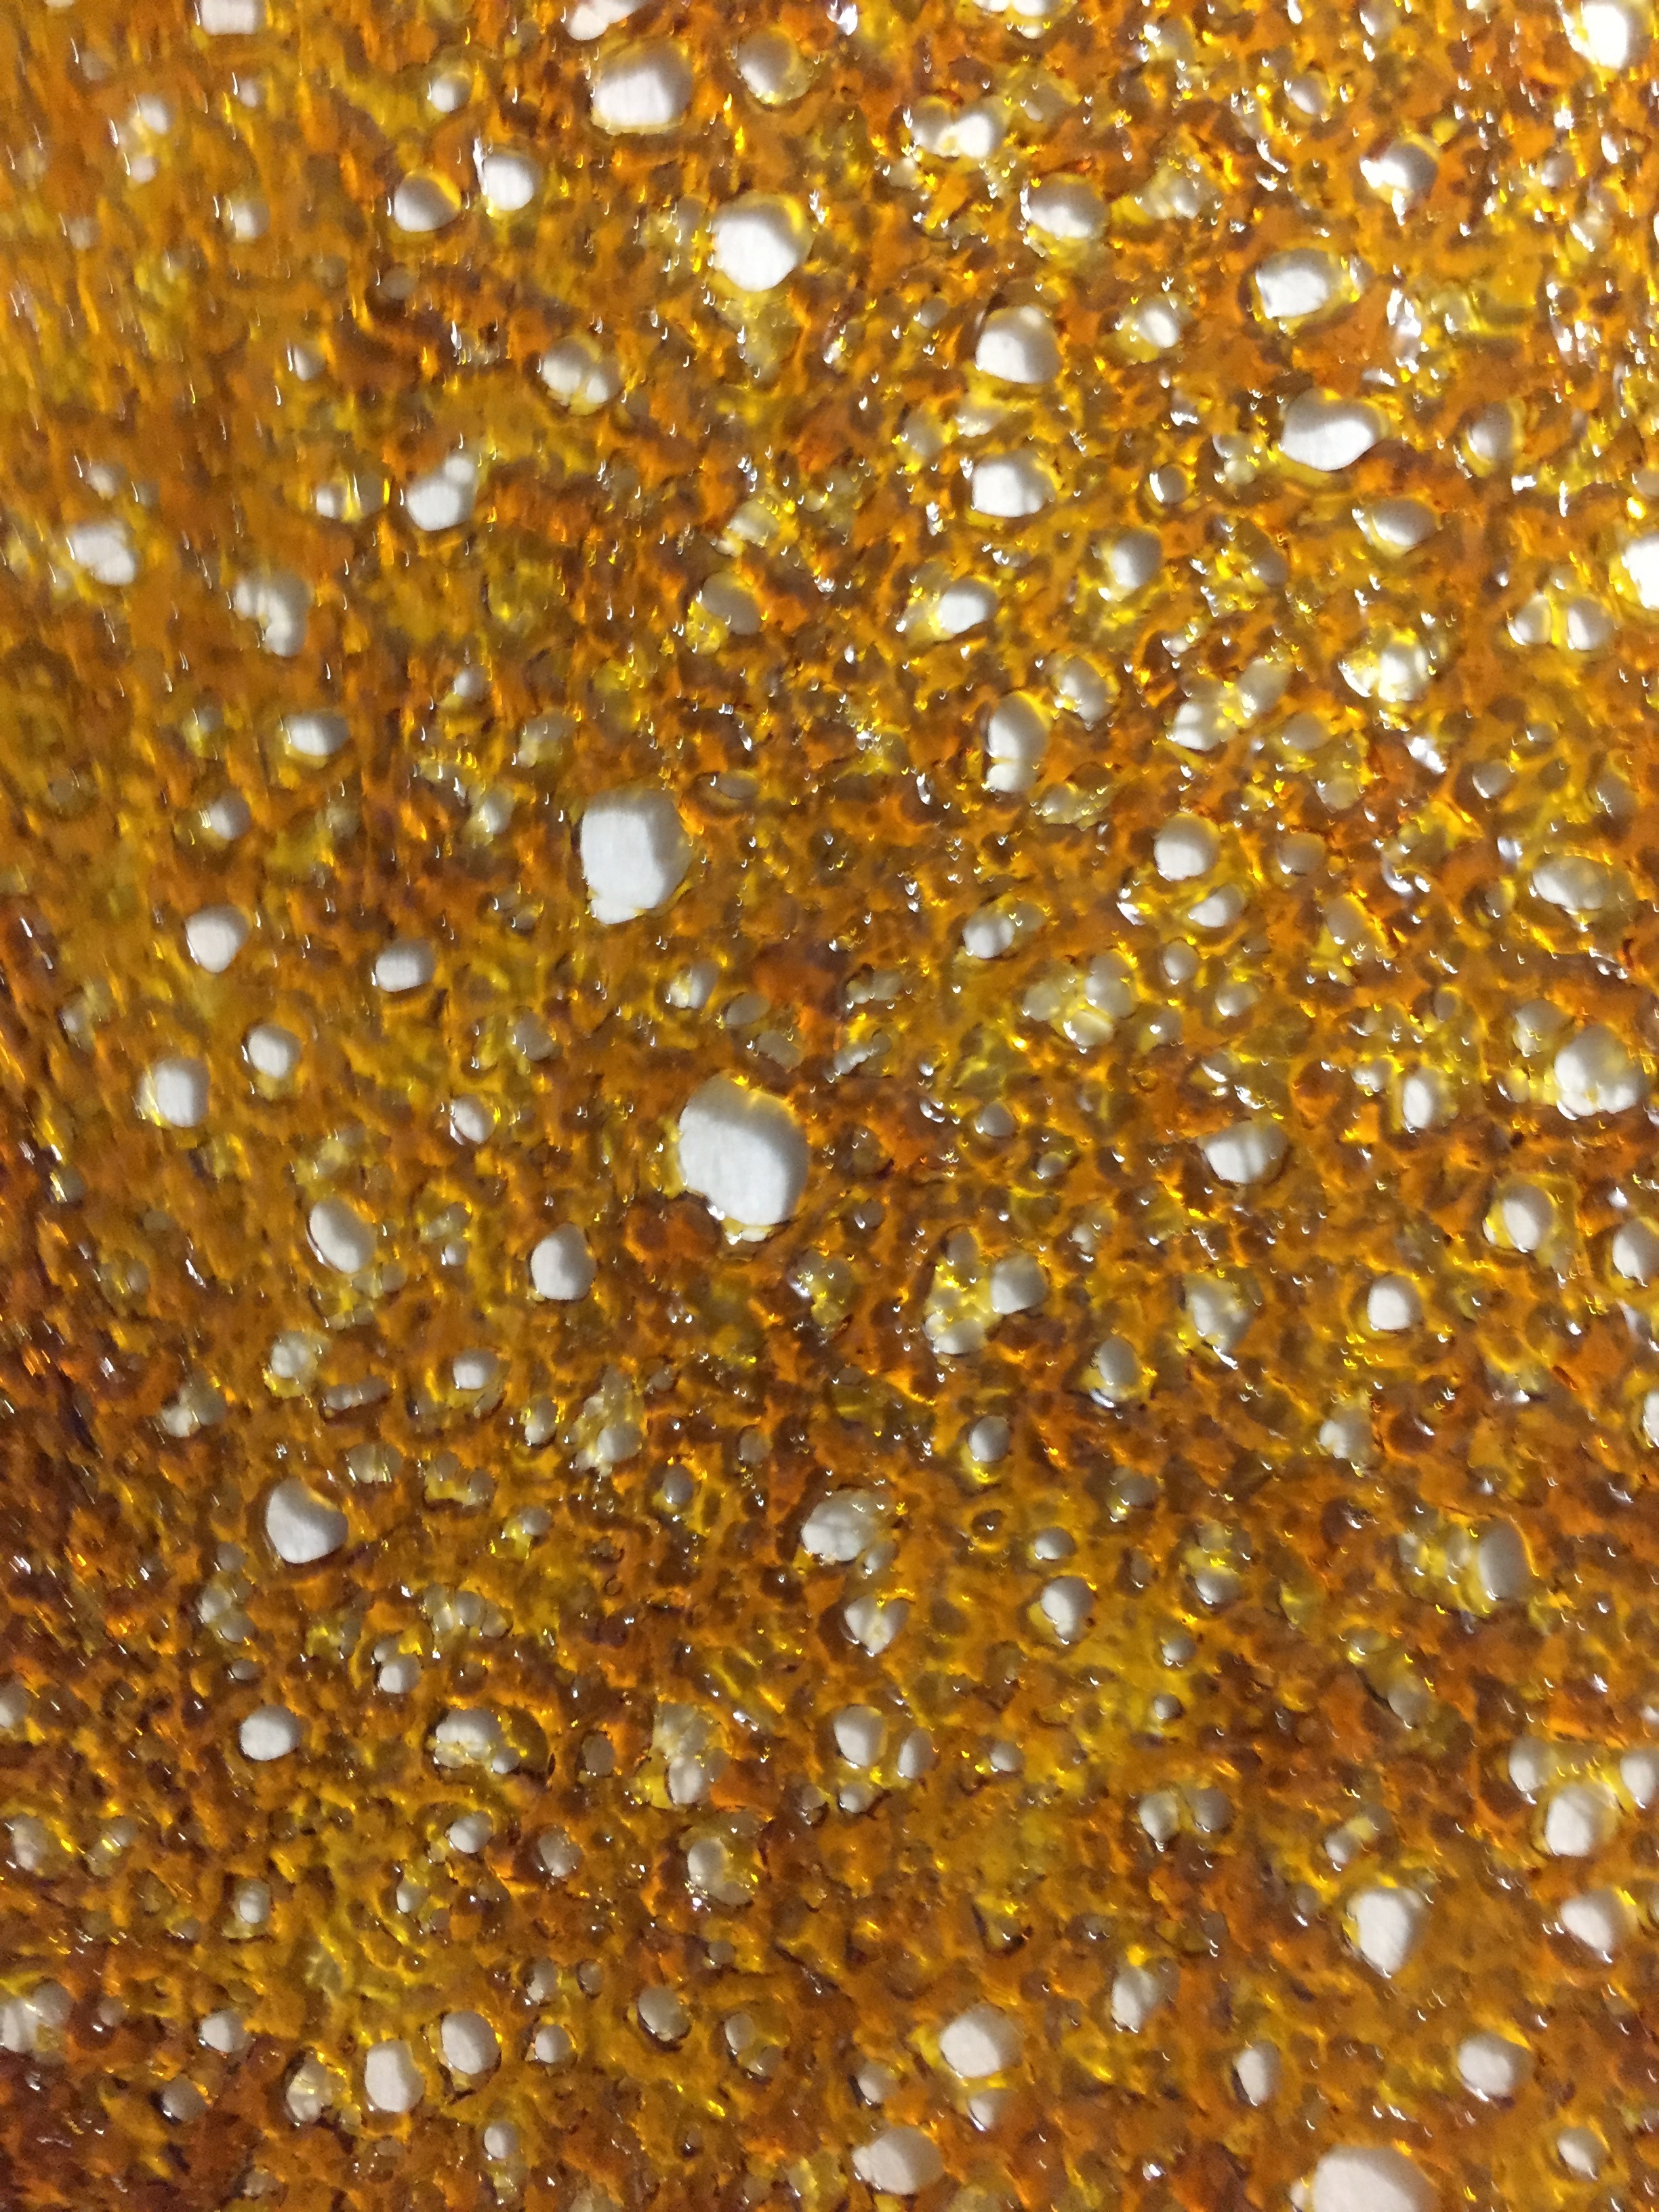
These shatter shots are from five month old trim that i processed.

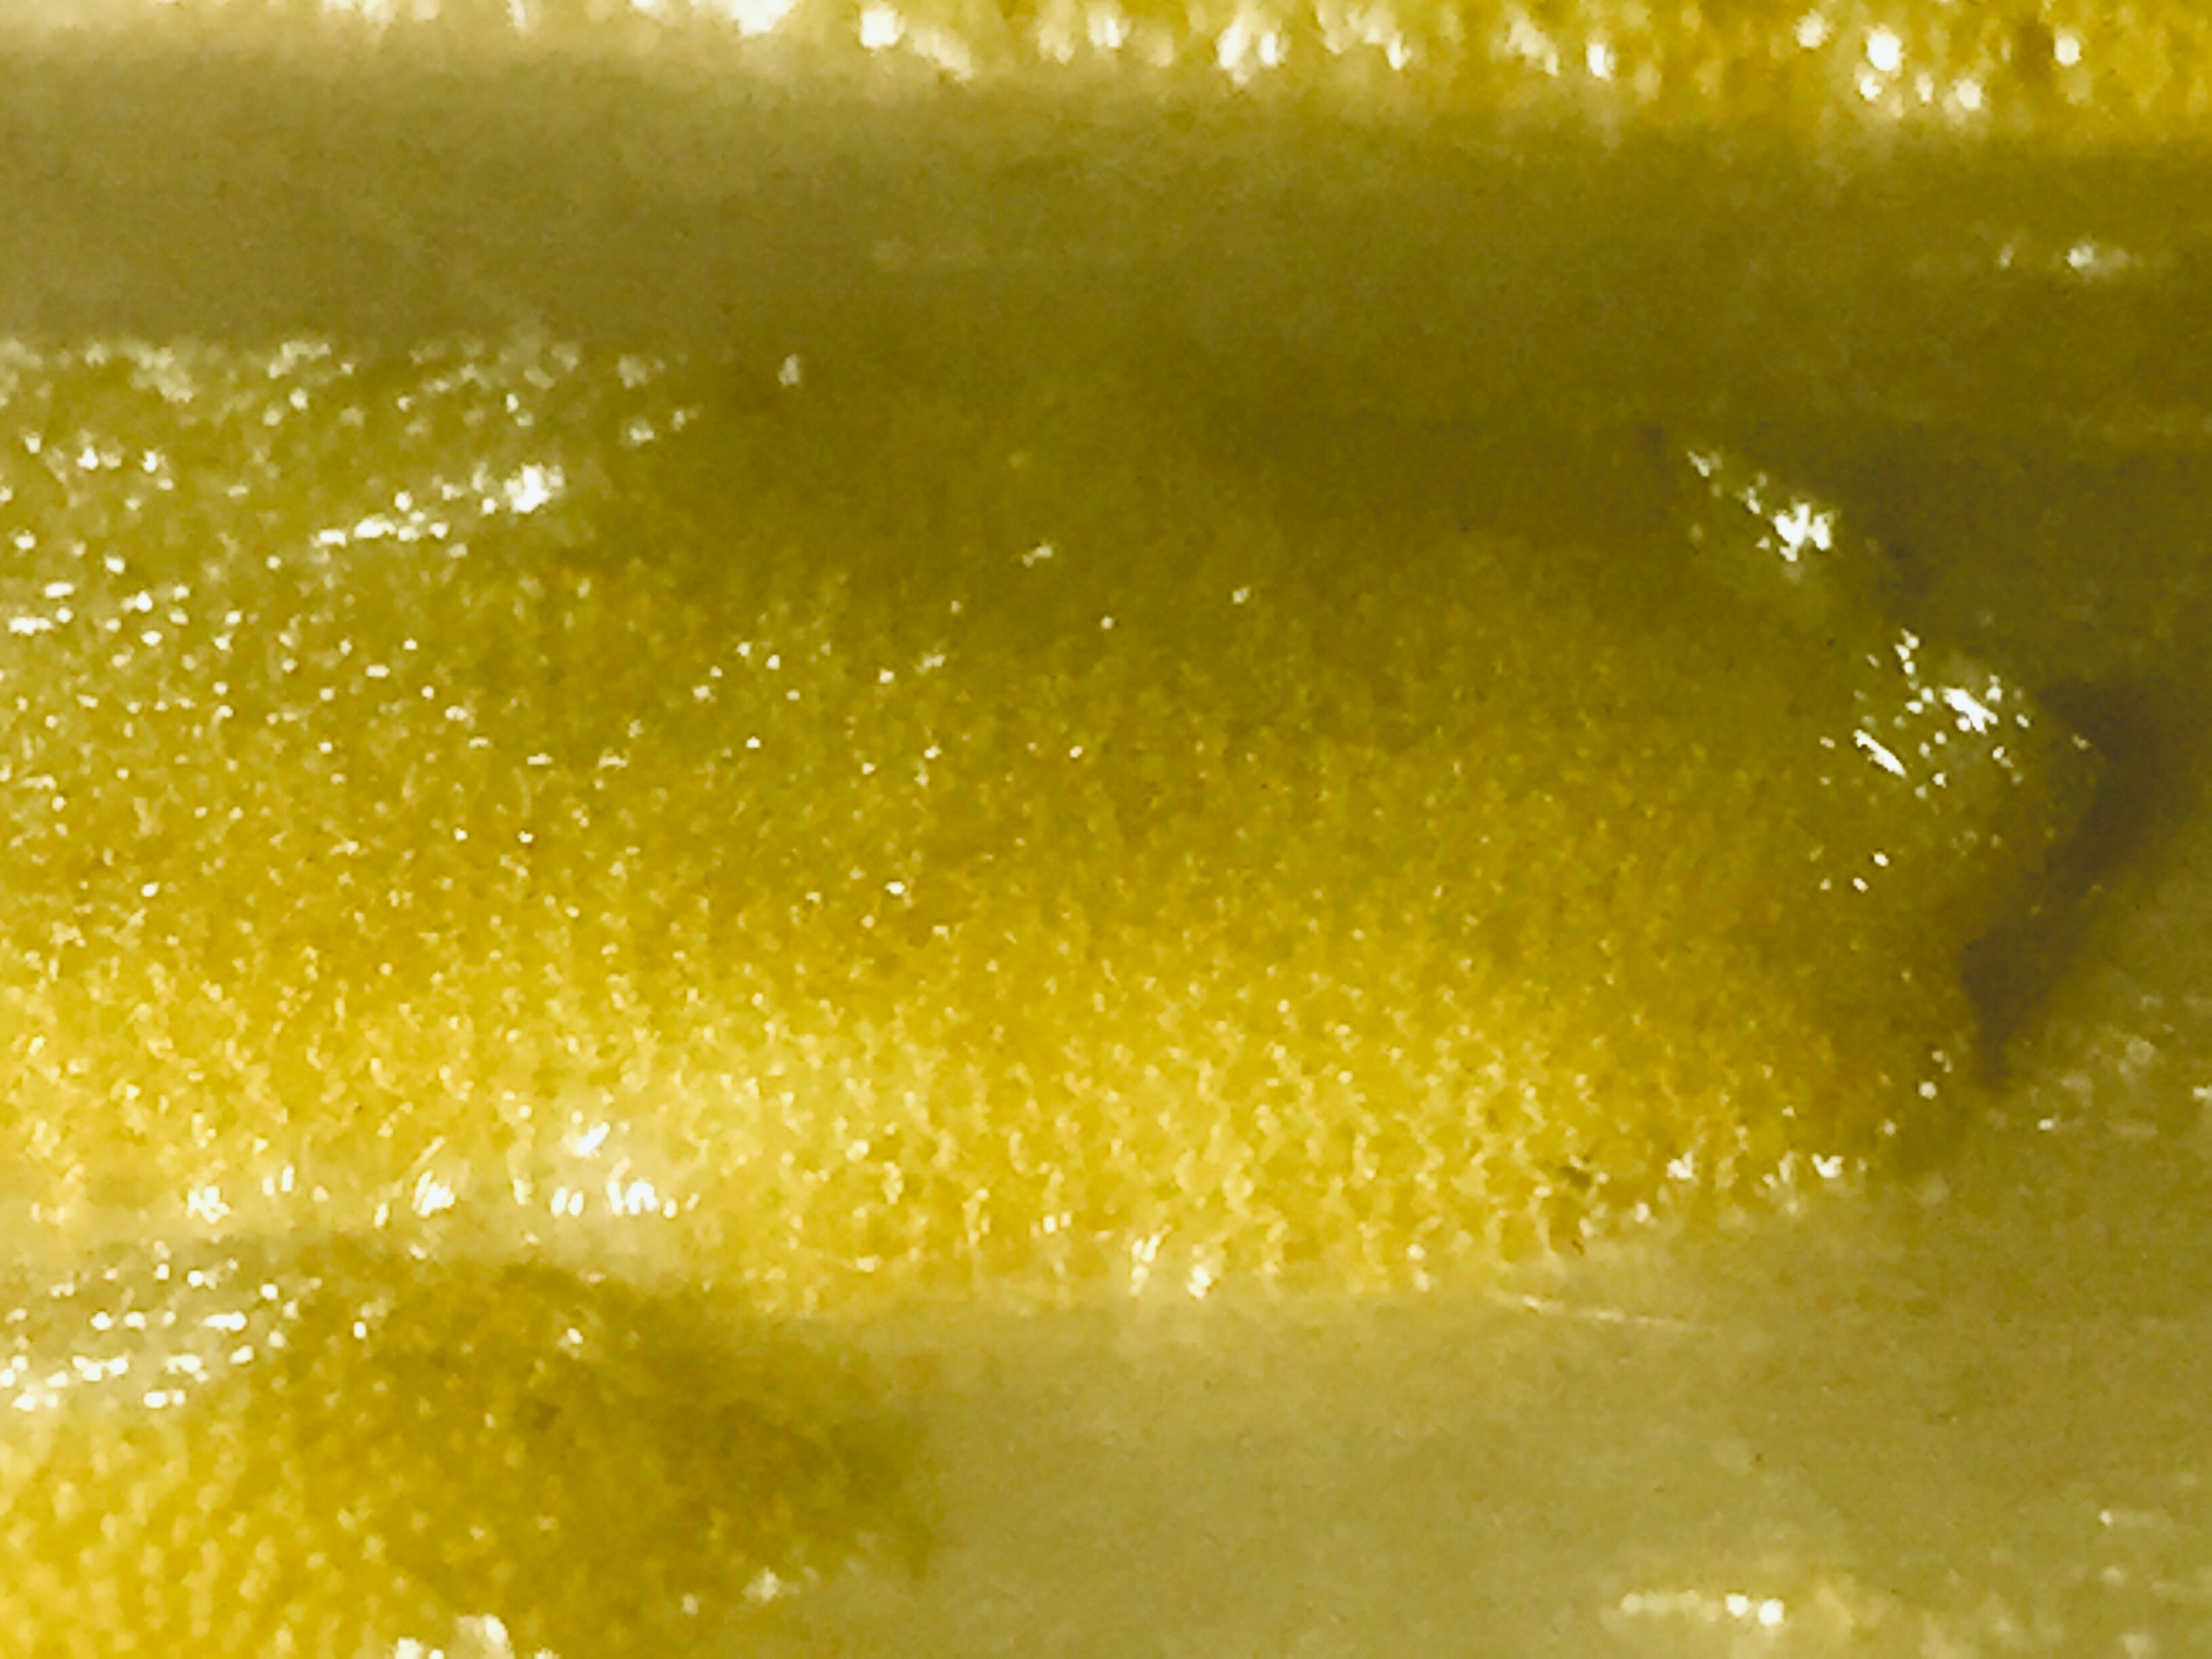
Example of solvent release temperature/primary bubbles

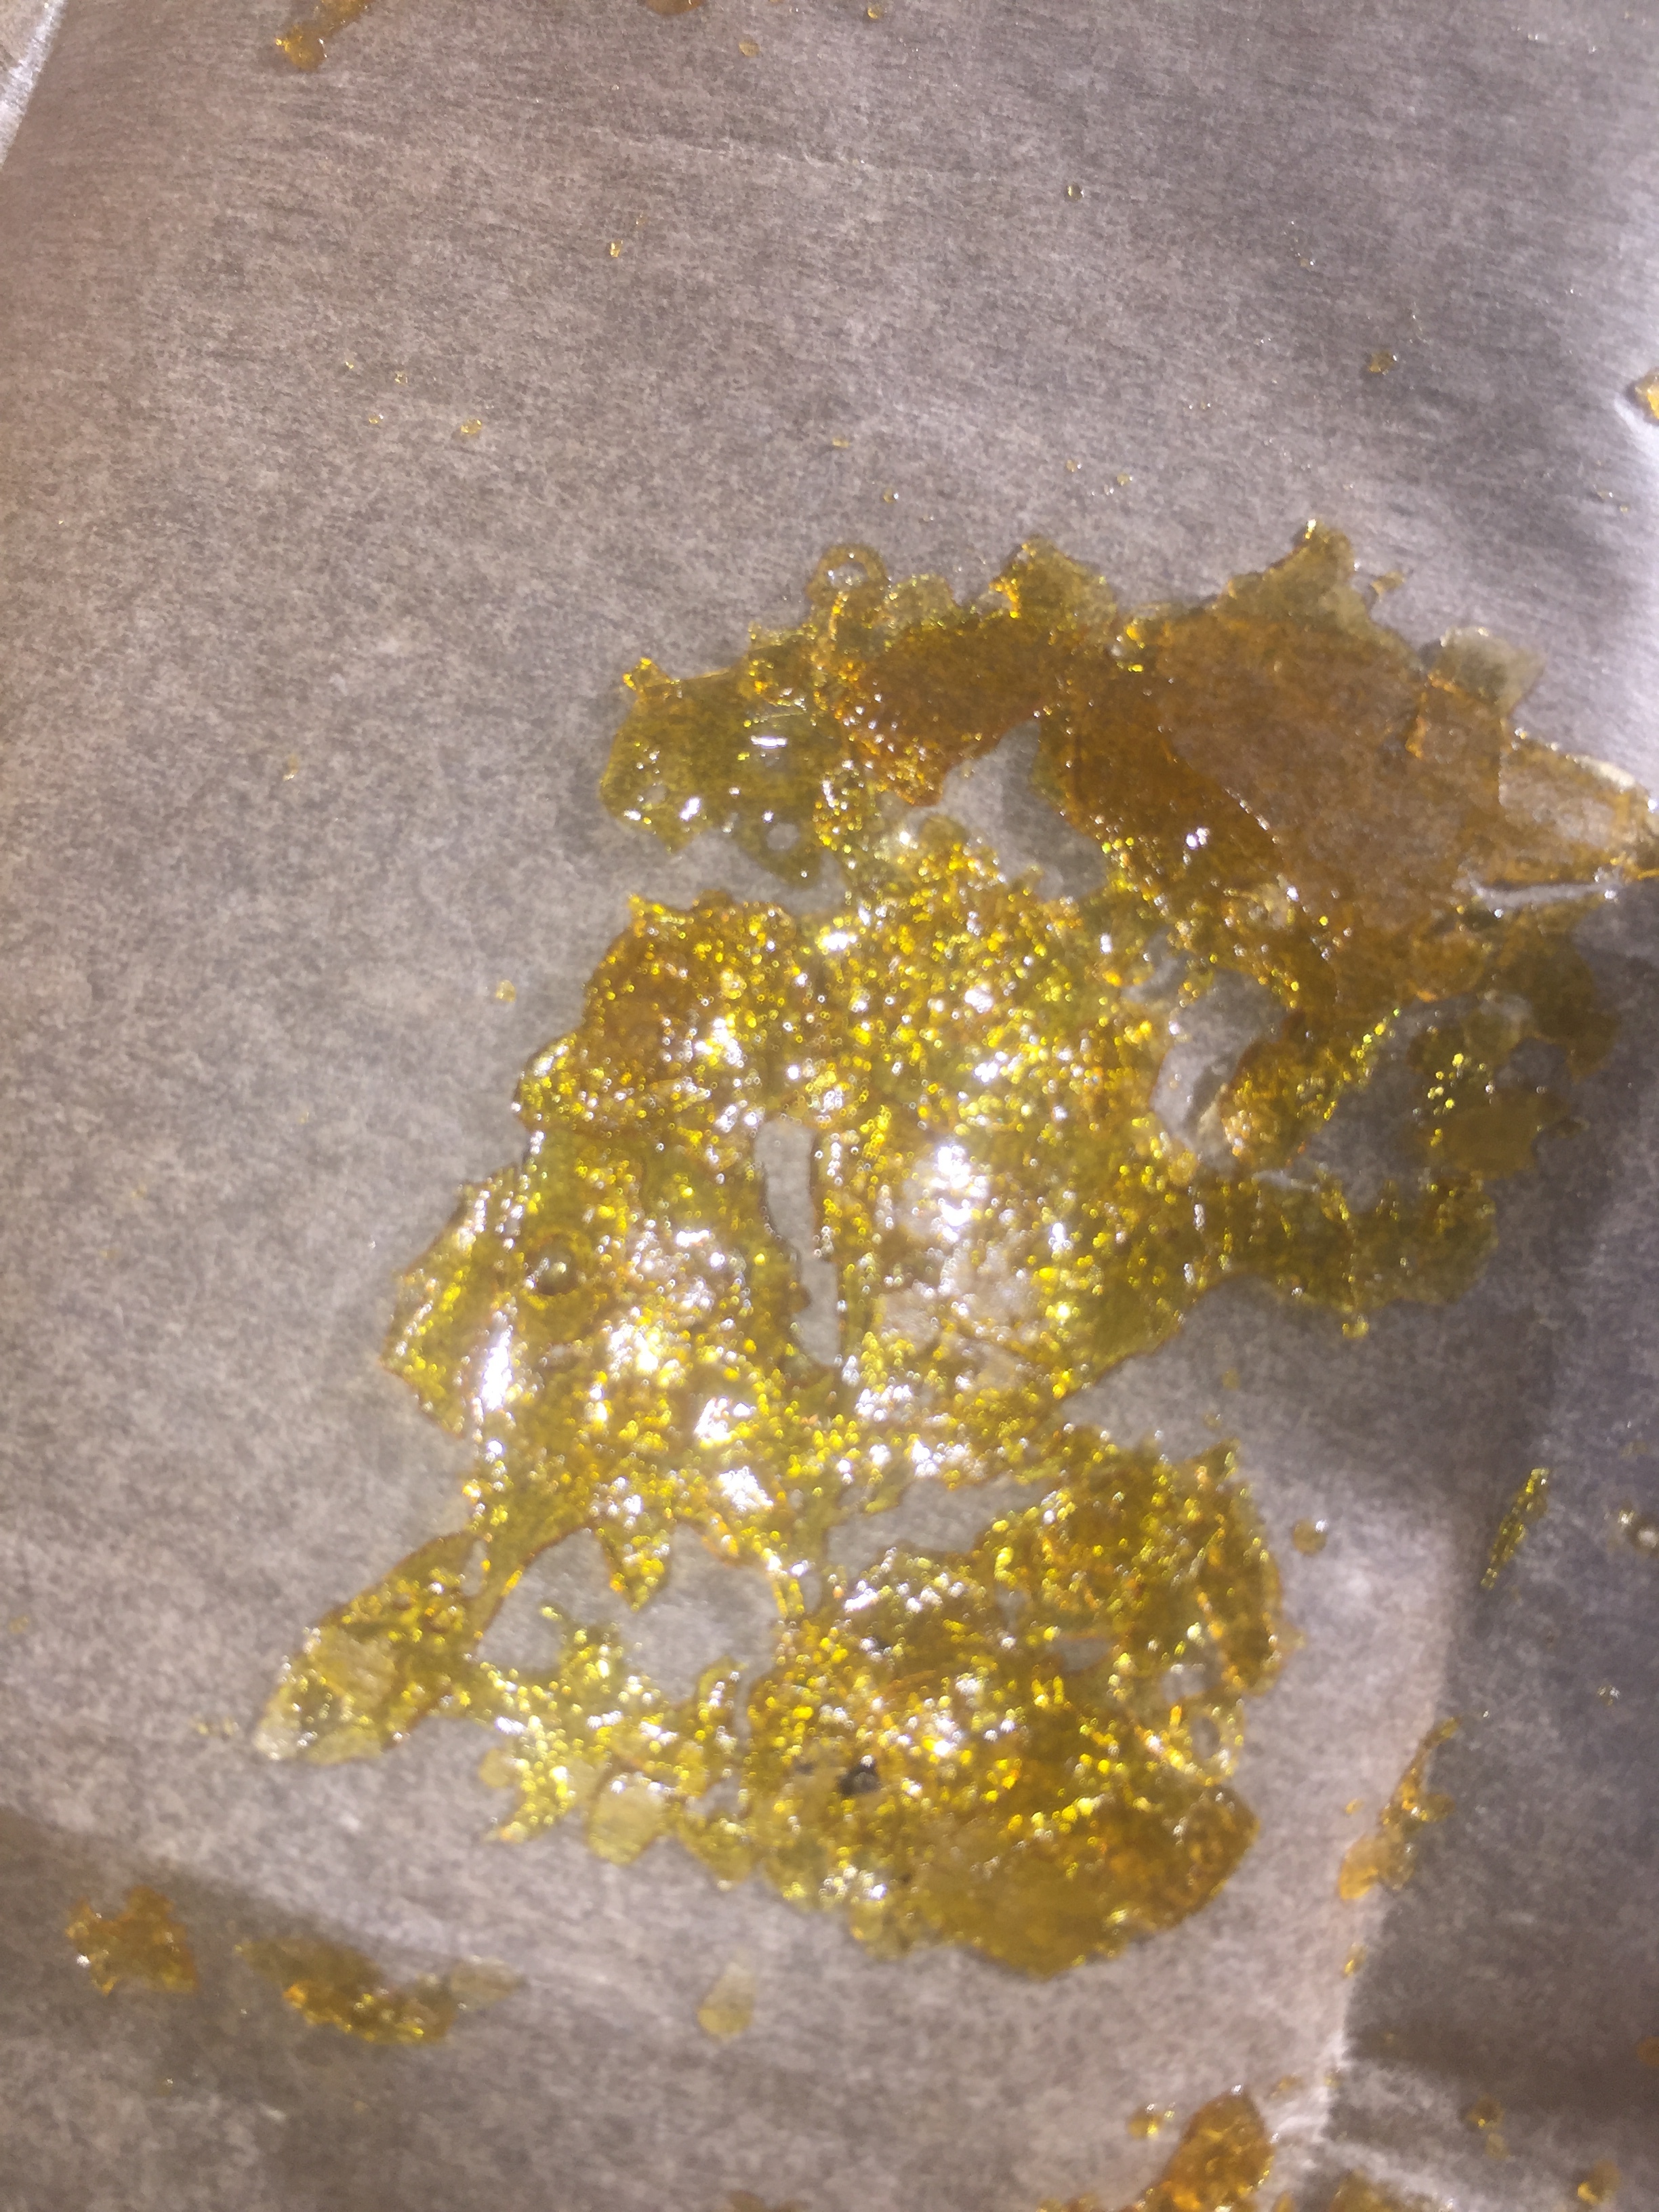
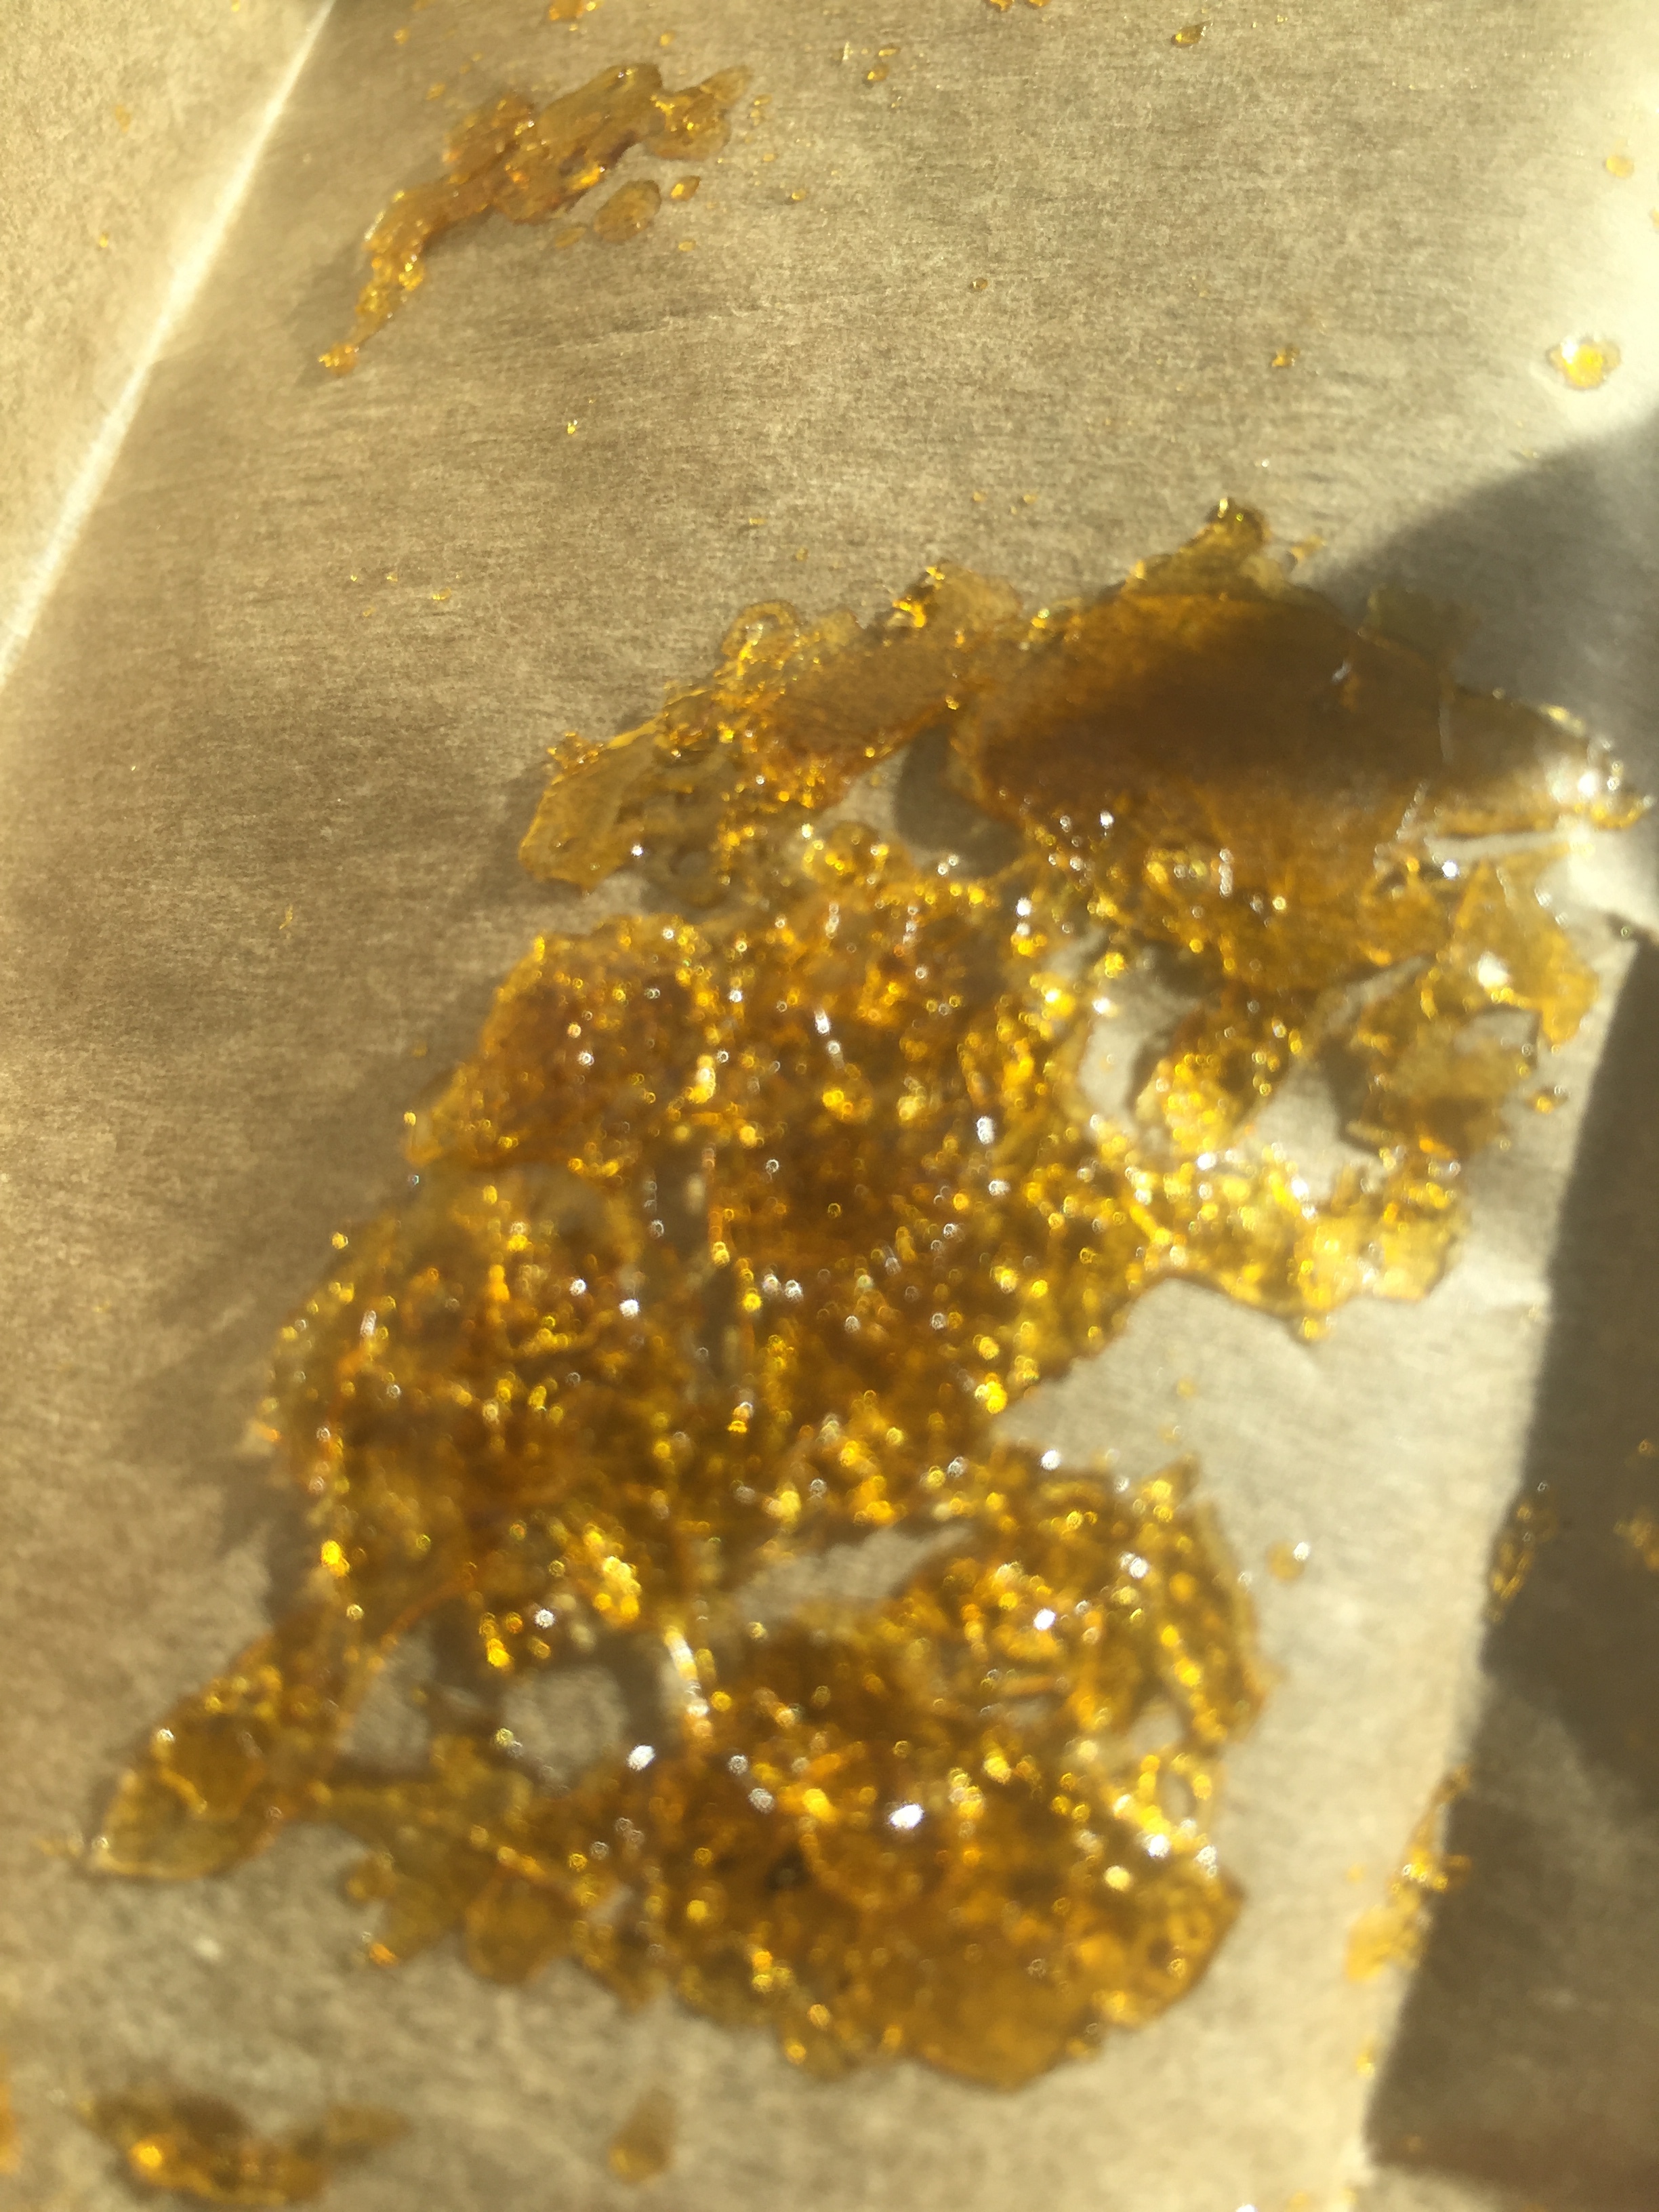
Finished product from above picture
-------Thank you for reading and have a stellar weekend -------