Drop your Mycology Tricks of The Trade here, for everybody to see. Every few days I will drop off a tidbit of advice. I will try to stay in some type of order, for example. I will start with beginner tricks and hopefully end with the more advanced stuff OR start with inoculation and end with drying.
I’m defiantly down with a little PPP, “Pin-Porn-Pictures”. So please feel free!
#1-The biggest advice to a new comer would be to start small and work your way up to larger/harder SOPs. Start out with the PF cakes.
#2-Watch these videos. You dont have to watch all of them to start, but the serious folks will automatically. Lets Grow Mushrooms Start with step 1 video.
I know this is a 90’s video, and looks like its going to be an 80’s porn shoot video. It is a simple and solid resource.
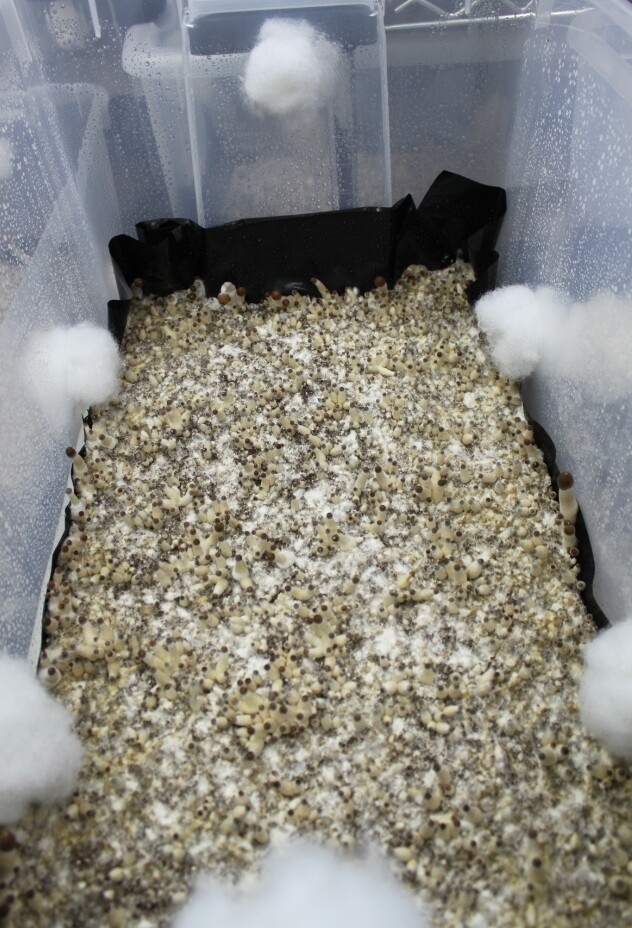
All my growing tips will be related to cubes, not all shrooms grow alike.
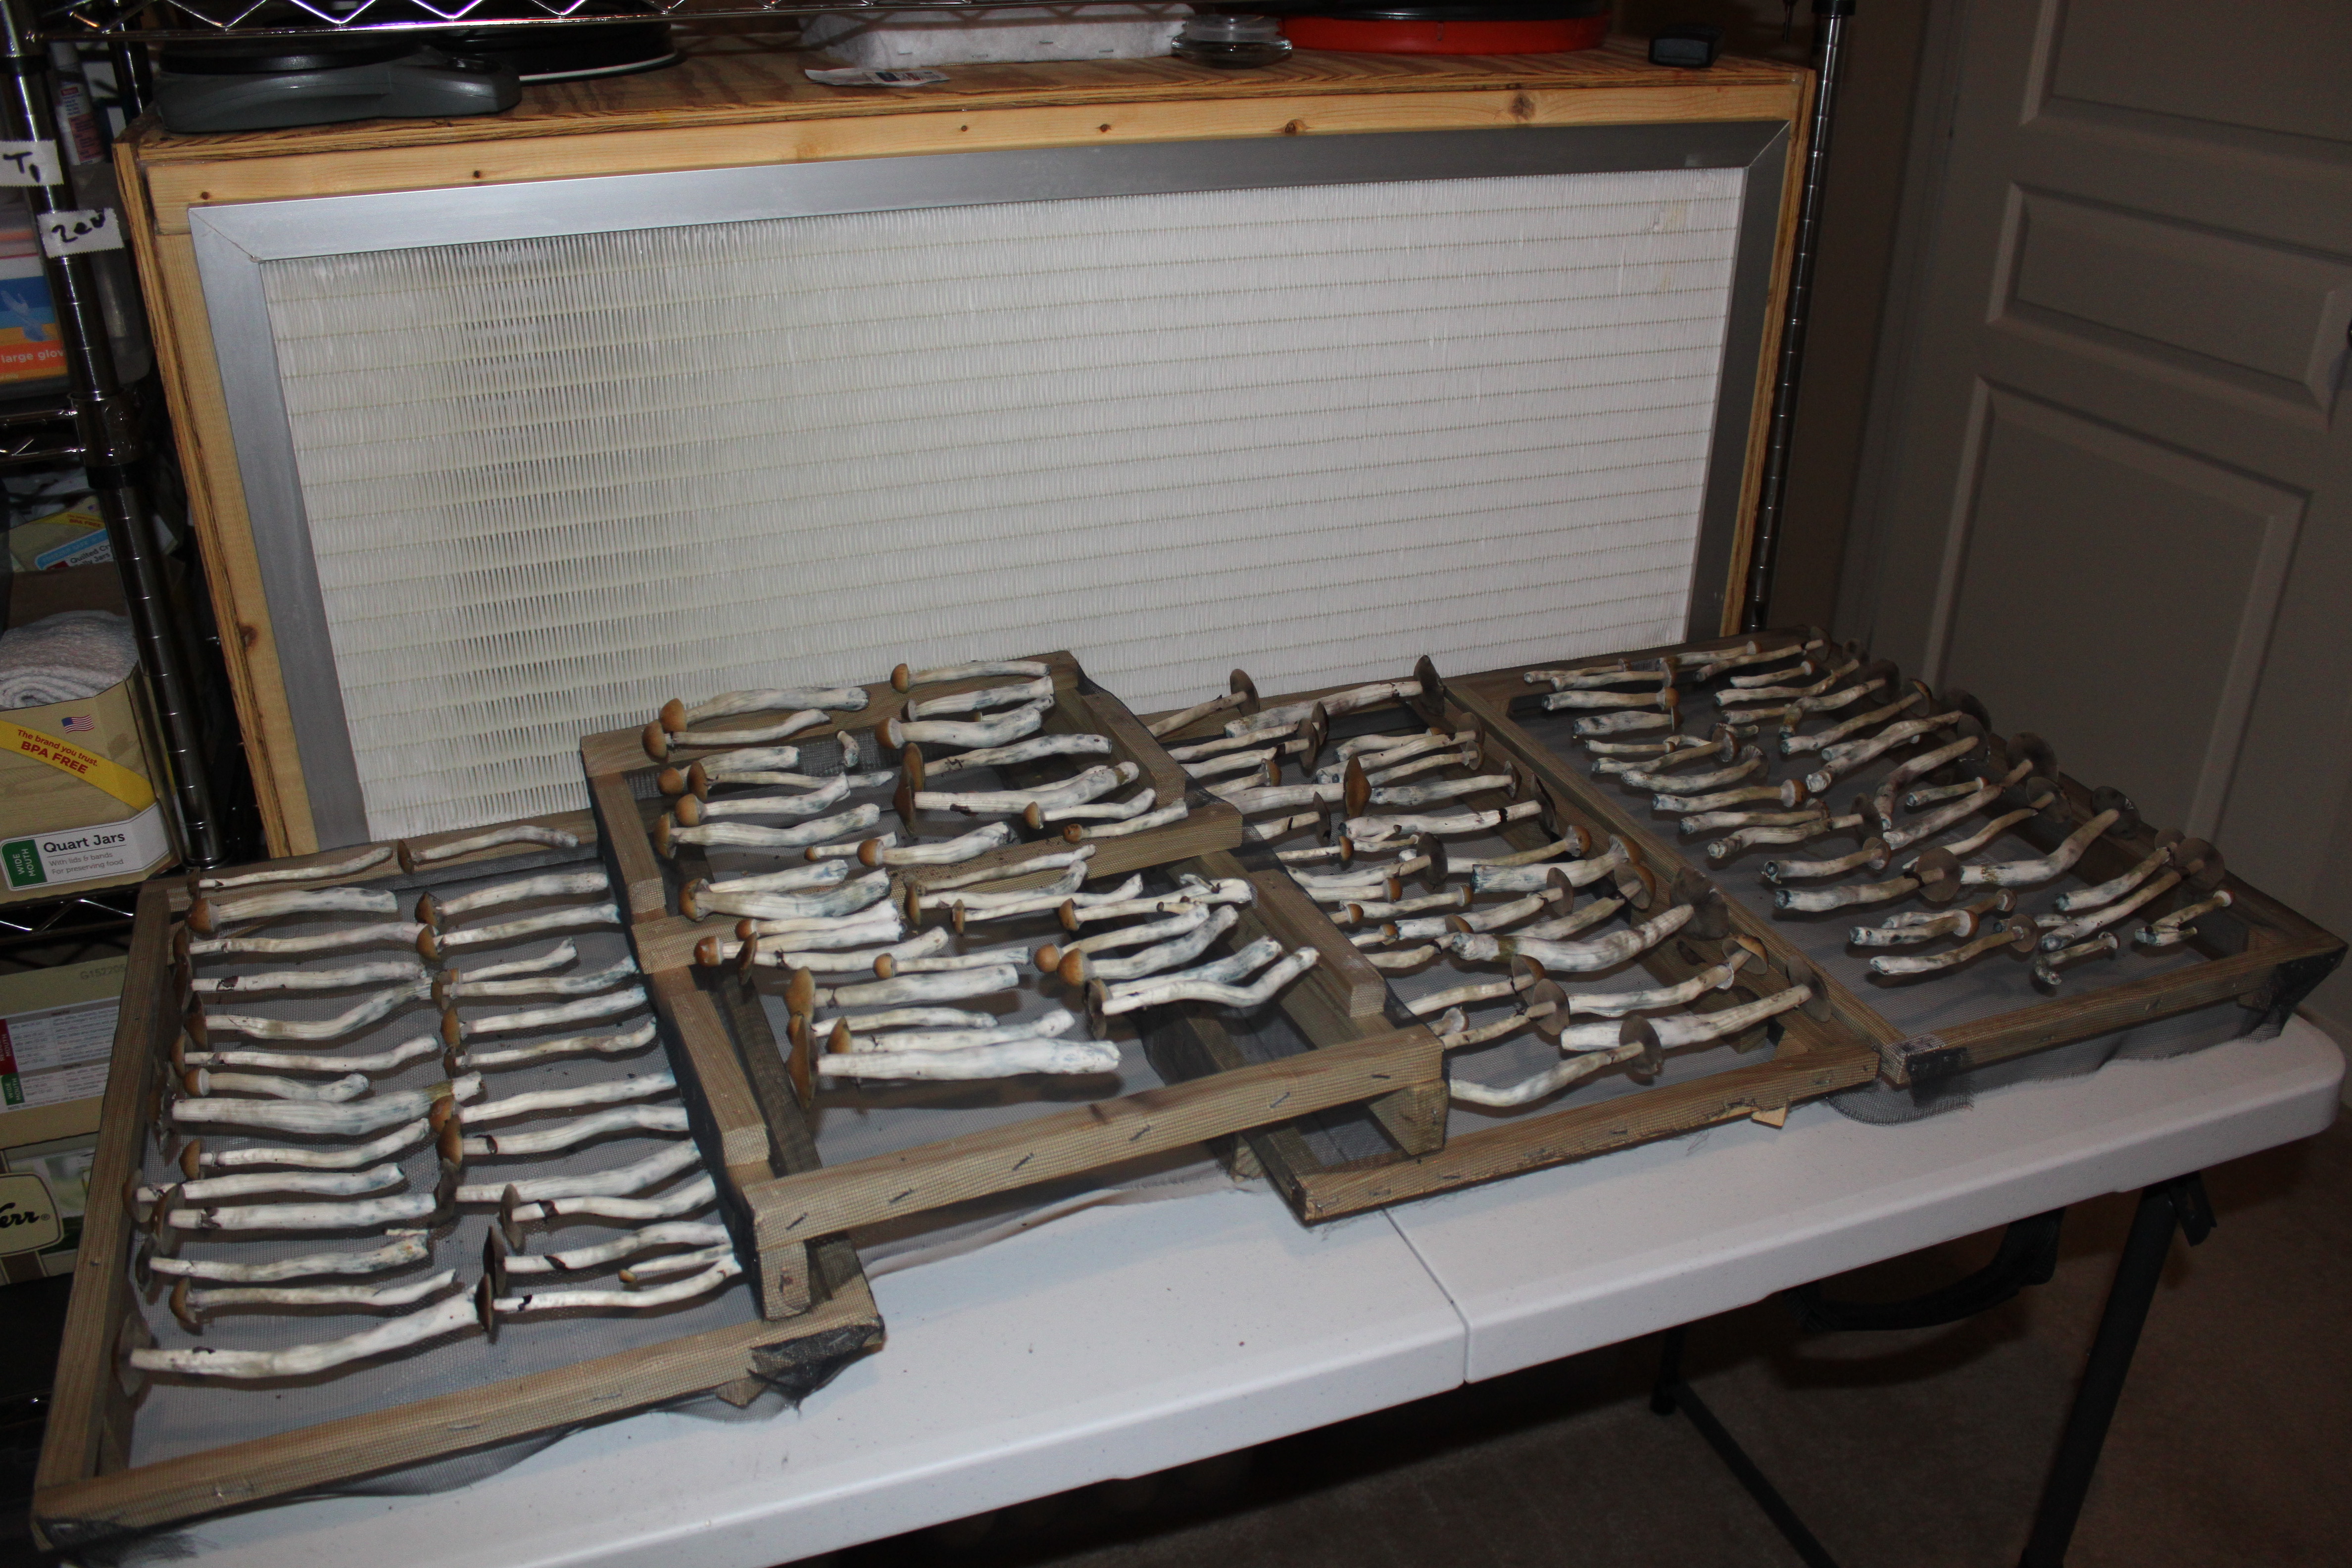
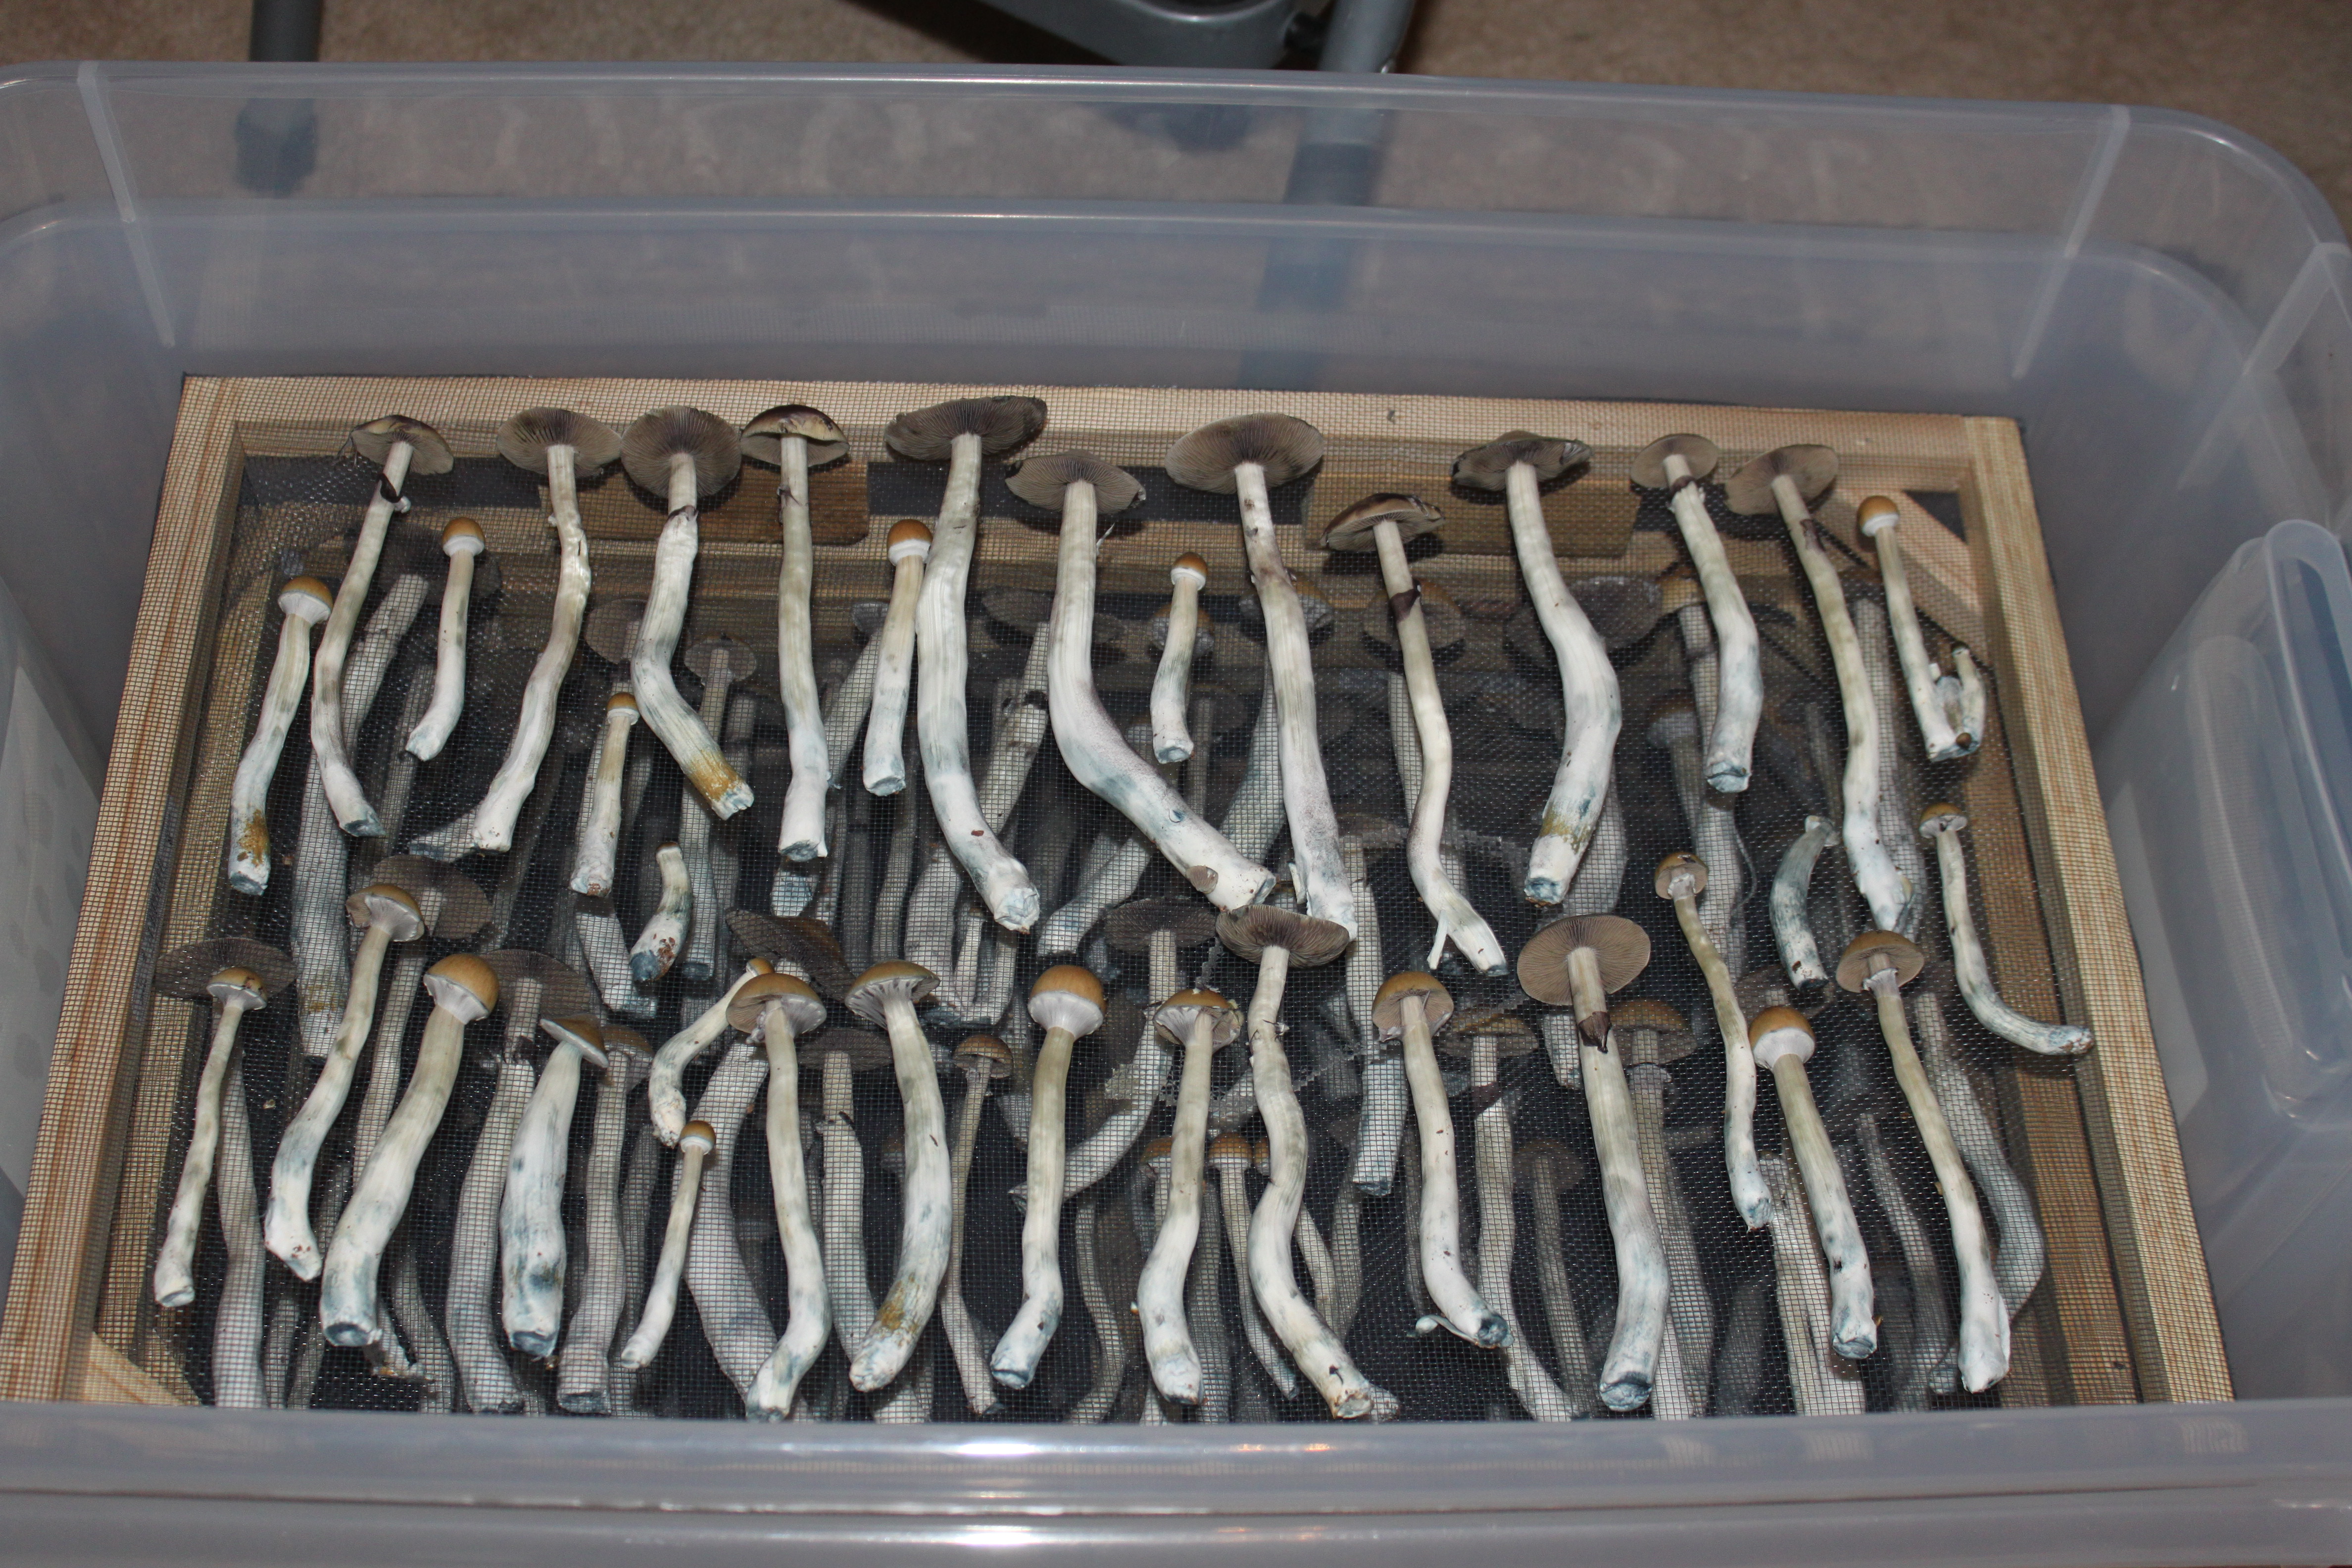
At the bottom of this tub, there are a lot of holes drilled out. So when you put a regular $10 box fan on top of this tub, some air can escape the bottom. It normally takes 1.5 - 2 days to get 75-80% dry. That all depends on the ambient humidity, which makes a BIG difference.
After they are 80% or so dry, they go into a food dehydrator. How long they stay in there all depends how many you put in the dehydrator. I had removable stack-able trays in my dehydrotor.
This is the one I used. I stacked 16 racks per blower, and had several of them. They did have an internal part that went out a lot. So Id stay away from this particular model.
Your looking at it wrong. It would not be random in relation to the strain you used to inoculate, but rather if it was worth keeping in the first place.
Might be a culture that’s only going to grow a few shrooms in a large tub. Same concept as seeds.
That’s because that’s typically the best place to take a tissue sample from.
Find a nice mature cluster, one you would like to see all over the tub. Take the sample from the base, where all the stems meet.
You want to get a small piece from inside the stem. Very small.
Transfer to a petri dish, and in a couple of days do another transfer into a second petri dish… because you are most likely going to have contamination in the first dish.
Soak your berries for 12 to 24 hours. You want to activate the endospores in side the berries and kill them in the cook.
Use gypsum in the soak to stabilize the pH. I used three cups into a large Turkey frying pot.
I used coffee in the soak as well. I brewed a pot of coffee over and over using the same coffee grounds and used the liquid not the grounds in the soke.
Your berries as a whole will expand, so leave some room at the top of the pot.
After they are done soaking, it’s time to dry them (with steam).
Ladell the berries and soak into a smaller pot.
Bring that pot JUST to a boil, and ladell the berries into a a colander. The key here is surface are, you want to spread the berries up the sides of the colander. NO BERRIES ON TOP OF OTHER BERRIES. The steam evaporates most of the water. You dont want them too wet. Use you fingers every few seconds to move them around exposing wet berries. You want to be able to grab a handfull. It should kinda feel wet in your hands, but not leave behind any water residue. I remember using a paper towel test until I got the hang of it.
Once your berries are “dry” fill your jars, leaving the appropriate head space.
The lids should be in place and tops of jars covered with tinfoil, to protect your filter from getting wet.
Make sure the jars are off the bottom of the pressure cooker.
Have the appropriate amt of water in the PC, not too much to boil over the tops, but enough to finish the cook.
Cook at 15psi for 90 minutes.
Let the pressure come down in your cooker, and repeat and repeat.
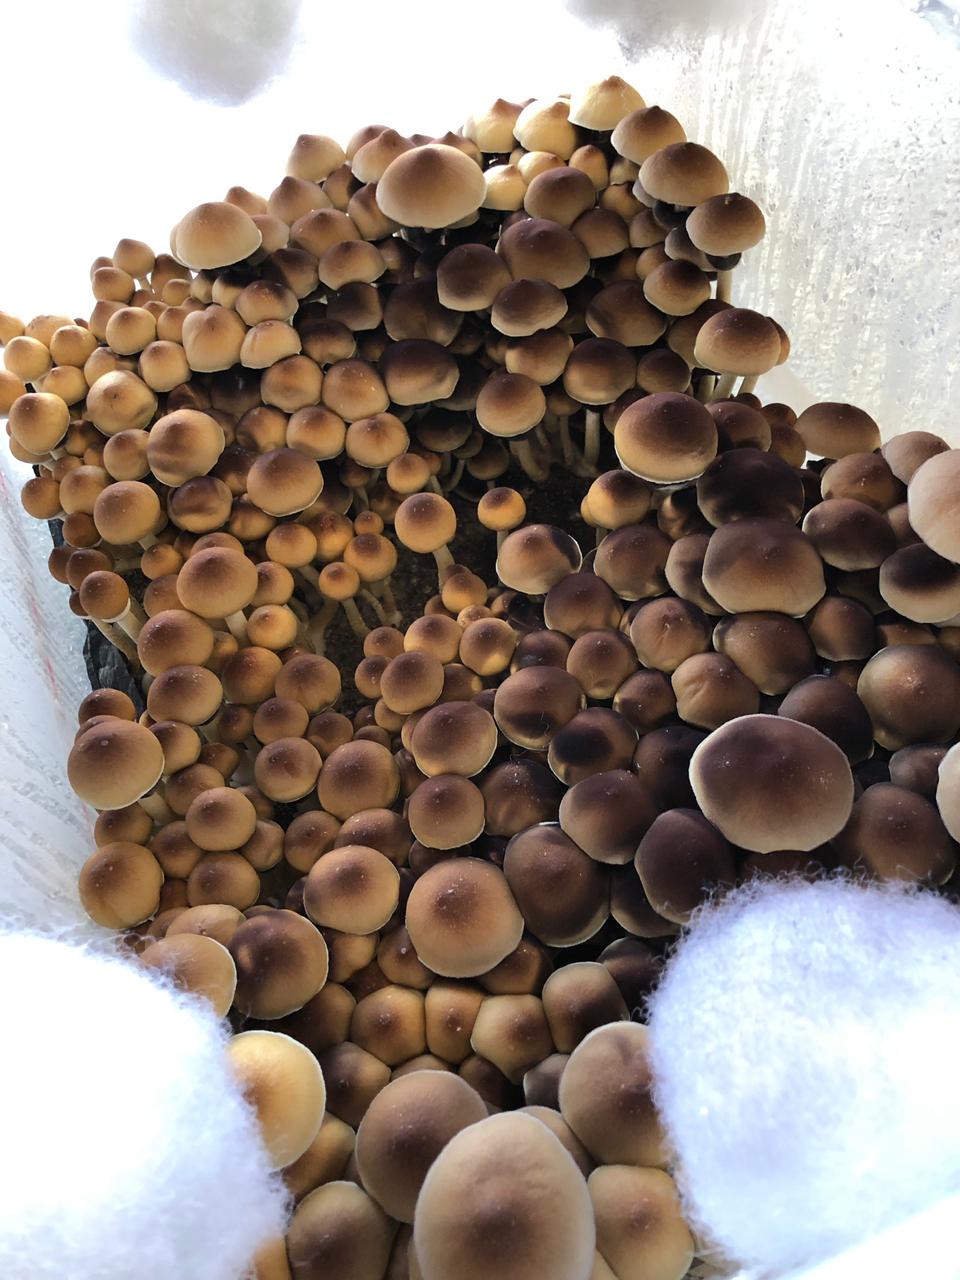
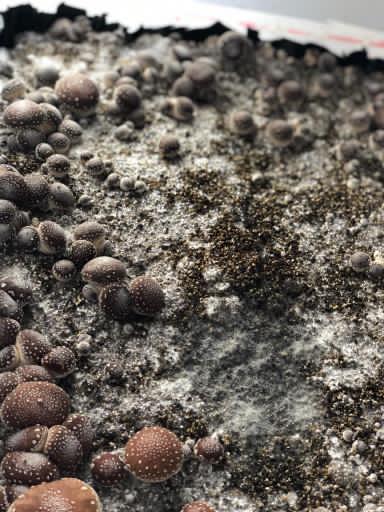
I’d look for the mid sized fruits. There are soo many things to look for. How they harvest, big hole vs no hole. Late vail opening, potency, size, pin set whole tub vs sparse fruits.
I was checking one of those out the other day but wasn’t sure if it was true laminar. All the places I read said you need a 6 in thick filter with like a big squirrel cage fan.
I was also confused because it said it uses 800 watts . That’s more than both of my tents combined lol I wonder if that’s a typo or something
I pretty much did the same as cyclopath, except I watched Ebay (a gamble) for my filter.
If I remember correctly, its about 4 or 5 inches thick. I just matched the suggested CFM to the filter and made a nice well sealed box. Need a pre-filter that can be replaced. You can use a Rheostat Switch switch if you fan is too powerful.
When its all done. You should be able to hold a lighter up close to the filter and the flame not blow more than 45 degrees, preferably slightly less.
If you have bad spots in the filter, you can use silicone to mend small holes.
Larger the better, if you plan on doing a lot of jars. This will save you a lot of time later in the game.
Iv seen a lot of good deals on this site for flow hoods.
Could you tell the bad spots in the filter with the lighter trick ? And what kind of fan did you use? I think an in-line would be smaller than a squirrel cage one
Nice thread !! I like to case my sub few days before finishing incubation…! Also after fourth flush flip the patty!!! And harvest before veils break!! I dry in the sun or make a little wind tunnel!
Cyan/azure can be a lengthy endeavour. Never heard of anyone doing indoor. But it can be well worth it once a mycelia mat is established in a location. You can have a harvest every year at the same place. Light maintenance once you get it going.
Cyan seams…hearty too. Seen it out compete dirty jars, dryish wood, crawl up glass and on jar.lids and send mycelia tendrils searching for what to assimilate next.
Cyan/azure; spore to agar(october), agar to grain, grain to wood (50/50) then eventually all wood outside(spring). Alder is a preferred wood chip to feed the beast. Outside there is no need for sterility, only to start it off inside.
Place down fresh chips in spring, cover with innoculant, fresh chips, then thin layer dirt and then grass seed. Come back in fall
Legendary potency…