In the hunt for a reasonable budget vacuum gauge @JacobsLadder was kind enough to mention the MKS 901p sensor and provide some information to help me get it working properly.
This gauge can be easily purchased on ebay for quite cheap, around 55$ shipped.
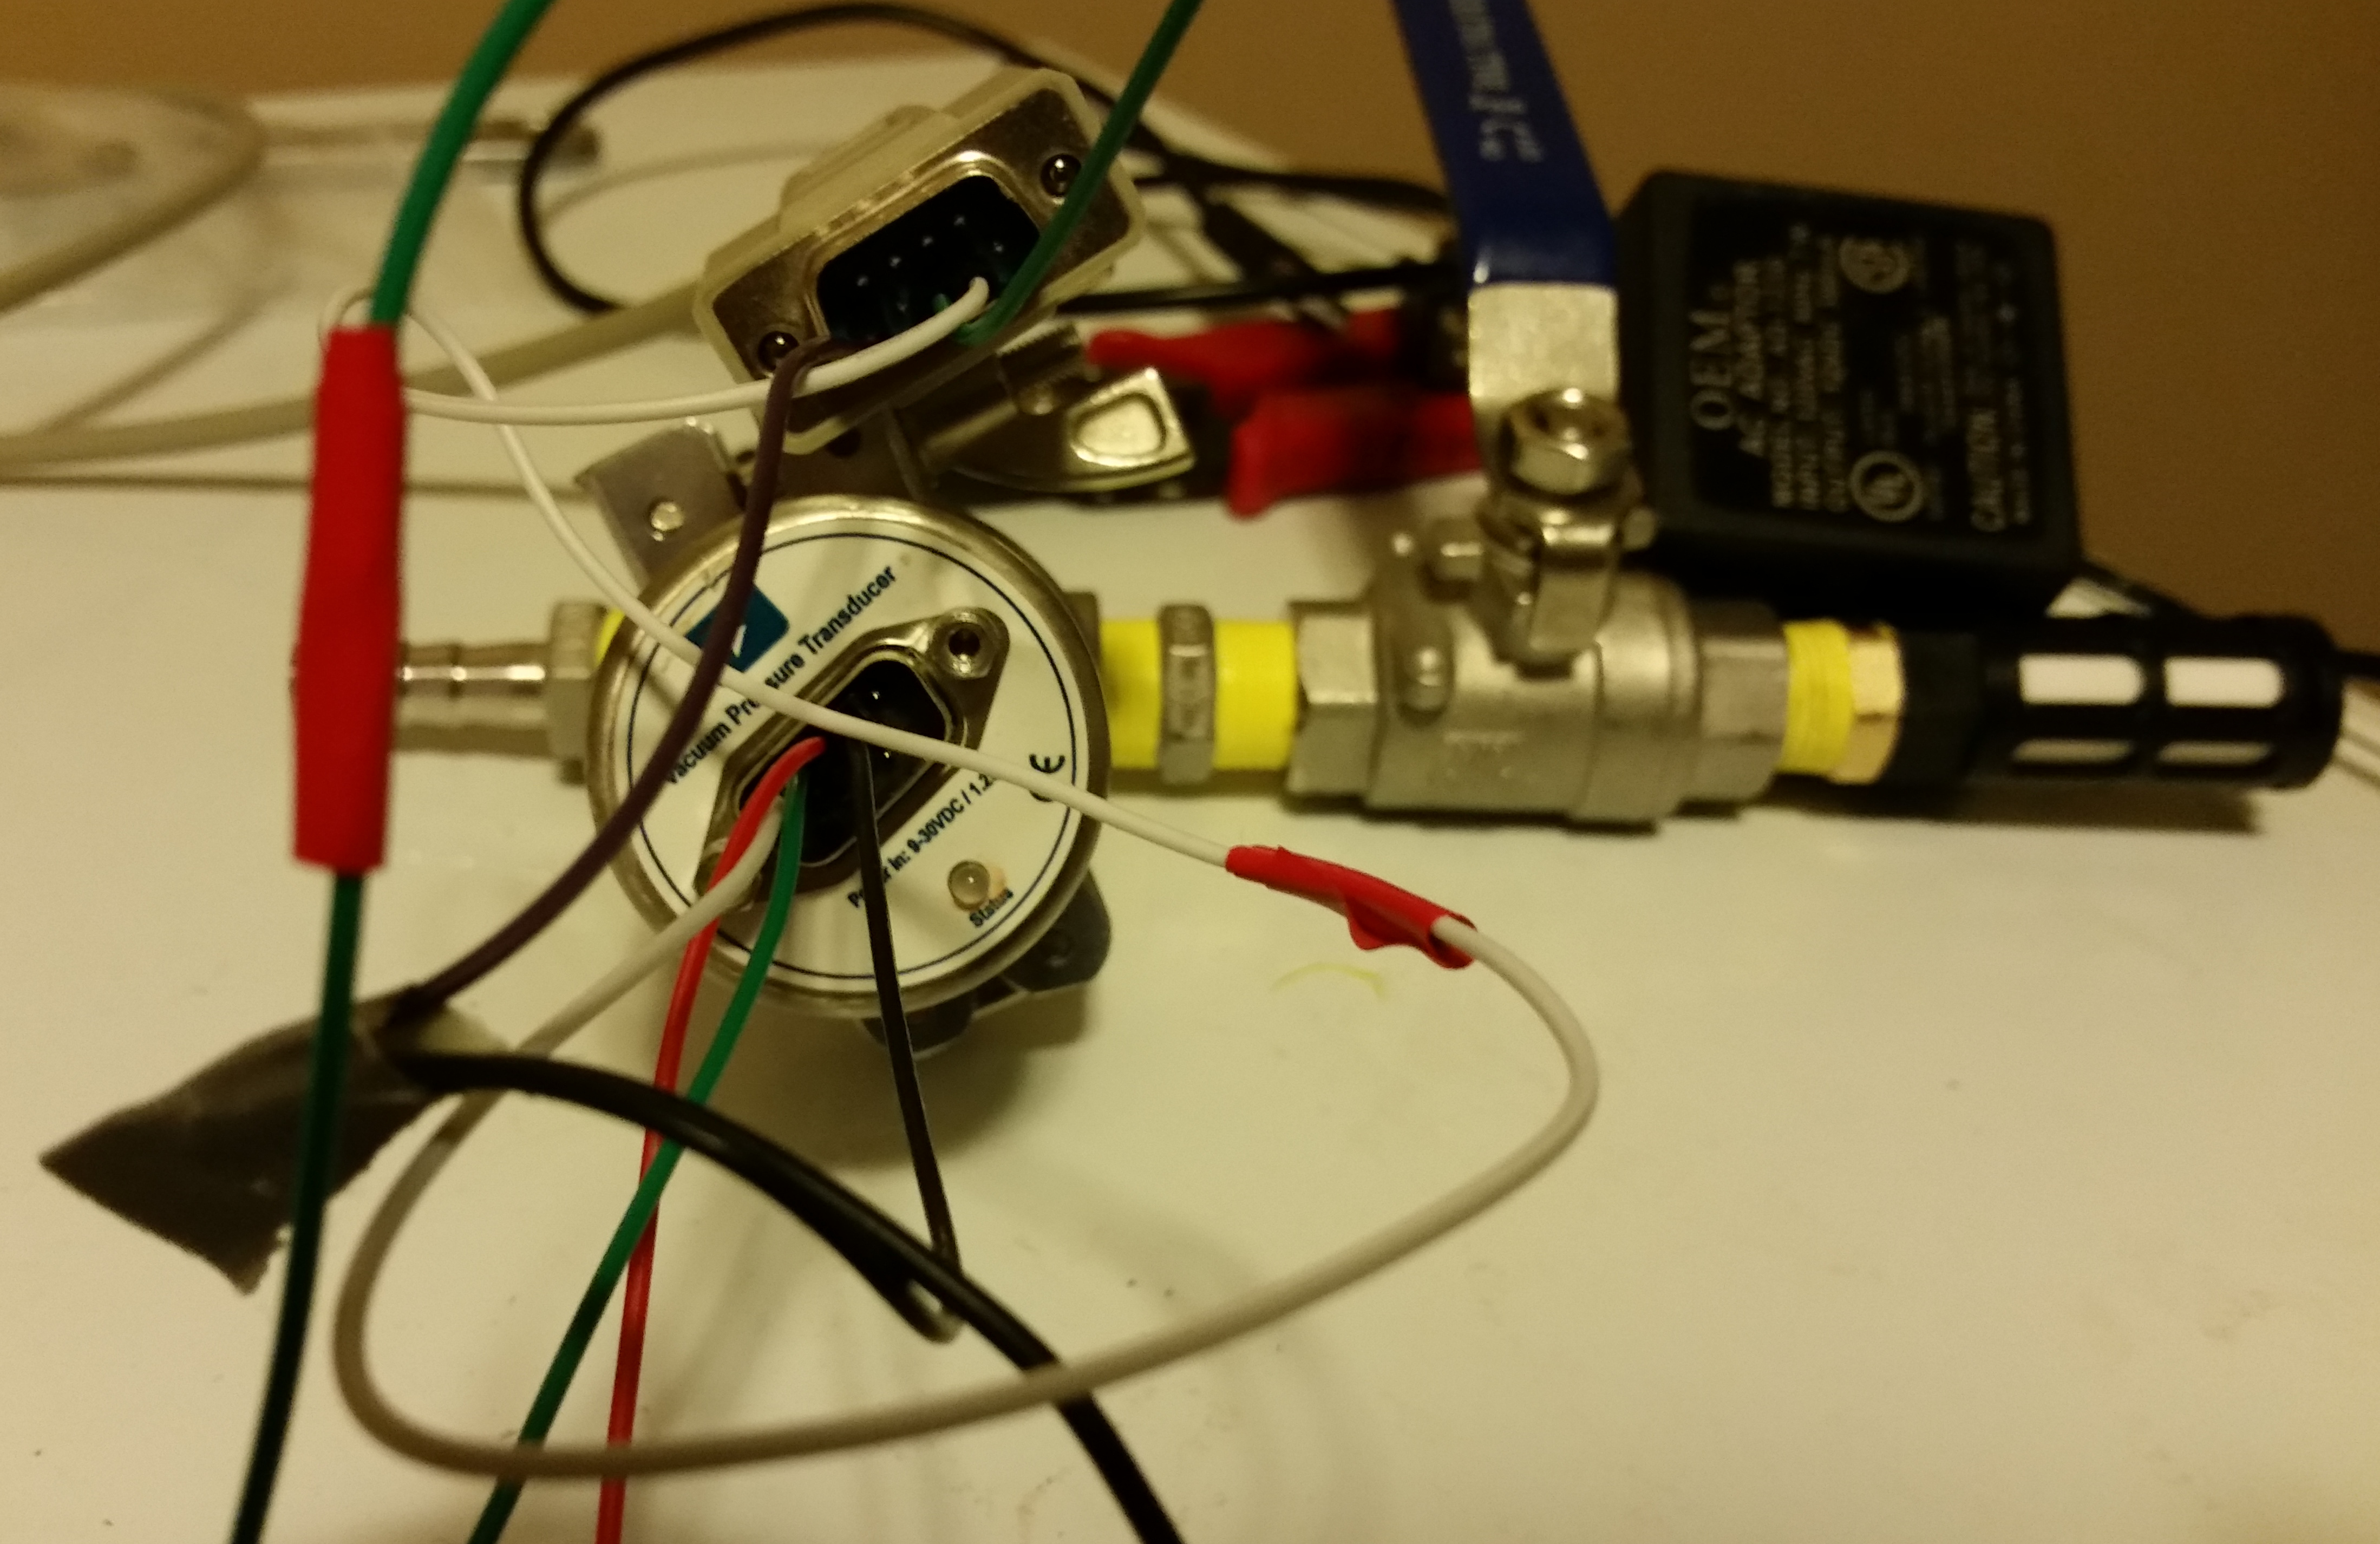
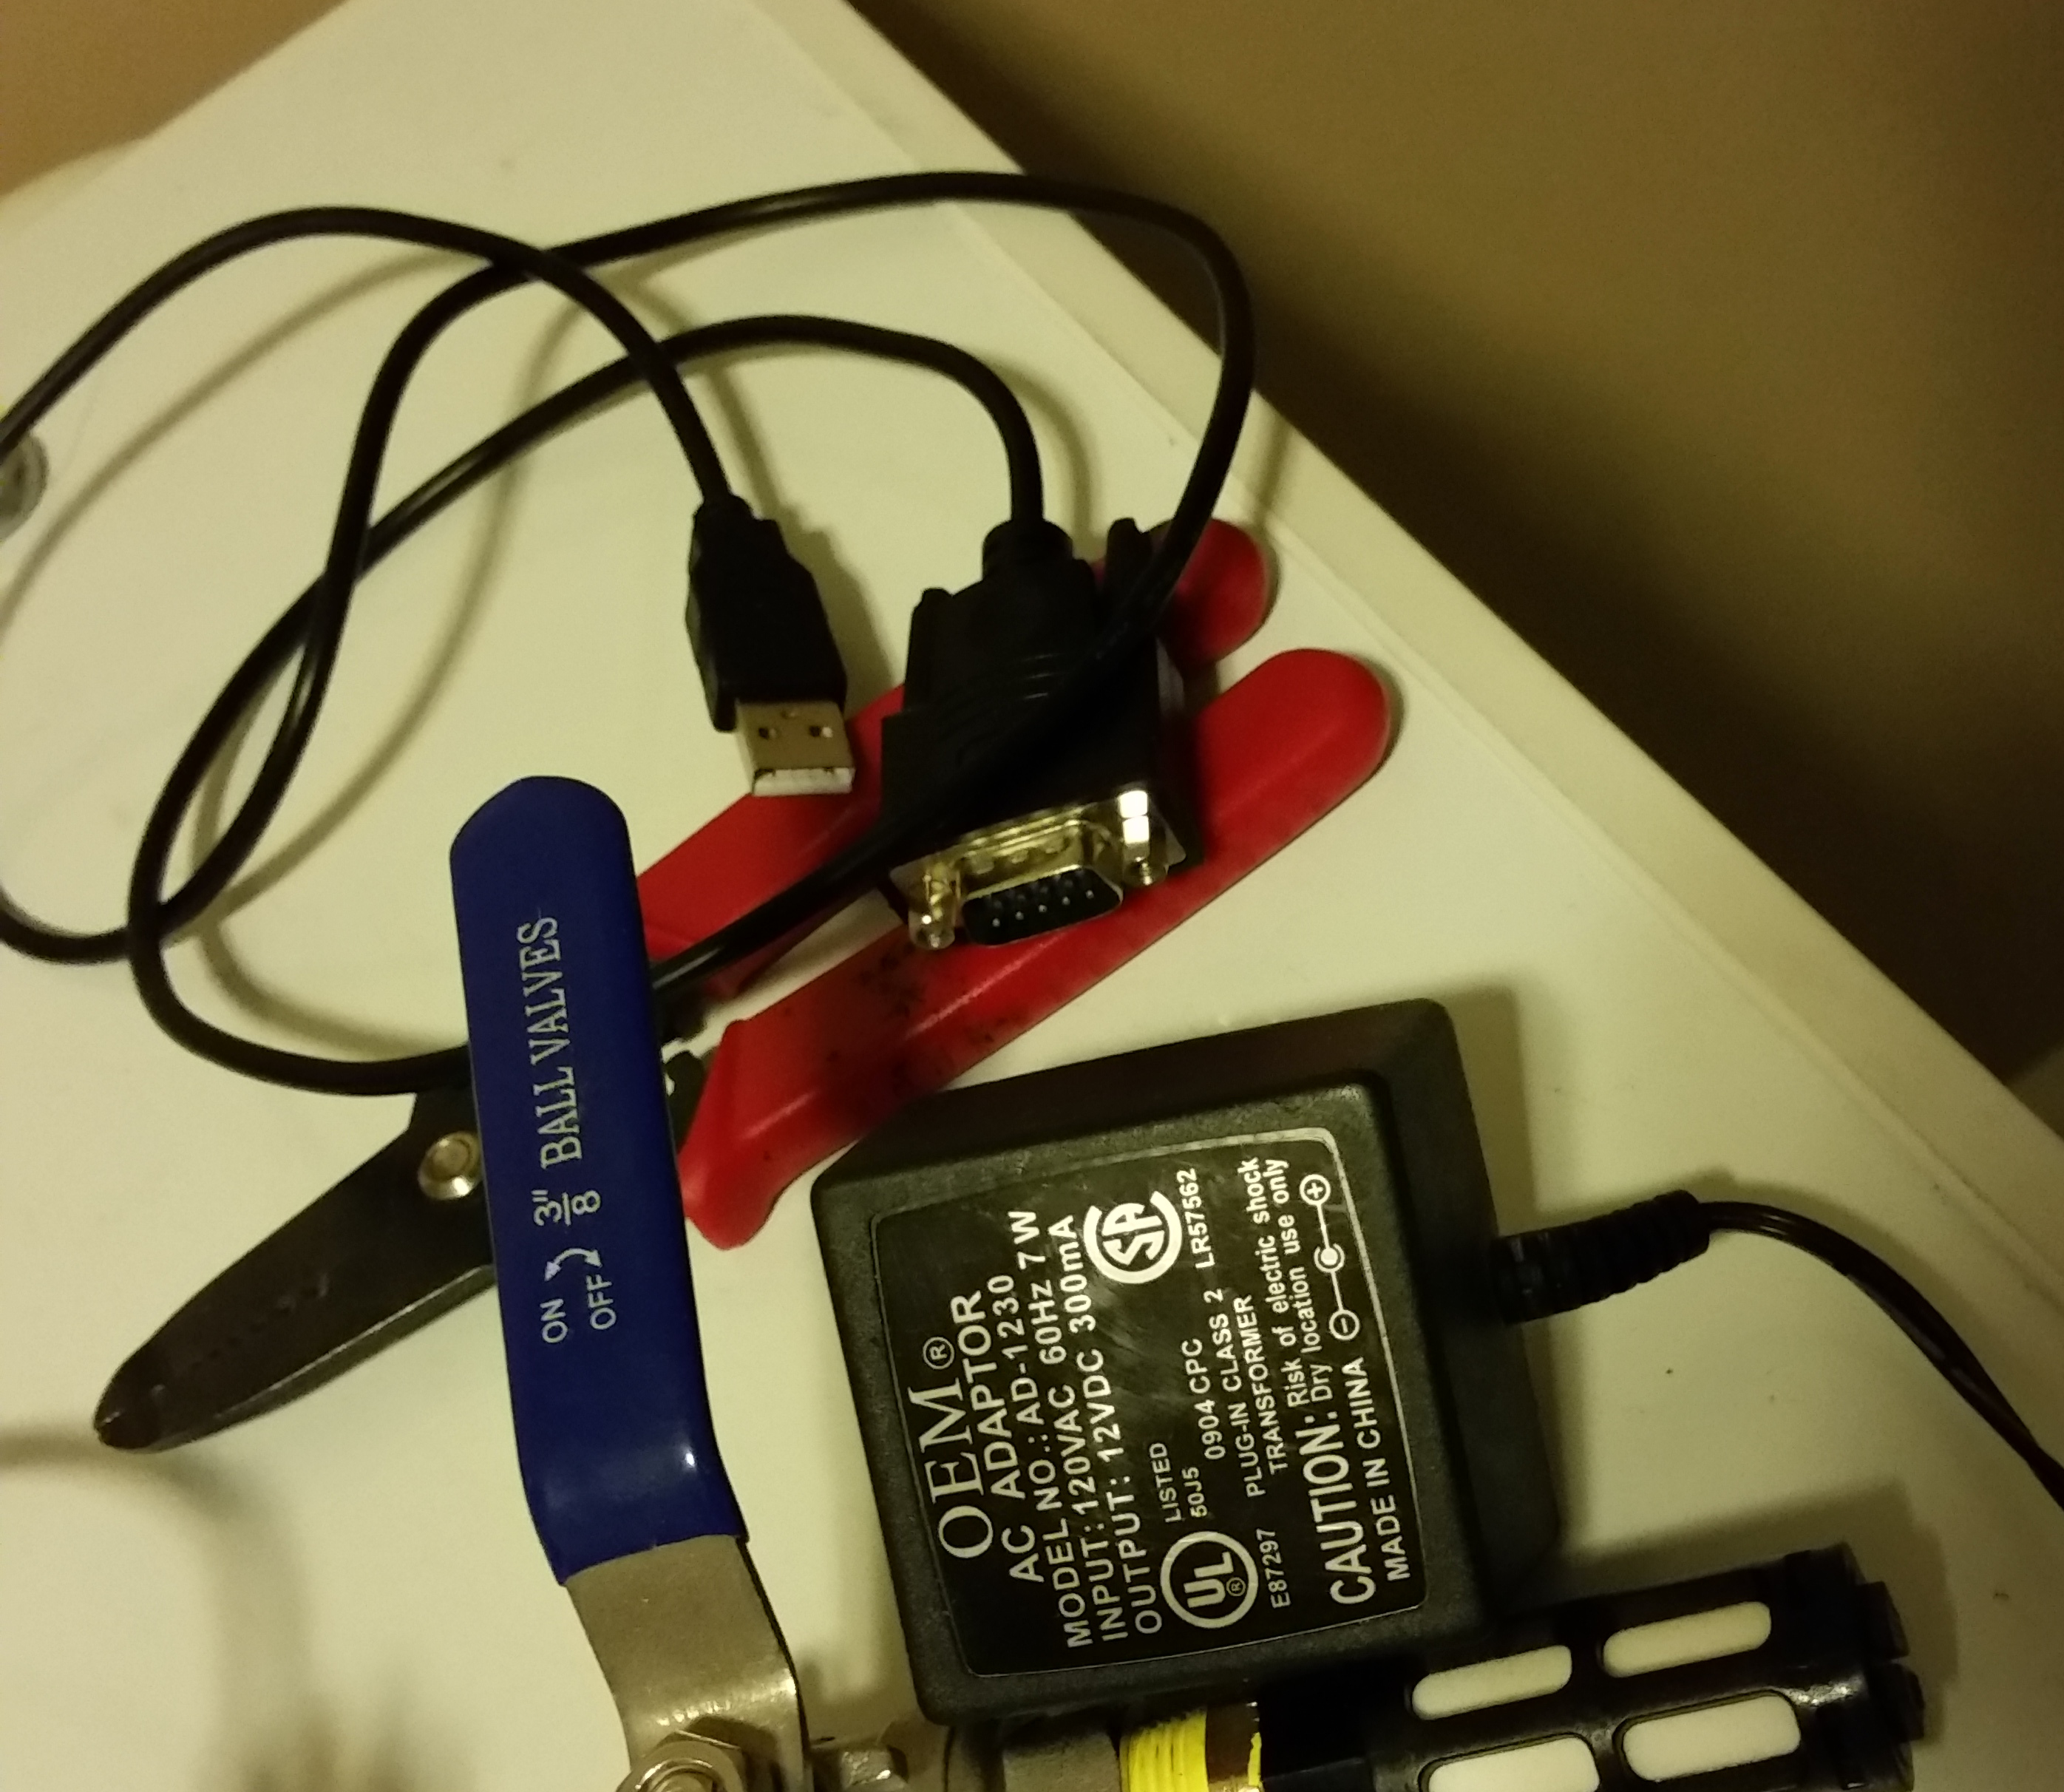
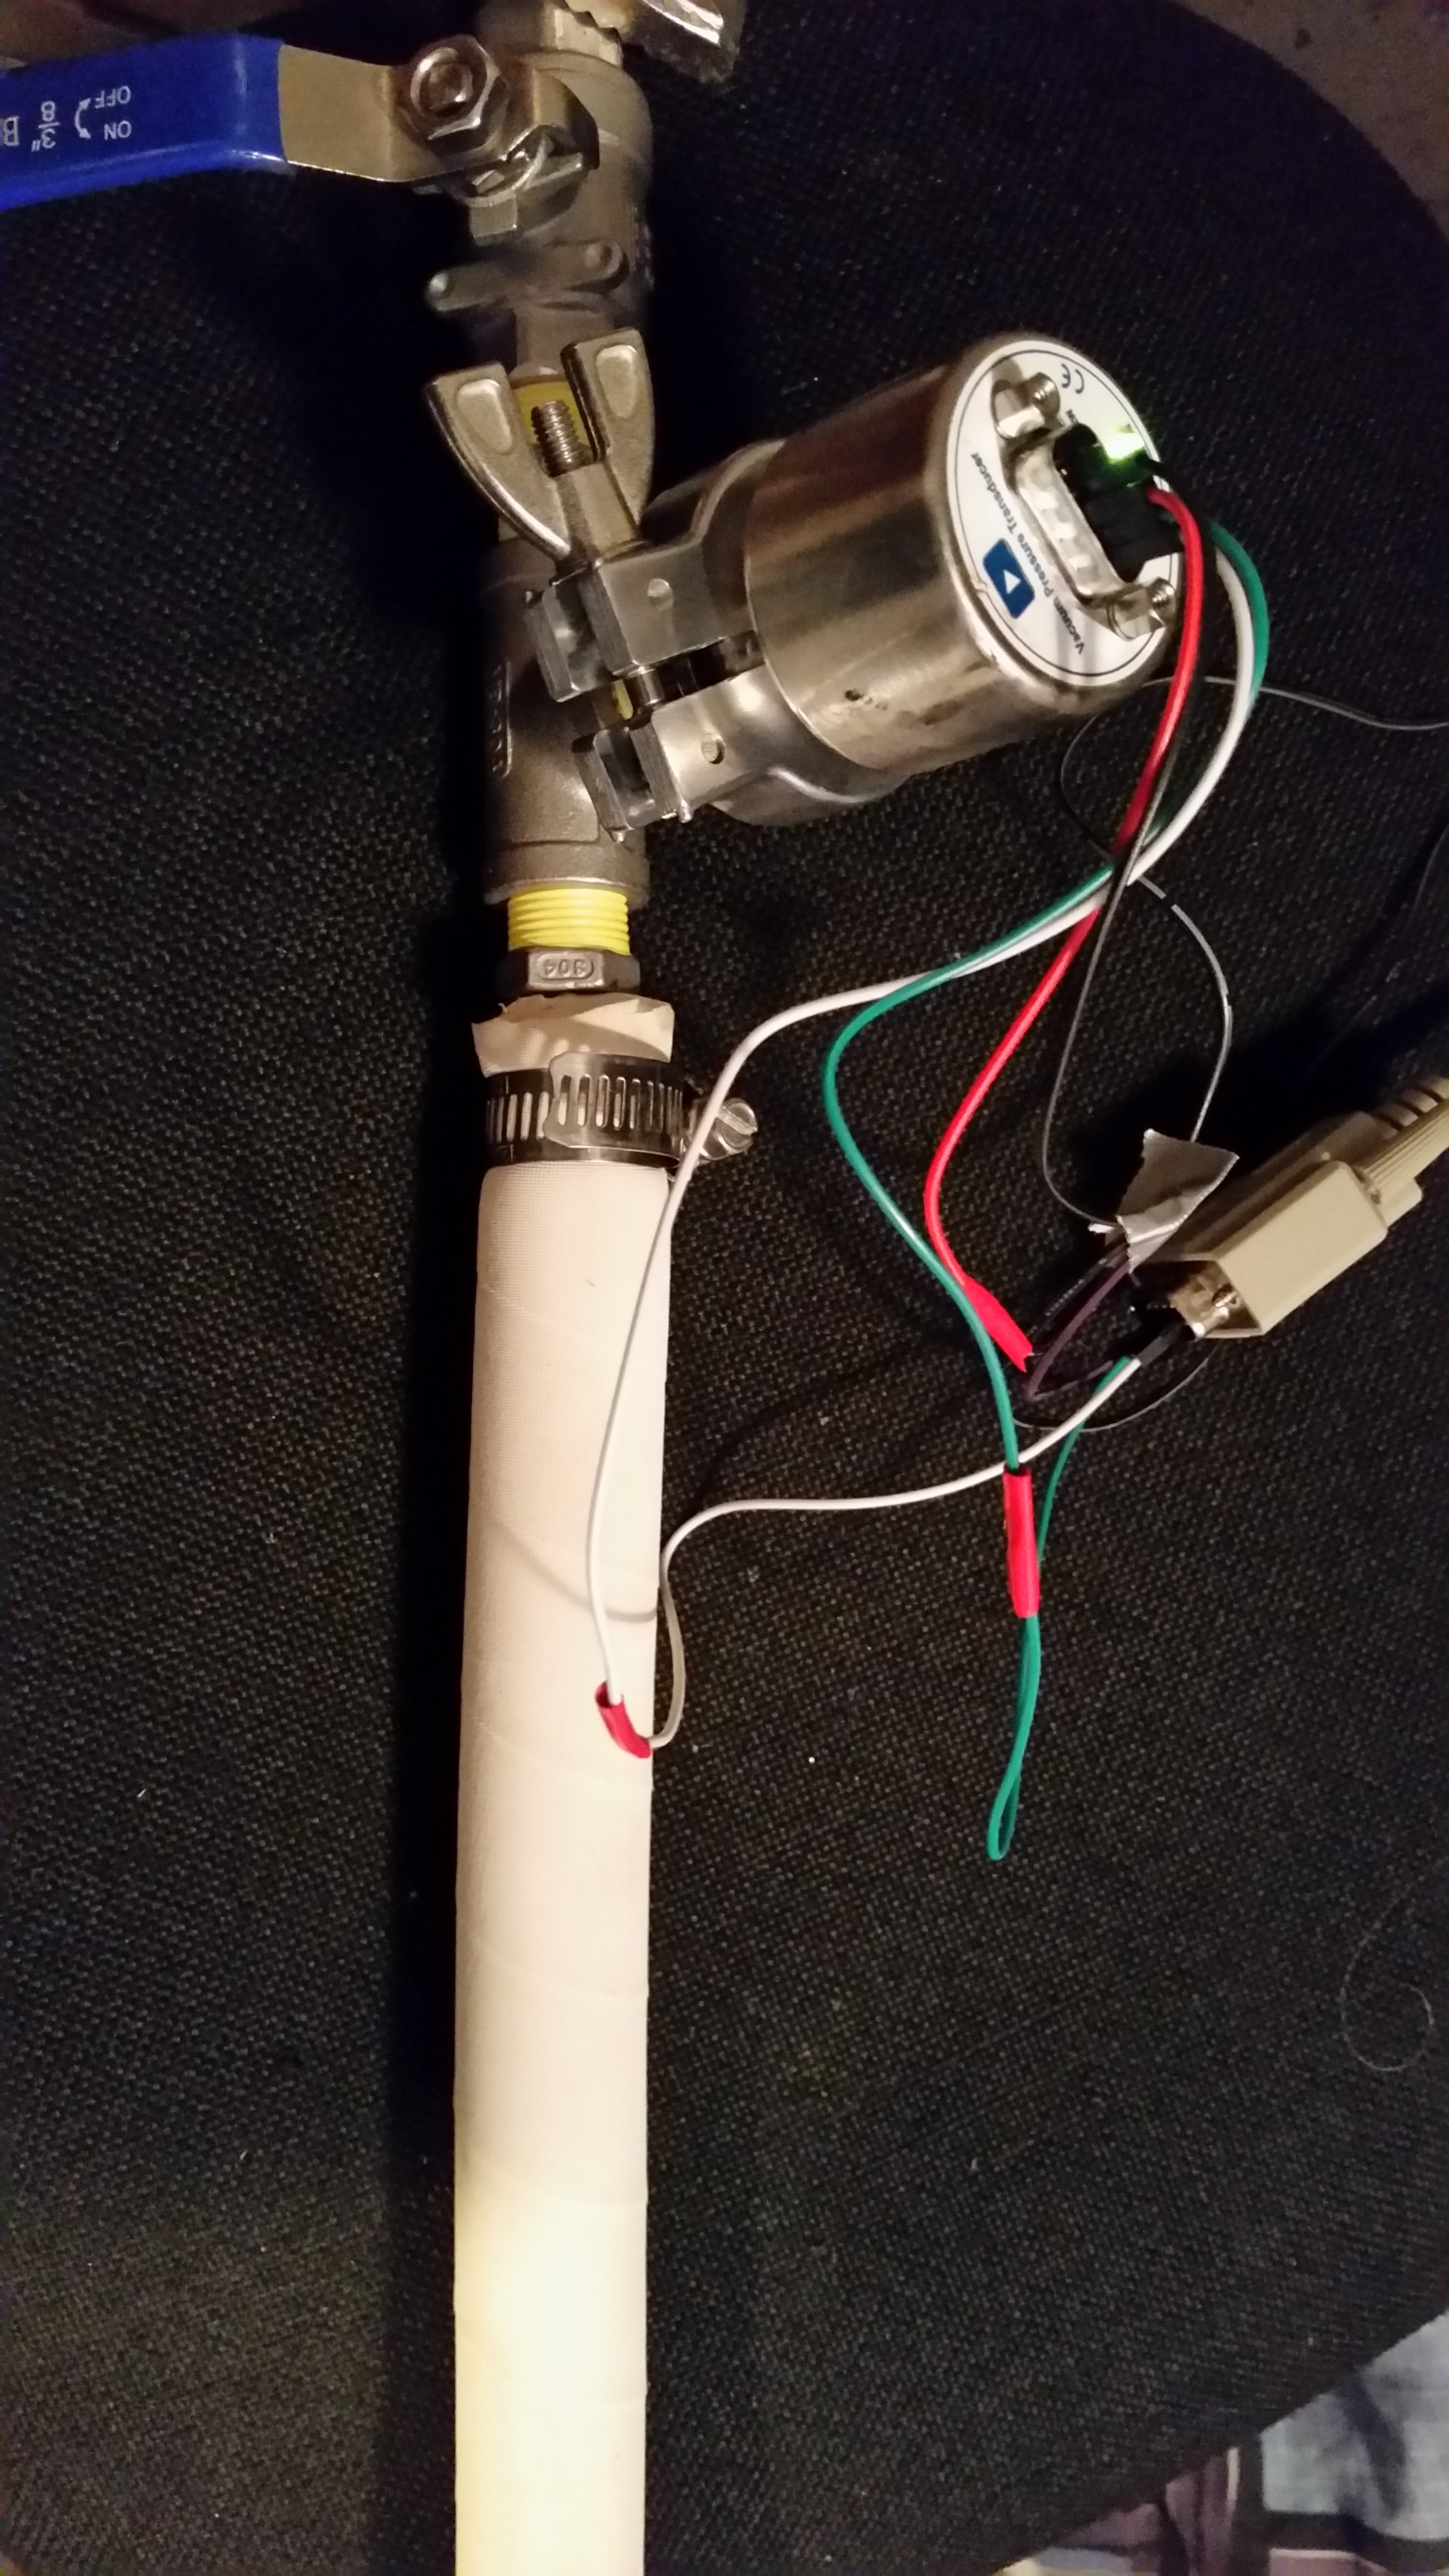
The transducer easily communicates over serial port to a PC. This requires 2 wires for serial communication, and a separate power supply that ranges from 9vdc to 30vdc. You want to choose a power supply with a very low power output. I searched through saved walwarts I had and found a 12v with only 300ma output. Some individuals might choose to power the tranducer with a battery. I used pin jumpers to easily connect the wires for testing but I plan on cutting up a serial cable I have to make a more durable version.
This is what my wiring setup for testing looks like:
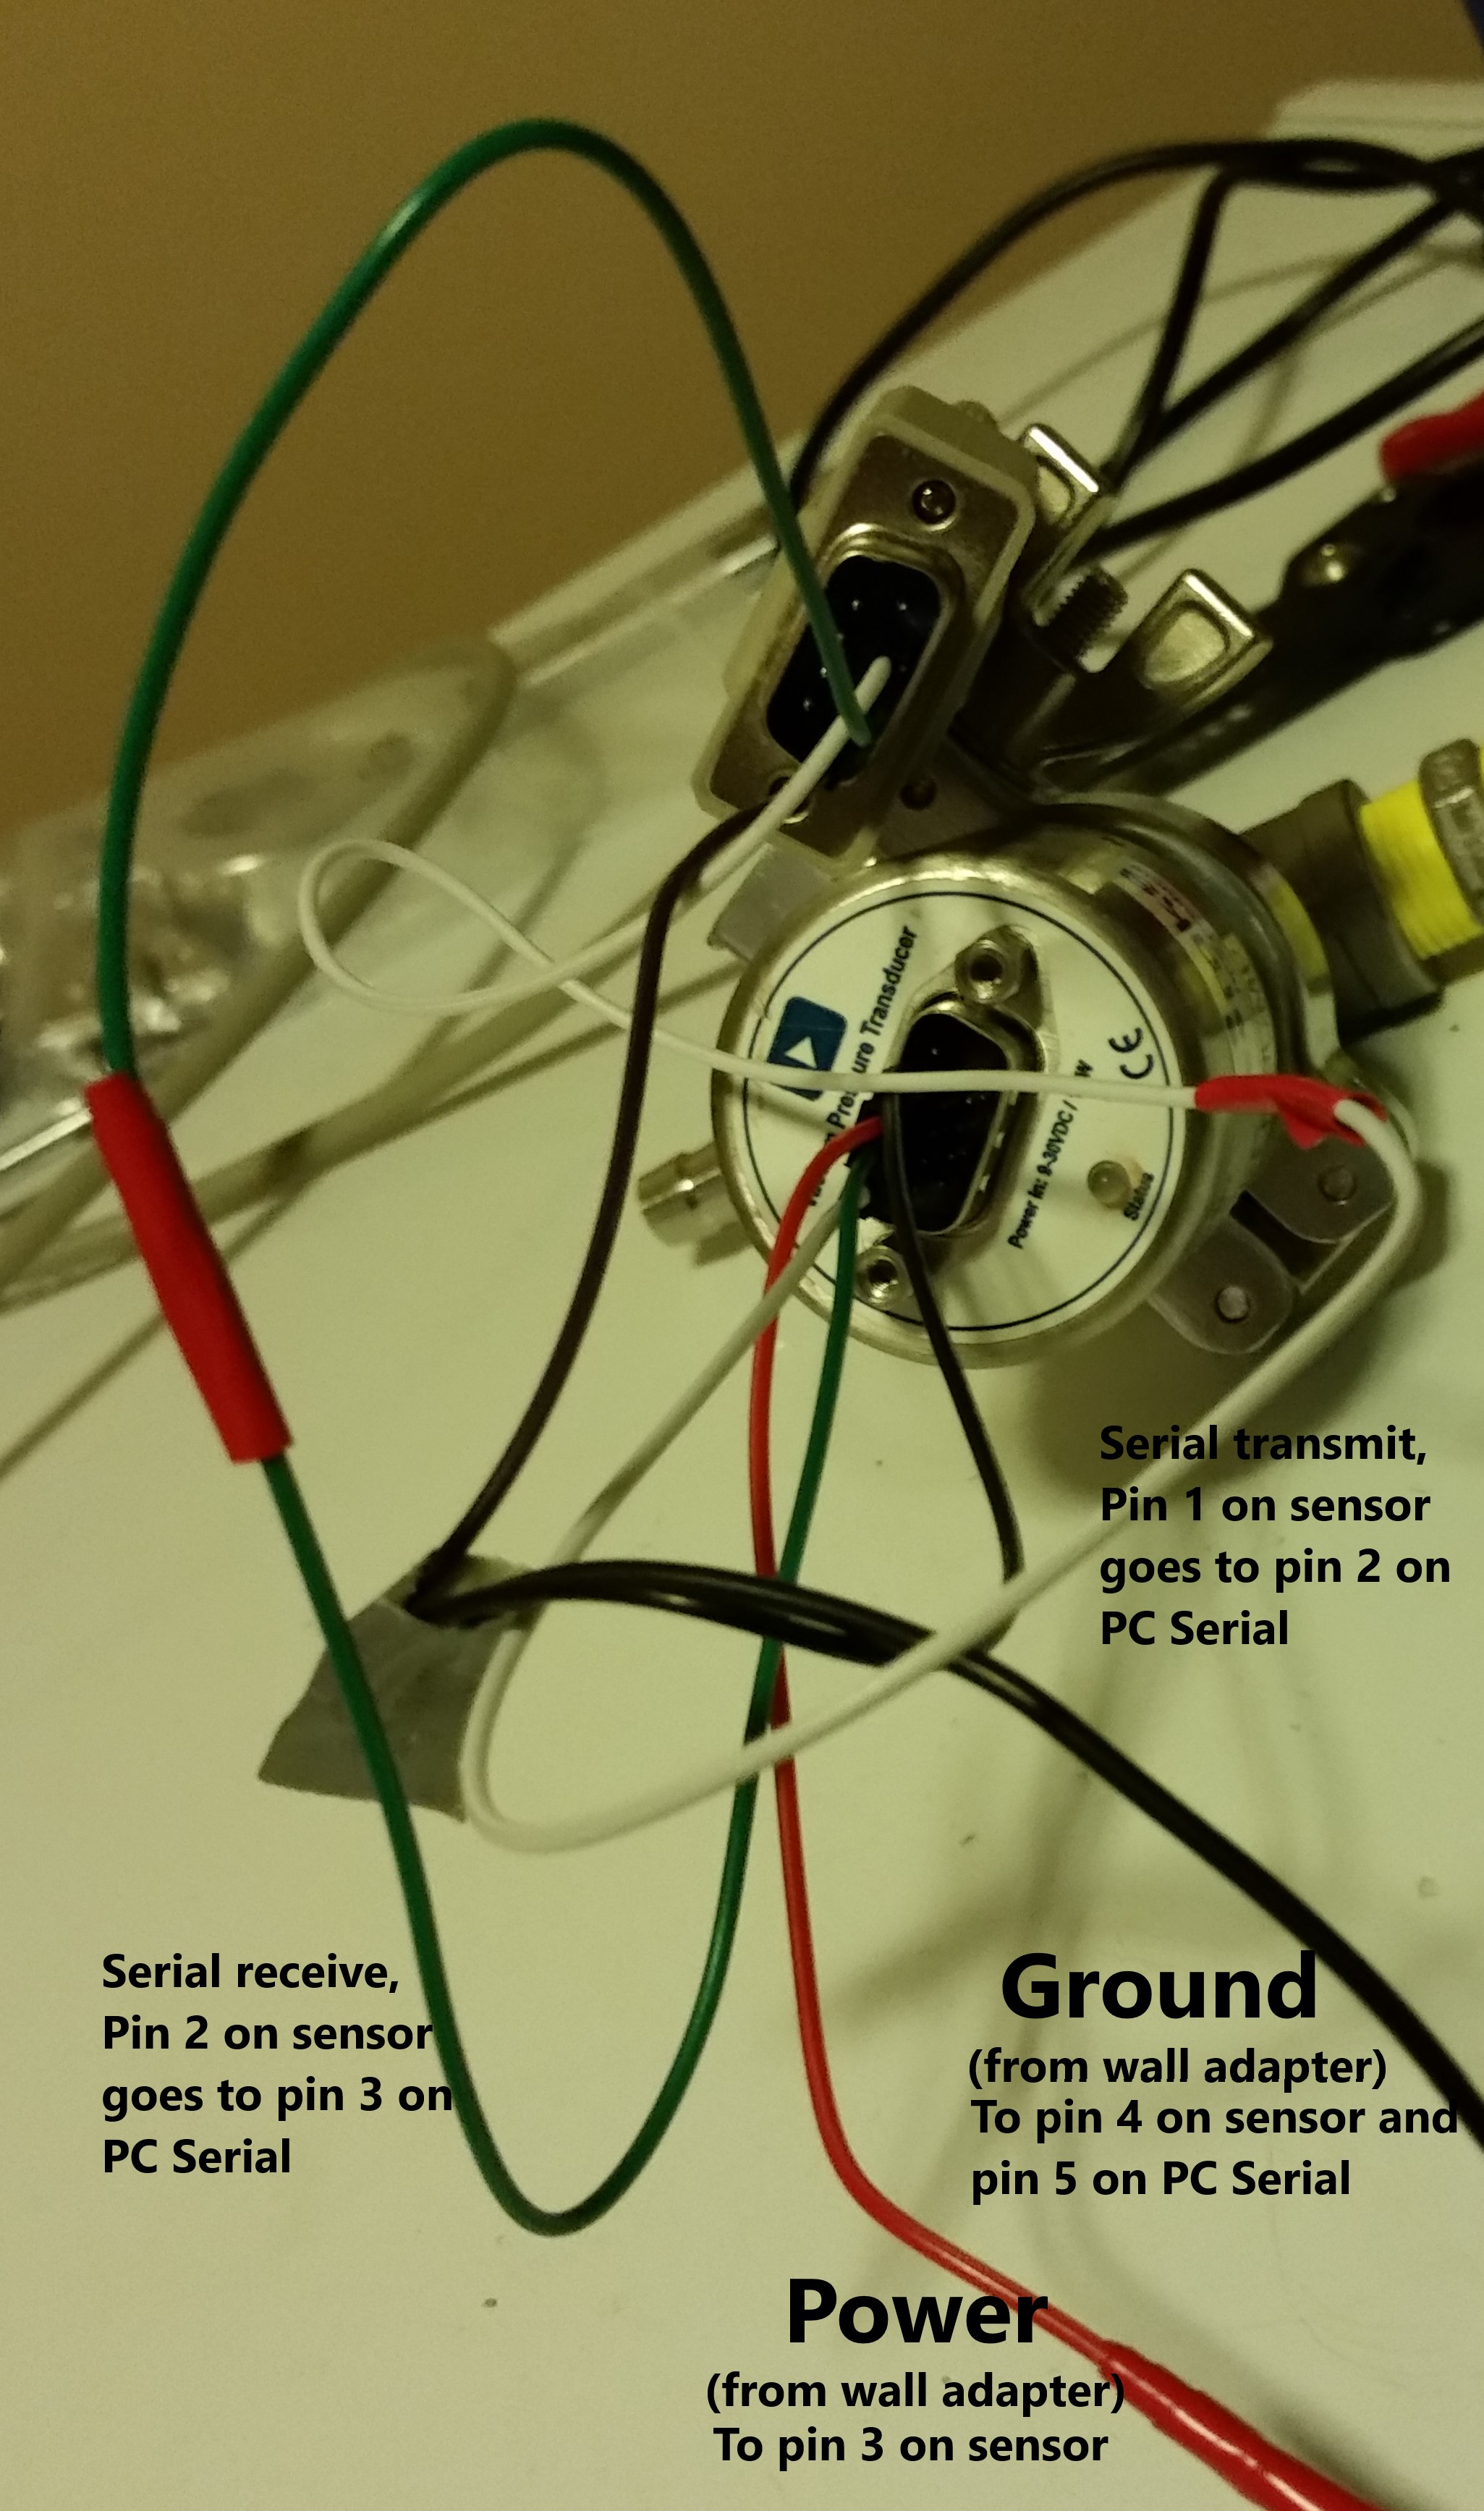
With labels:
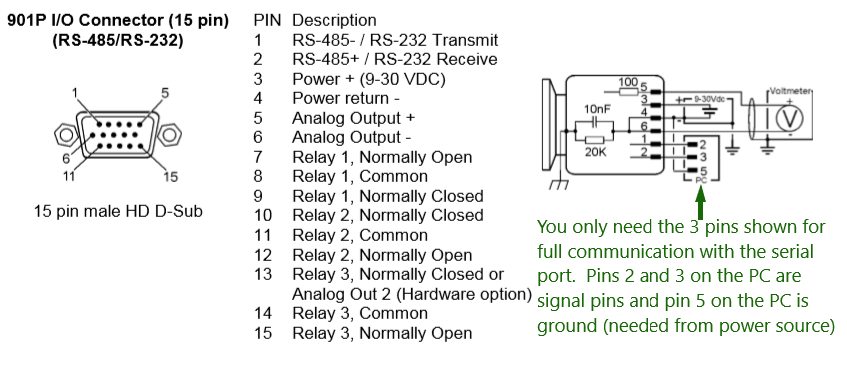
Pin Diagram:
I used an older PC I had with a serial port but you can easily get serial to usb adapters.
The transducer has a standard KF16 fitting. You want to mount it with the connector upright. I would read some of the manual which ideal vac is nice enough to post: https://www.idealvac.com/files/manuals/901manual.pdf
The best serial program I’ve found is the opensource ScriptCommunicator, ScriptCommunicator / serial terminal download | SourceForge.net
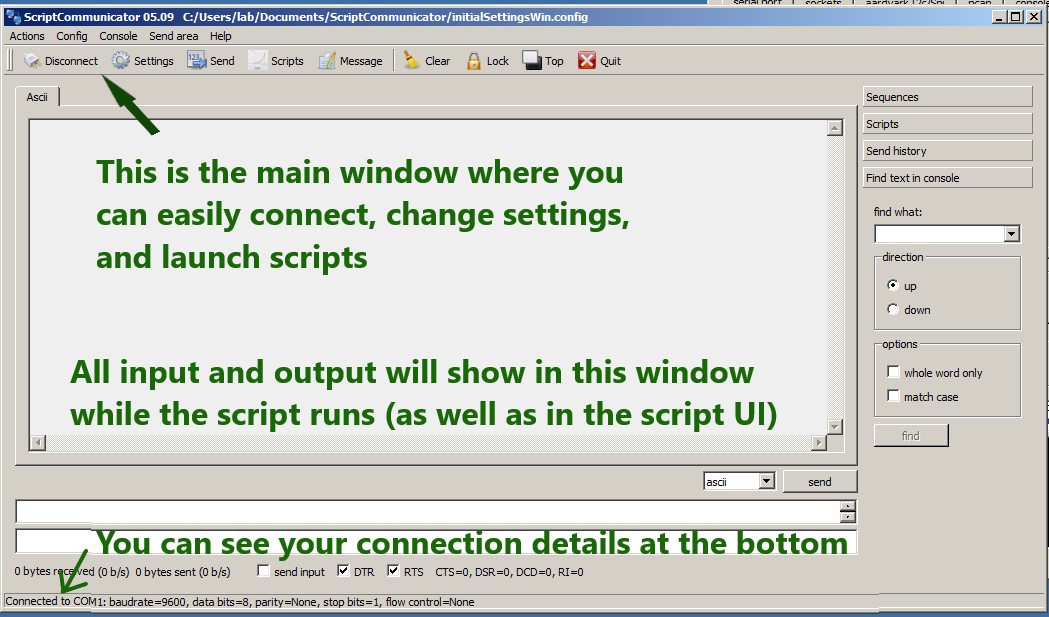
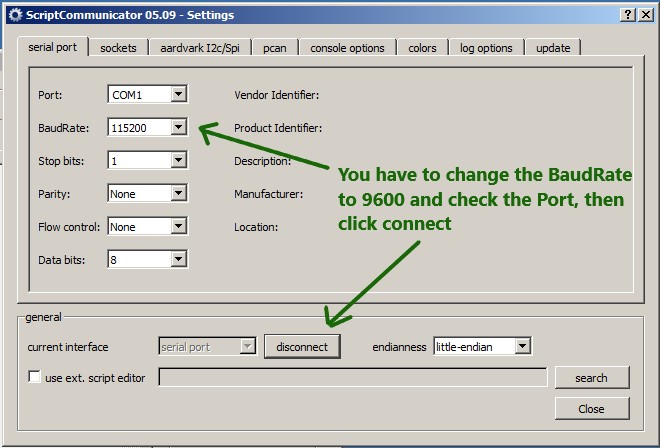
First go into settings and use the default settings for the 901p sensor, you can also connect on this screen, your com port might be different but SC usually finds it:
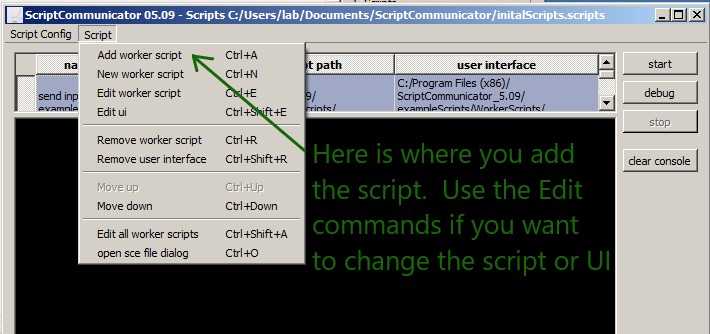
Go to Scripts, add the vacuumpressure.js:
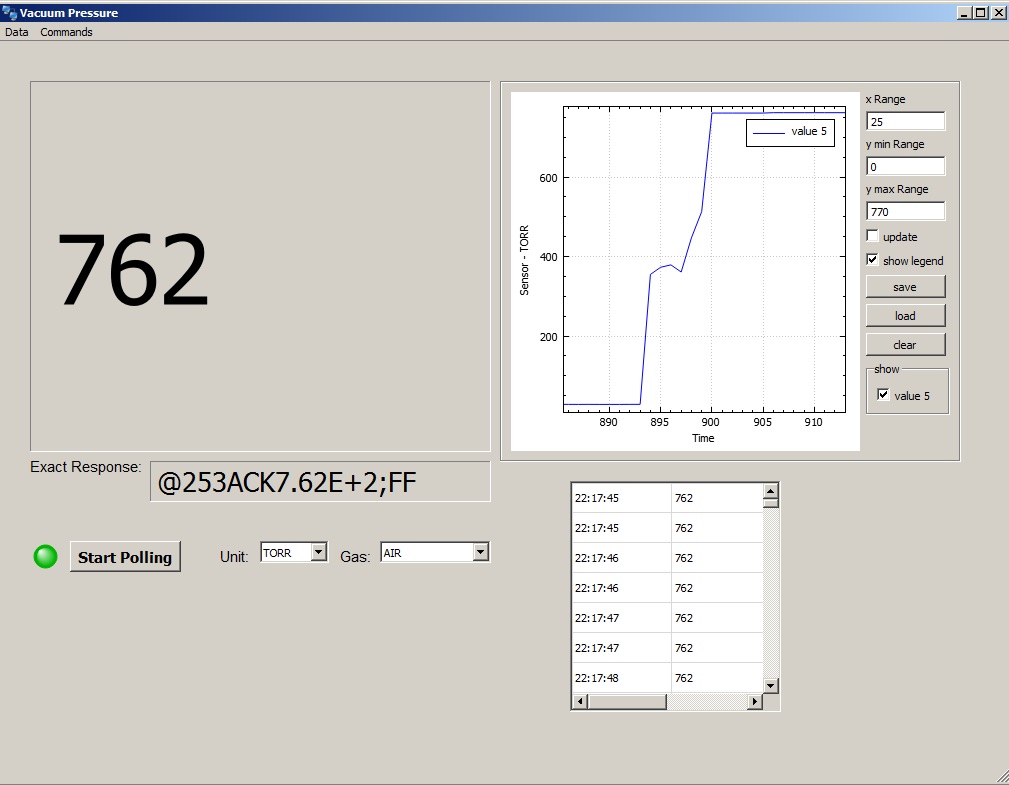
When you start the script it will first ask the transducer what unit it is set to. When you click the Start Polling button the script will ask the transducer for the pressure every 1 sec and post it to the large window, add it to the graph, and add the local timestamp and pressure to a table (which can be copied and pasted to excel). When you click the button again it will stop polling. If you use the comboboxes to change the unit or gas type the script will send the command to the transducer to make the change.
The code is stable and works well to take readings but is still a work in progress and I’m in the process of making the plot range values auto adjust to the readings over time, as well as adding commands to the menu structure such as changing/reading some of the other transducer settings and working with multiple transducers.
Here is the script running on my welch 2090b:

And when I turn it off you can see it return to ATM:
Here is the script:
** EDIT ** A few years later and my file host shut down and I also have an updated version with the Microns added as a unit:
https://easyupload.io/m0yqyh
This is the thread where we first talked about it and @JacobsLadder mentions his arduino powered version: Vacuum gauges - #28 by JacobsLadder
My plan is to put a monitor near my setup and use a wireless mouse to control the script. I had the font a lot larger but changed it when debugging but I will update the thread when I’ve finished making stable changes. At first I was going to build the arduino setup and then decided I could do more with the PC version. I would like to figure out a good way to read thermocouple temp values and combine that with the vacuum readings in a table format…
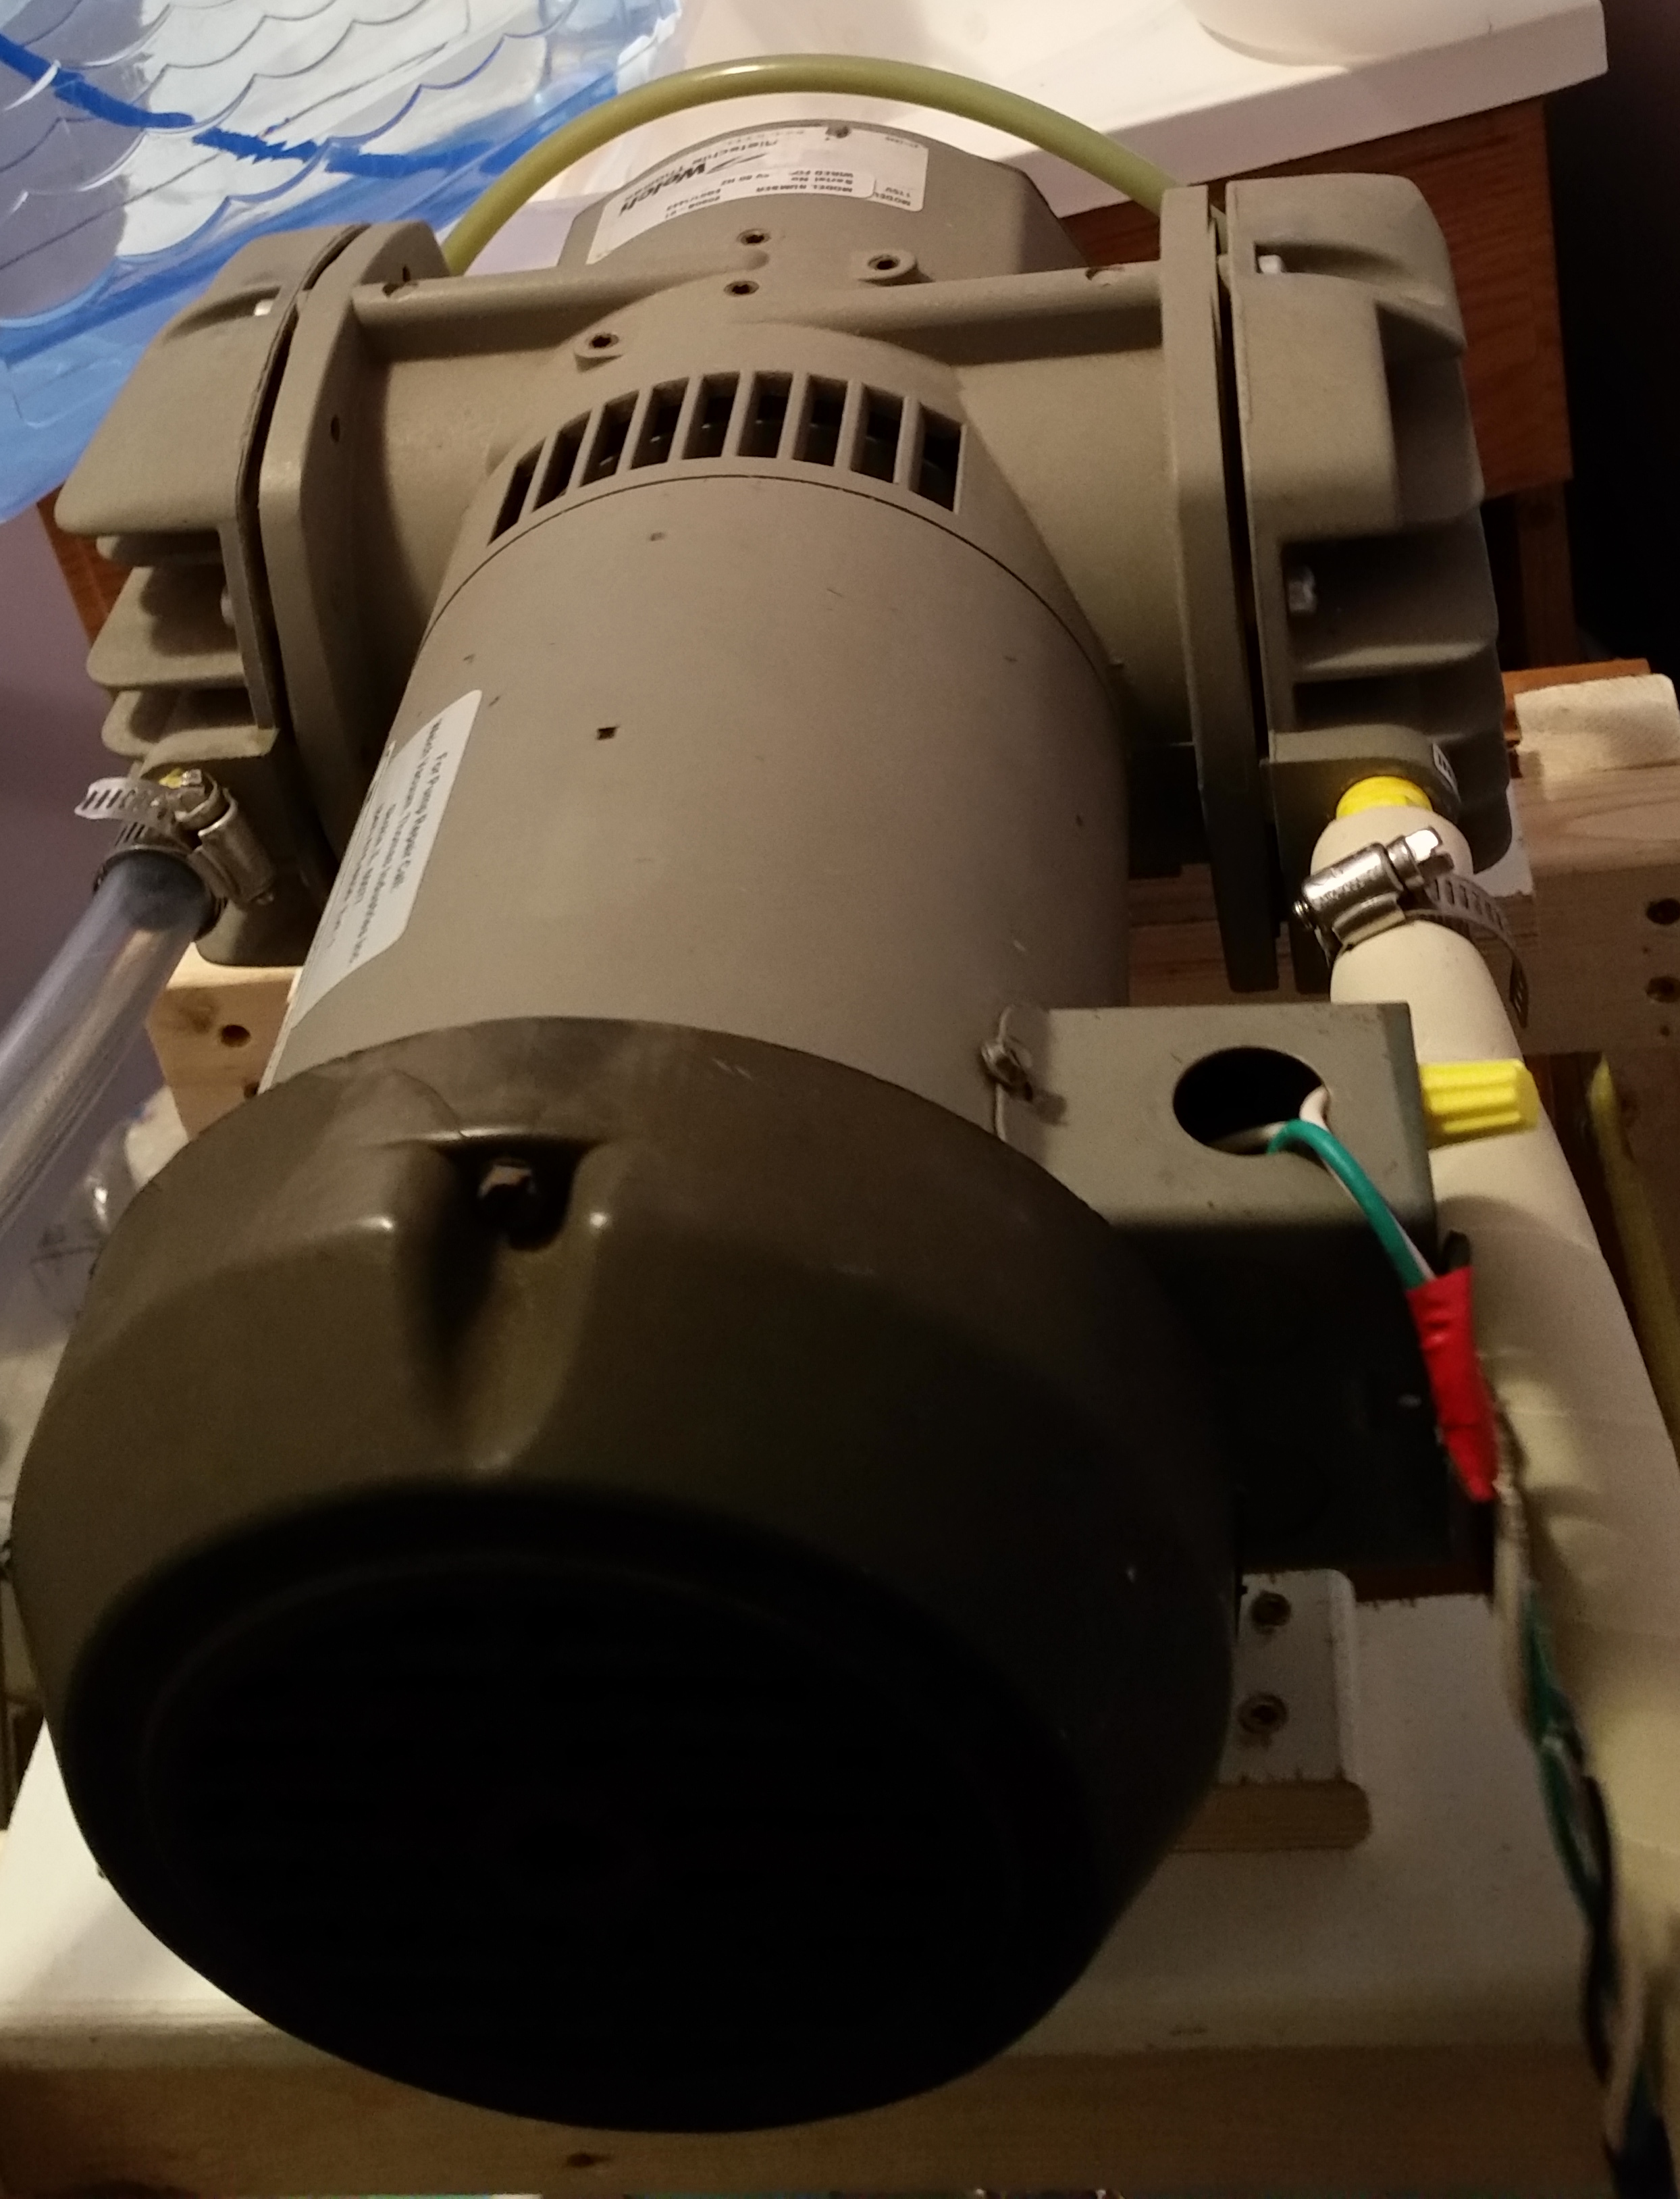
I was super happy to get it working and to confirm that my 2090b is truly a beast, pulling 25 microns (it is rated @ 33), which is really damn good for a chemical duty diaphragm pump. Here is a picture of the badboy:
If you want to know how your vacuum is sucking and you don’t have thousands of dollars to spend doing it I highly recommend the 901p transducer.