Tear down map for CUP-30?

Please demonstrate you have followed scientific procedure before asking for assistance.

How about I just admit I’ve voided the damn warrantee.

Again.

:shushing_face:

So…I think I pissed off our CUP-30 running it at 1500rpm for an hr without added cooling.

What makes me think that?

It spit ethanol vapor and made many of the cries associated with bearing destruction.

I don’t particularly feel like dissecting it without the service manual, which I’m not gonna have access to.

Has anyone torn down the drive-shaft on a cup-30 and taken pictures?

Care to share?

(DM works)

3 Likes

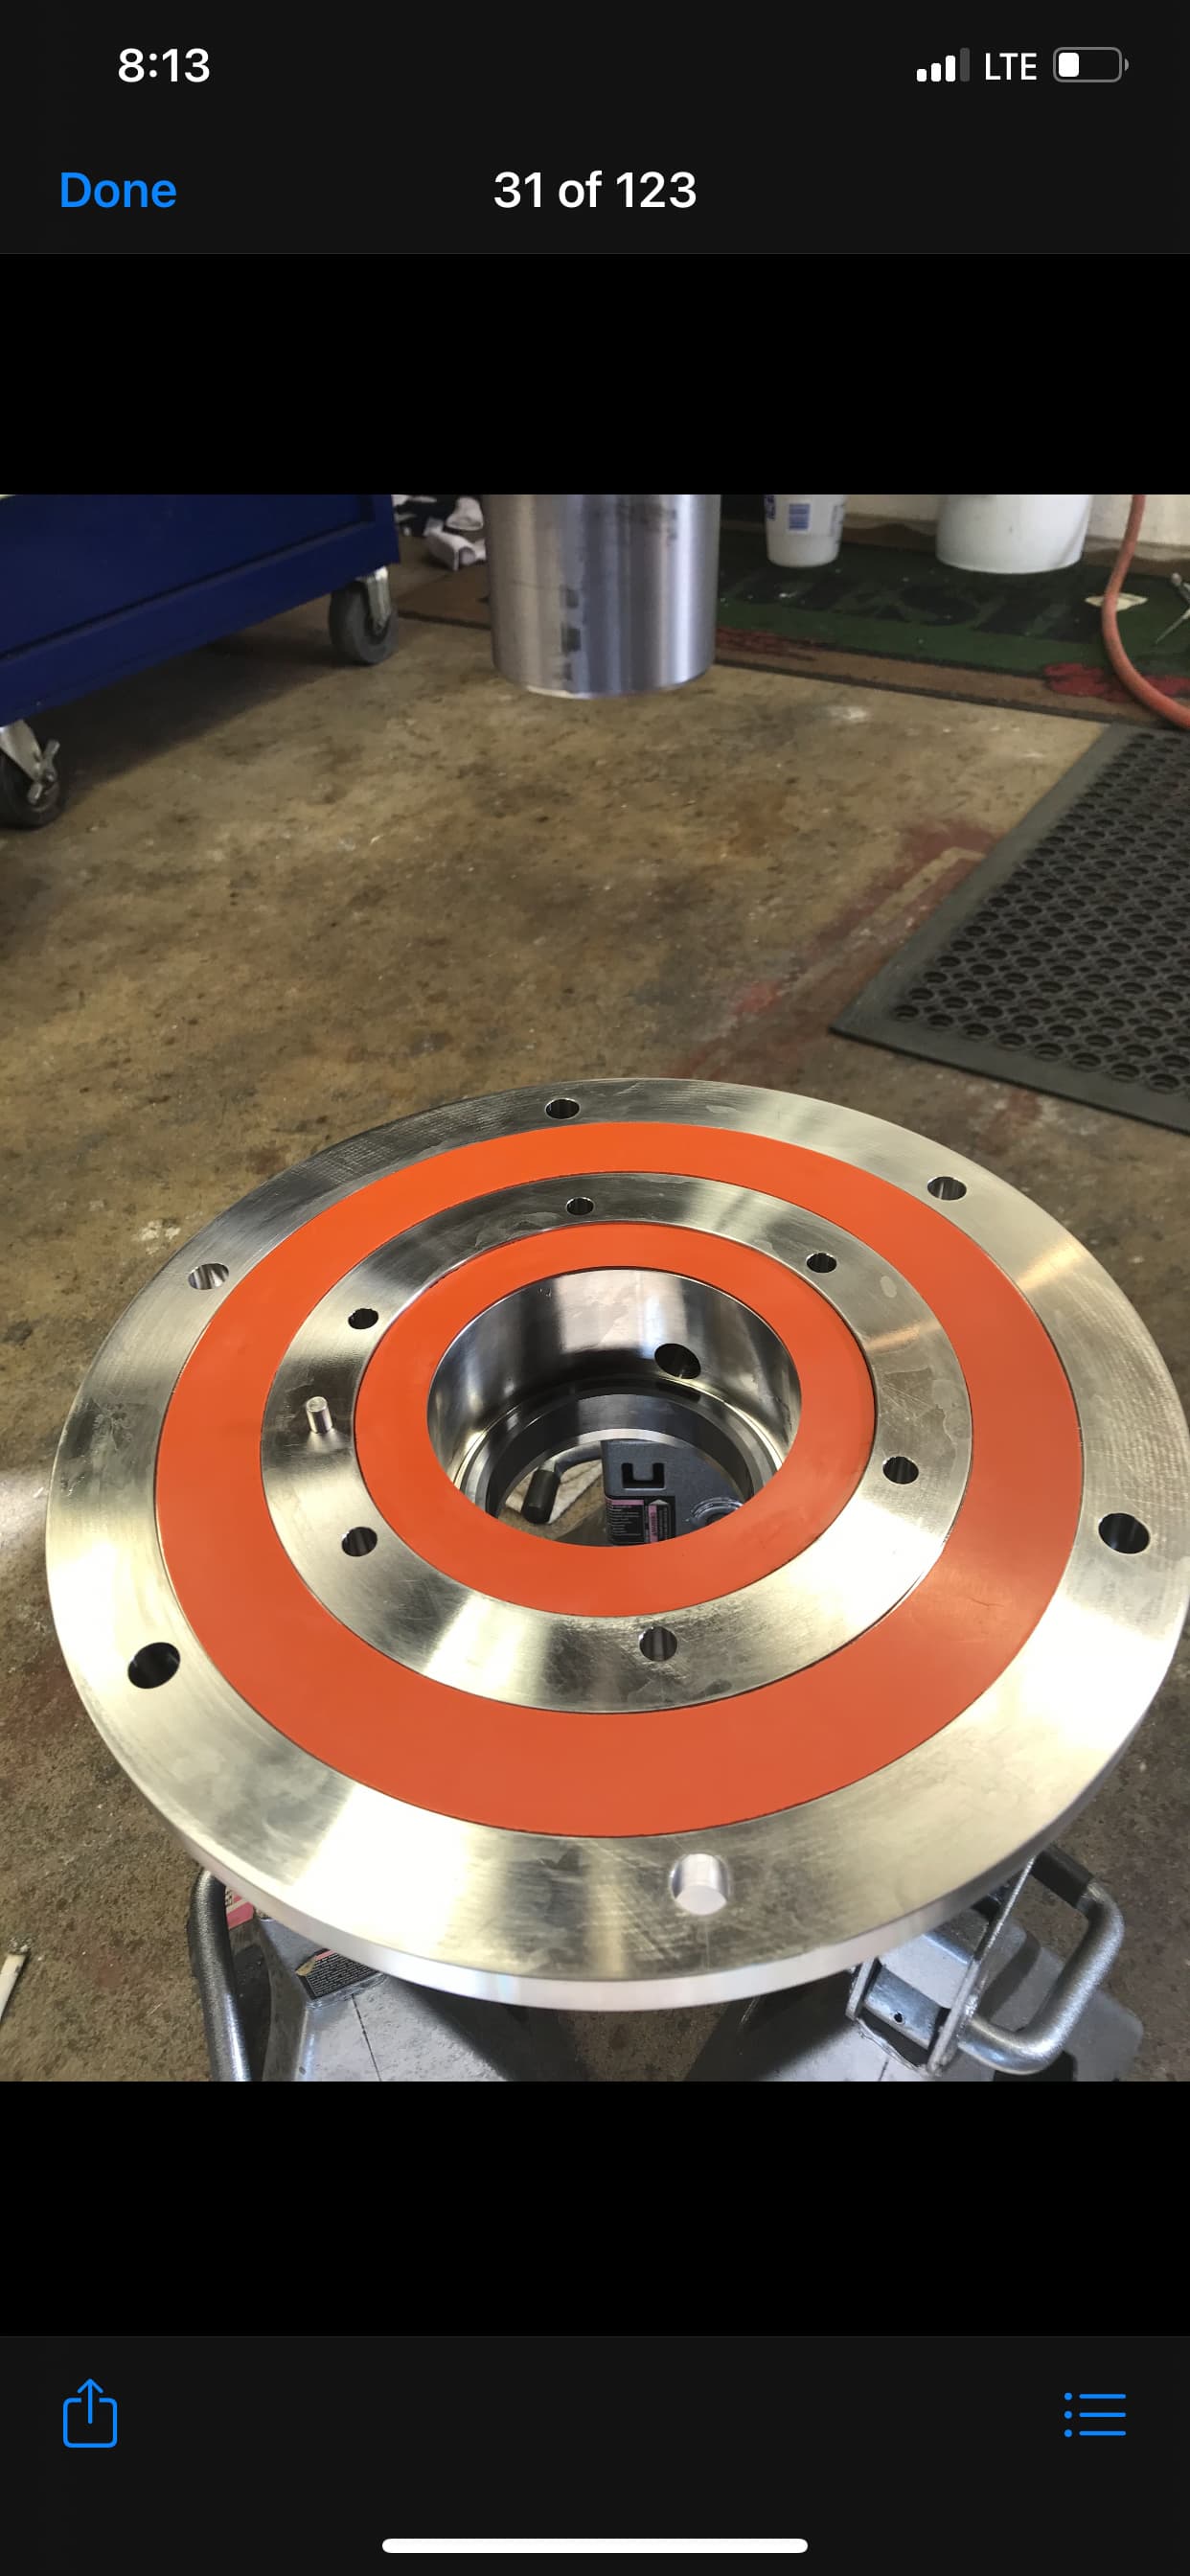
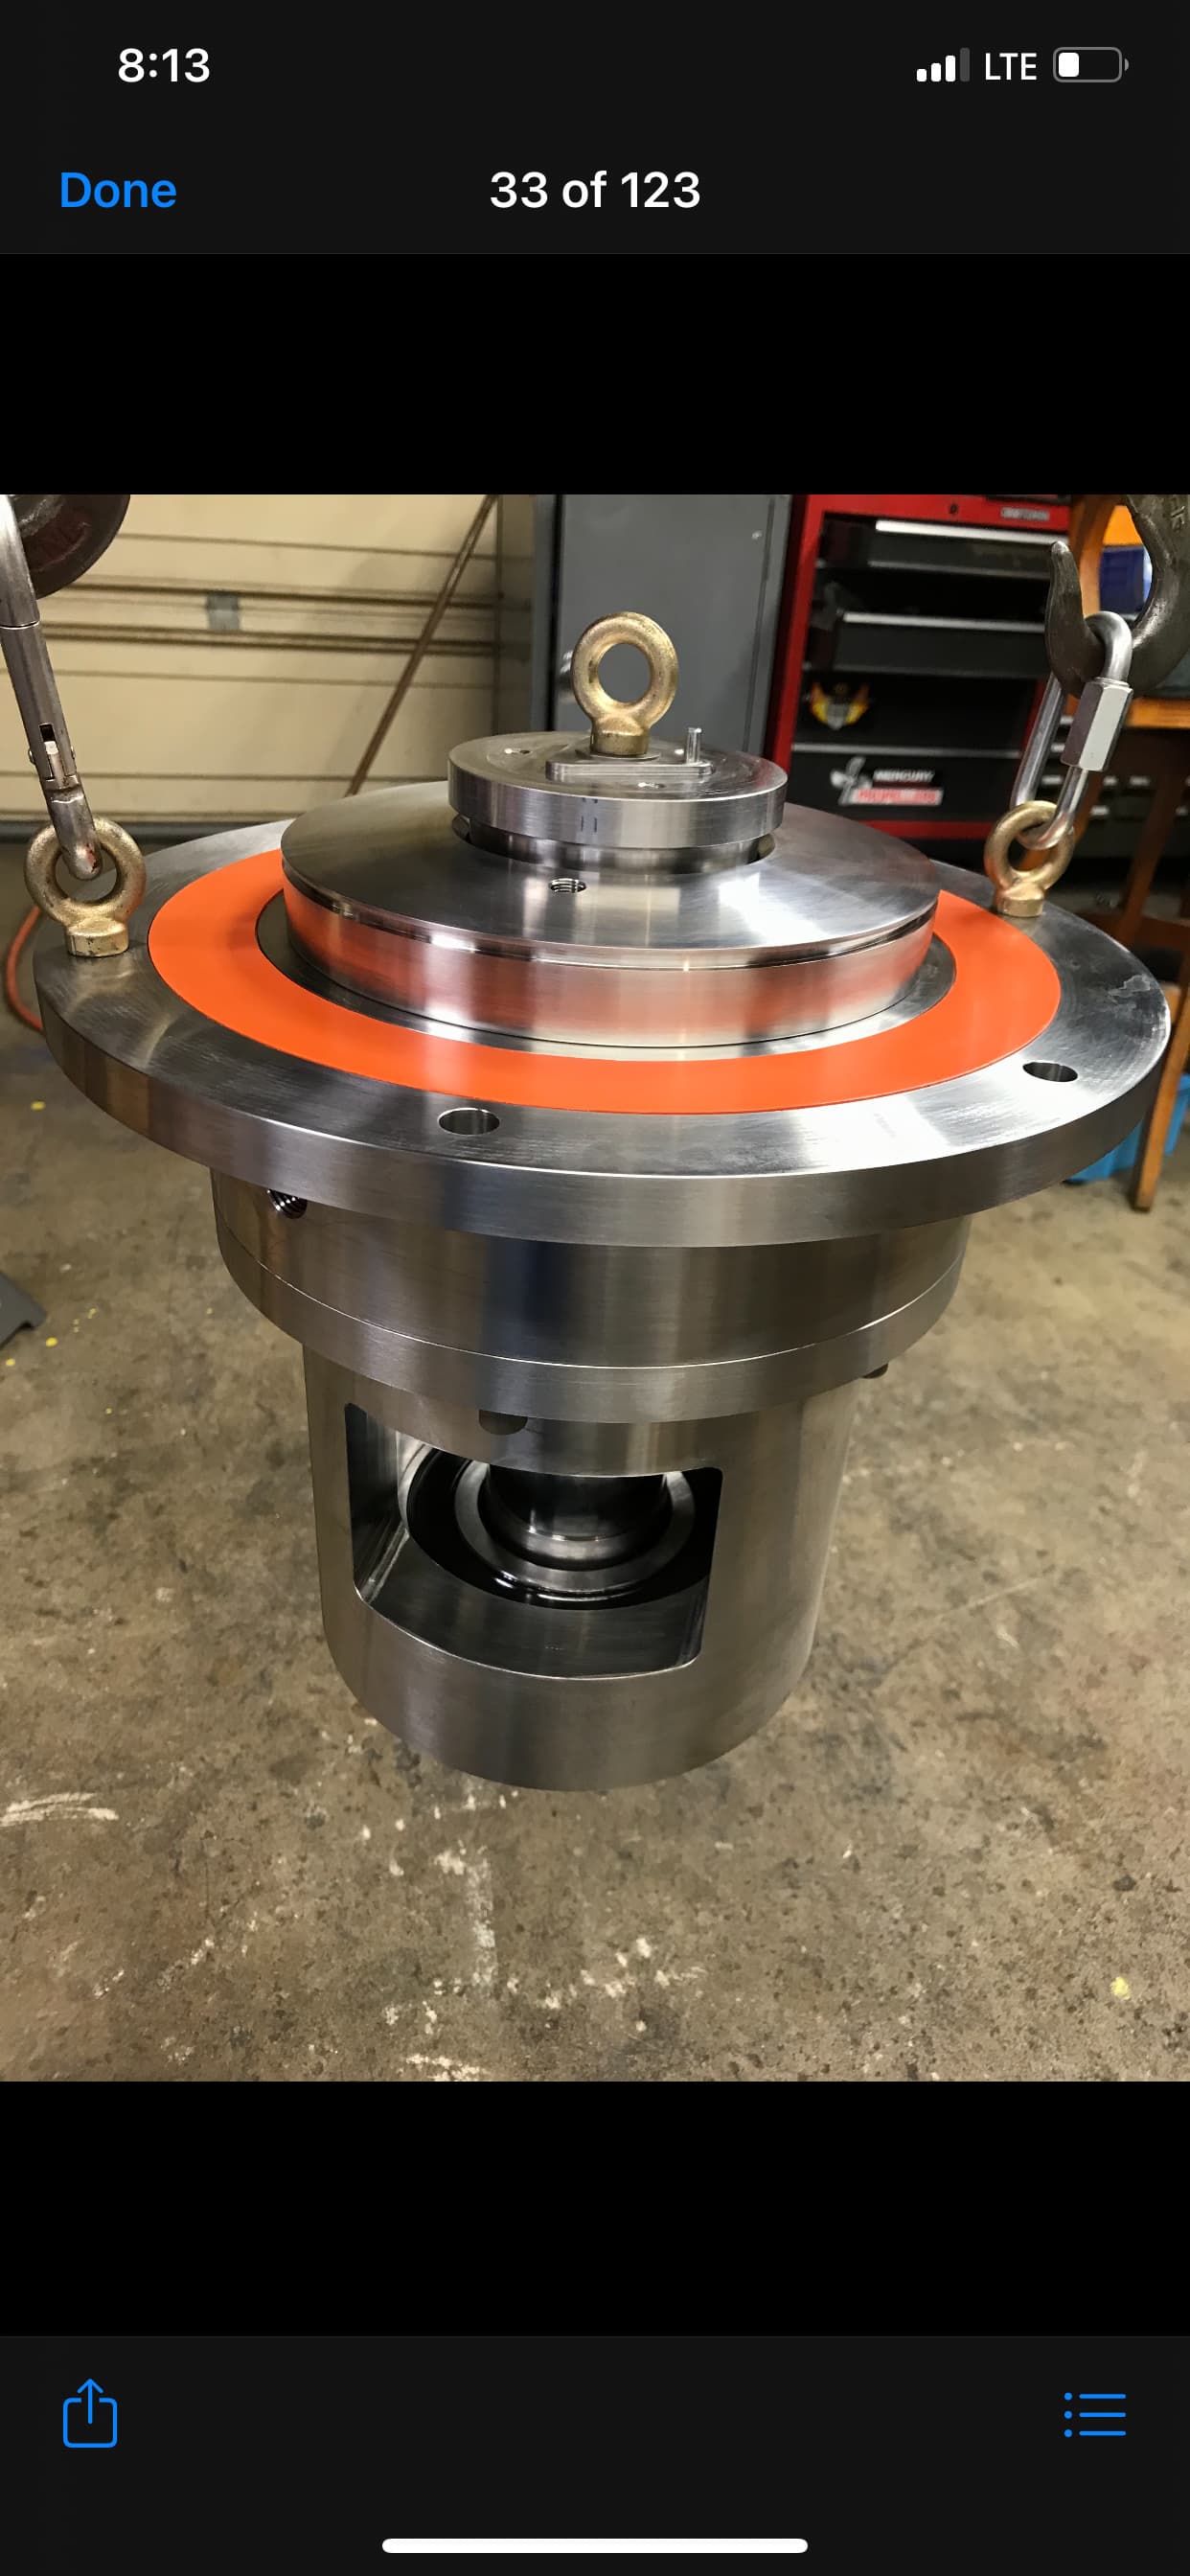
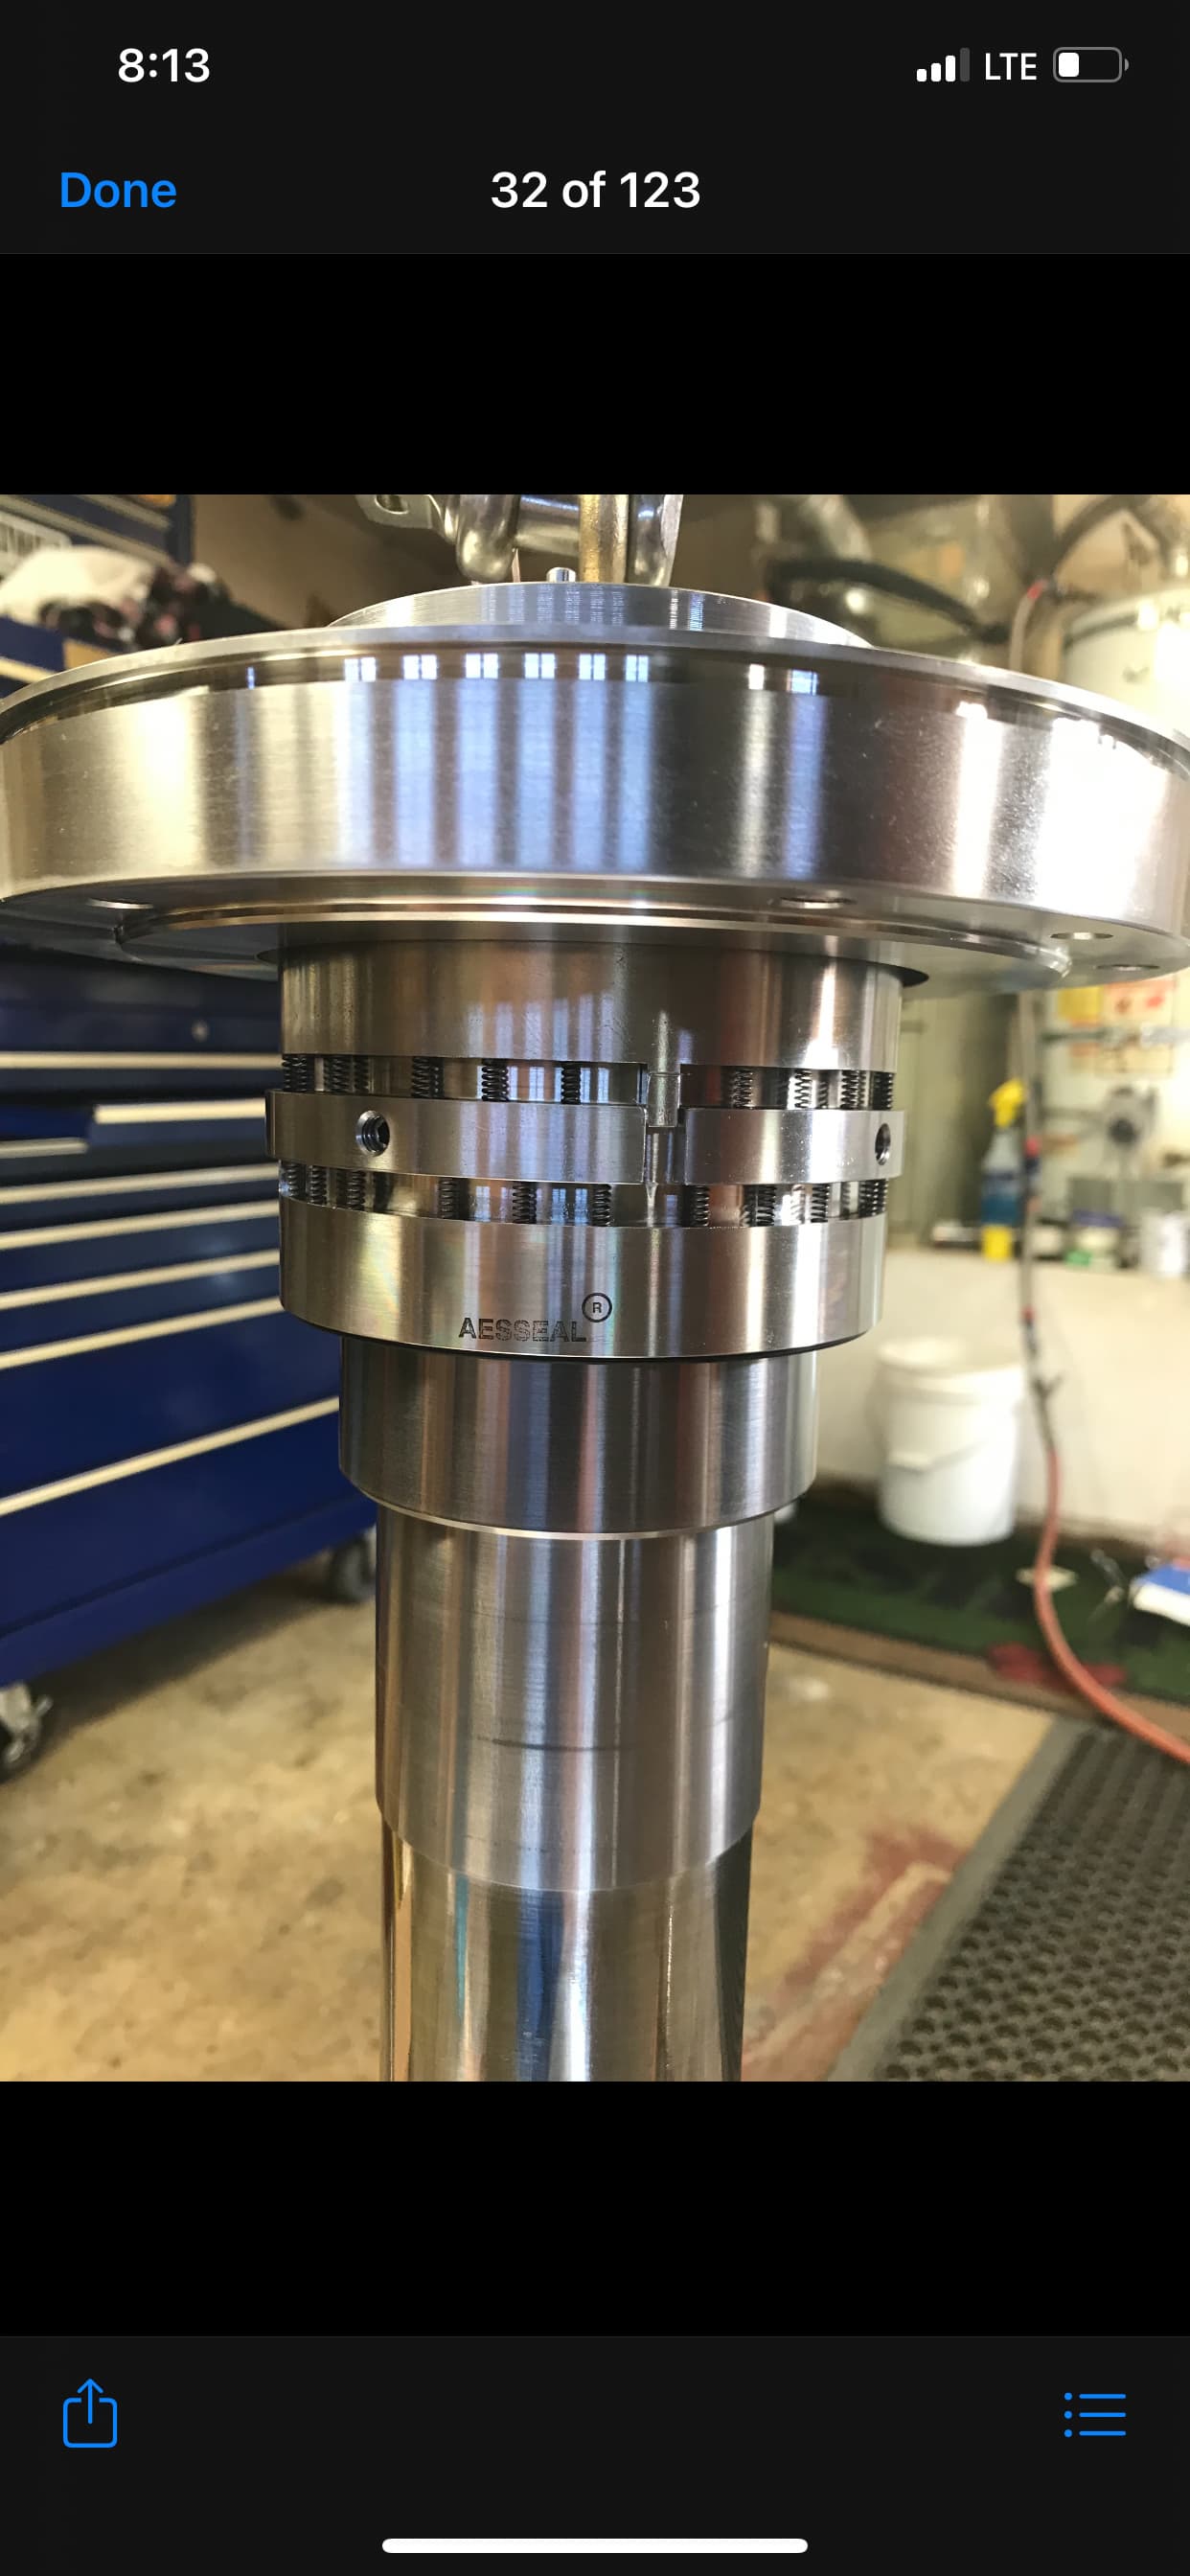
my pops rebuilt ours when it took a crap and delta wanted 25k. the part that goes bad is the mechanics seal. A company ASEAL I believe is the name sells them for 4k. When I get home after work ill look through my photos and can send you the whole thing torn down and each part.

10 Likes

Thank you!!

1 Like

While where here…

anyone figure out/know the VFD password?

It’s not 420 :shushing_face:

3 Likes

Wait, you need external cooling for your centrifuge? Good to know.

1 Like

That was my take home.

Manual say max temp 60C.

Original title for thread was “chiller for CUP 30”…but that seemed unnecessarily convoluted, and probably would have been ignored by @johnbigoilco

Is a bell (chiller) necessary on this bicycle?

That probably depends what you’re doing (how long you’re spinning).

The max it let me program was 45min at 1500rpm (which is 100hz on the VFD).

I made the mistake of going to lunch rather than babysitting that 45min. I’d sat through three 10min spins and all was well.

She apparently got hot under the collar when I wandered off.

Given that I have to tear this down, I might install a couple of thermocouples when I put it back together so I don’t make this mistake again.

2 Likes

I’m considering getting a cup 30 and running at ambient temp and therefore without a chiller. I figure a small one will suffice?

1 Like

Should.

Depends if you’re flooding it (or flowing liquid through it) or not.

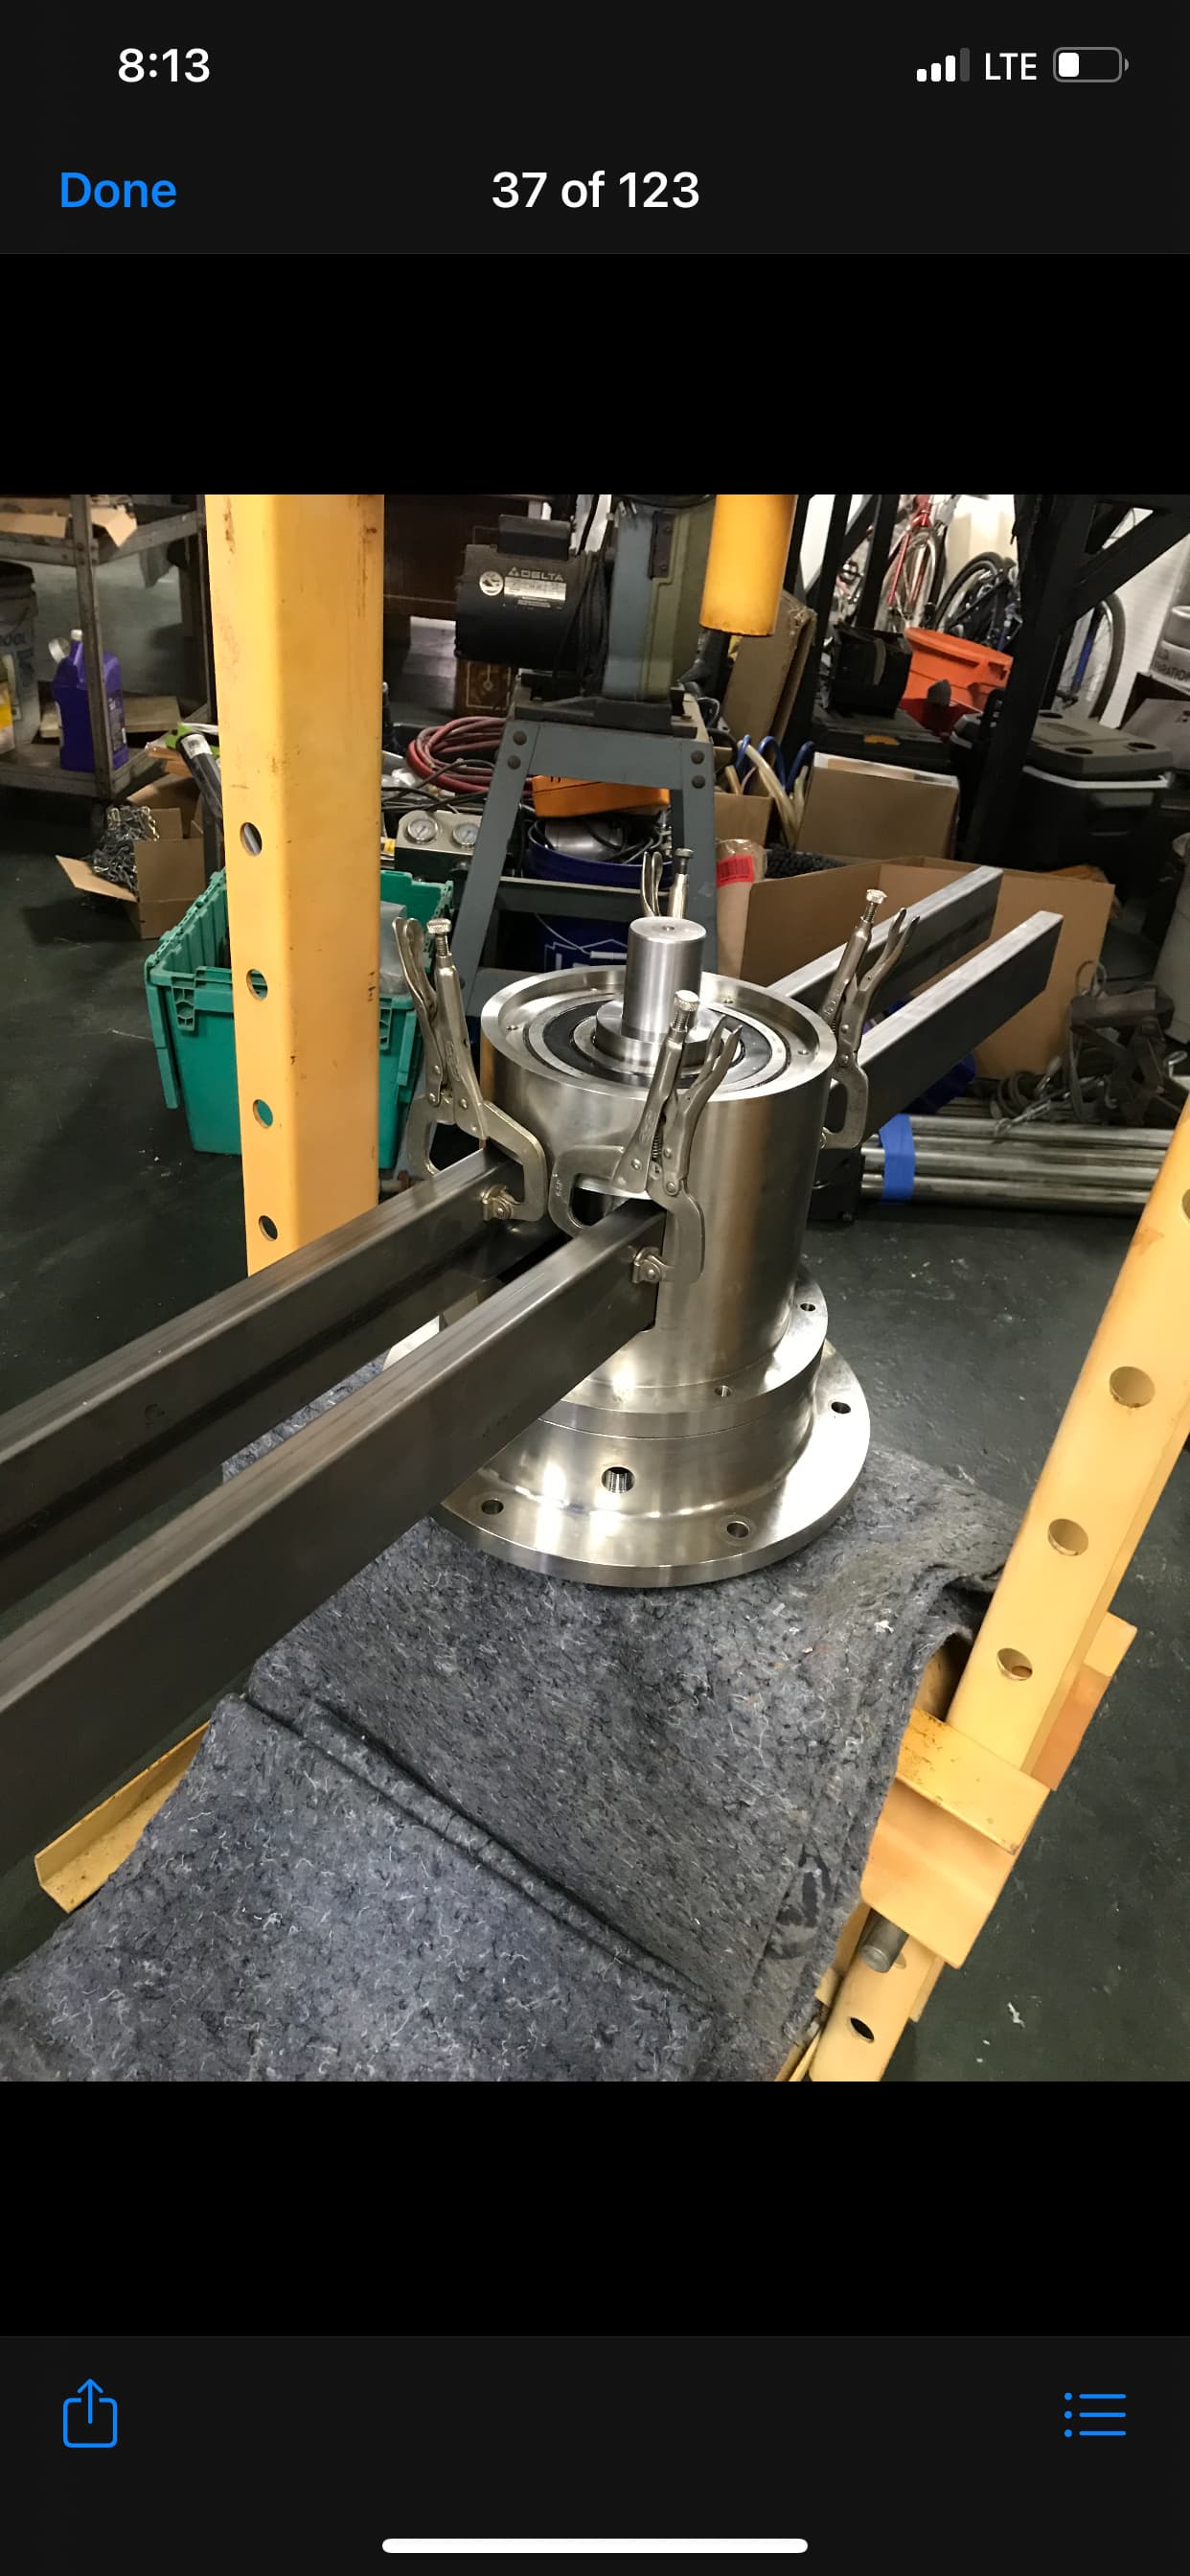
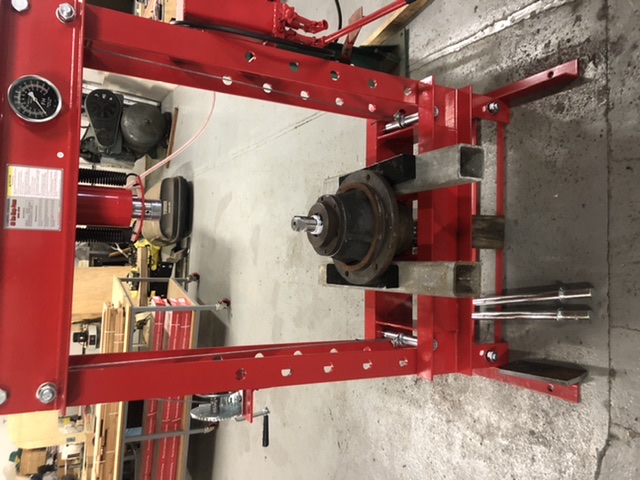
It’s the wrong tool for the trick I was trying to perform, but I know how to solve that, and at this point I’m committed to tearing it down, so chances are it’s gonna do what I’m requesting or die trying

1 Like

Well please don’t die lol :slight_smile:

2 Likes

Reread that…

And yeah, I’ll try very hard not to kill the poor thing.

3 Likes

As far as it trying to kill me or anybody else?

I agree, they are dangerous critters.

this one has got it’s own room, and if I do anything stupid like over-clock it directly from the VFD, then the controls would be outside that room (with e-stop on fuge).

I’ve still got to get it spinning again and convince the boss to throw more $$ on top of that to make it perform new tricks.

I had, but that was before I broke the damn 40hr centrifuge.

:man_shrugging:

That’s Repair & Destroy for ya…

1 Like


Won’t have time to explain each photo till later

8 Likes

THANK YOU!!!

…even without explanations those 1k word substitutes go a LONG way.

that is definitely NOT how I though it went together…

Other than the unexpected insertion, it doesn’t look too much more complicated than the junk I usually have to deal with.

image
image
image
image
image
image

Shinier though…

3 Likes

Manual explicitly states “don’t run dry”.

If you’re planning on extracting at ambient, you’re probably fine.

1 Like

That’s because one would have plenty of solvent to absorb the heat load and keep the machine from reaching that critical temperature point.

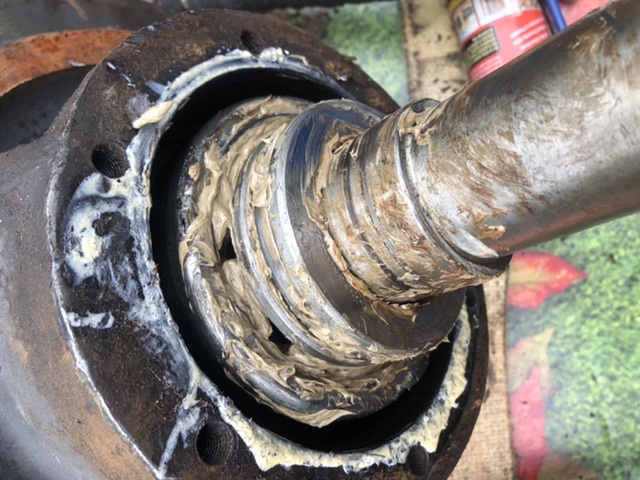
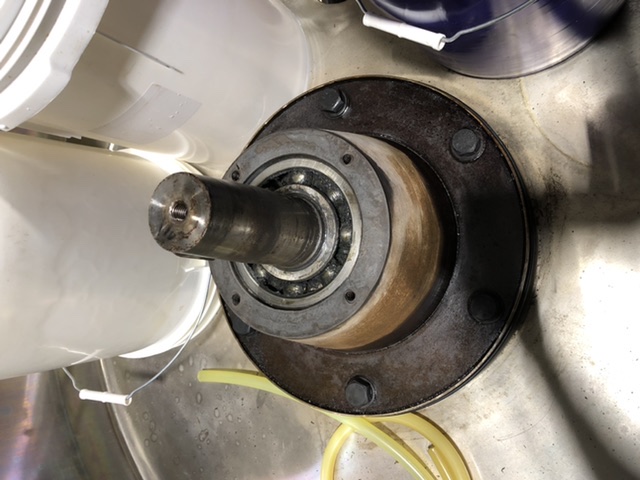
You know the right type of grease for those bearings, and you know that the temperature rating leans heavily toward the colder end of the spectrum. Can imagine it would lose viscosity and move where one doesn’t want it in a hurry without something to take the heat load. The jacket is too far away from the heat source to make enough difference, methinks.

1 Like

Damn straight.

Which means I need to solve that or pick a new tool. I like this one, but mainly because it’s in front of me.

You know how I feel about solving the problem with parts on hand :shushing_face:

2 Likes

Bump.

What I think I’m seeing suggests that the bowl comes off first?

Followed by the entire drive unit?

Base on your pictures (and mine) it seems like this pin threads in?!?


“A” (bowl) comes off first.

Then remove pin and thread lifting eye.

B & C lift out of base.

Remove/loosen all fasteners (highlighted, underside of drive & holding bearings in) and press apart.

Looks like part of that pressing might have required some extra bits :thinking:

@johnbigoilco ?!?

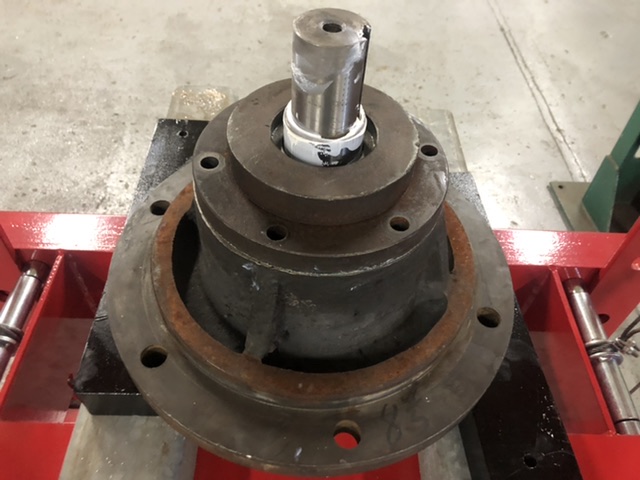
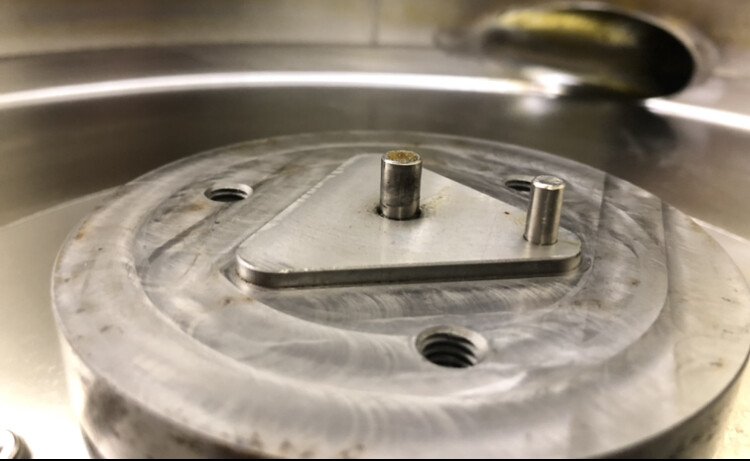
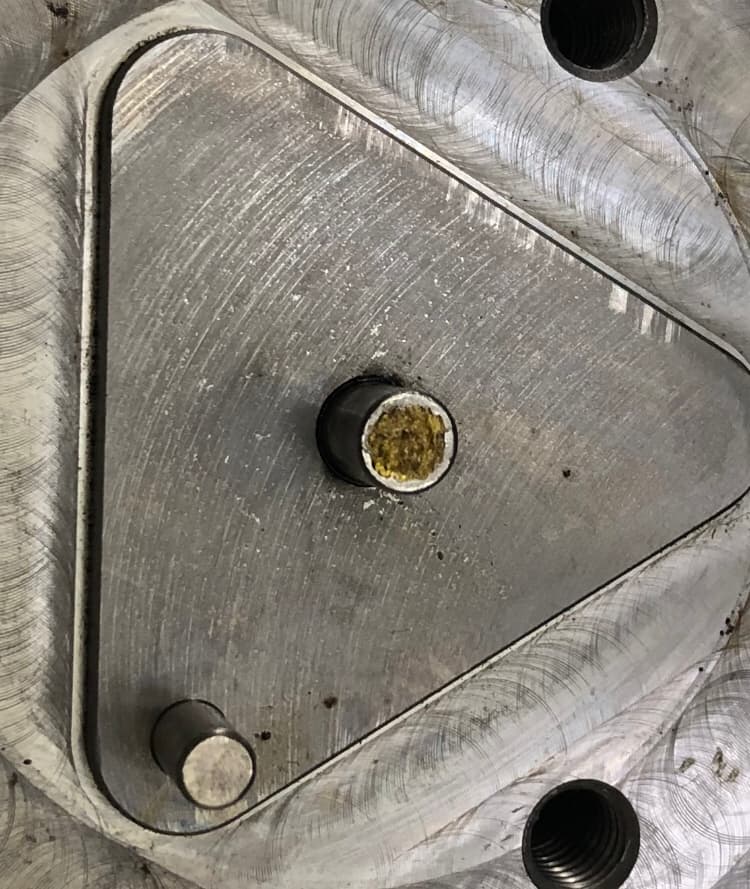
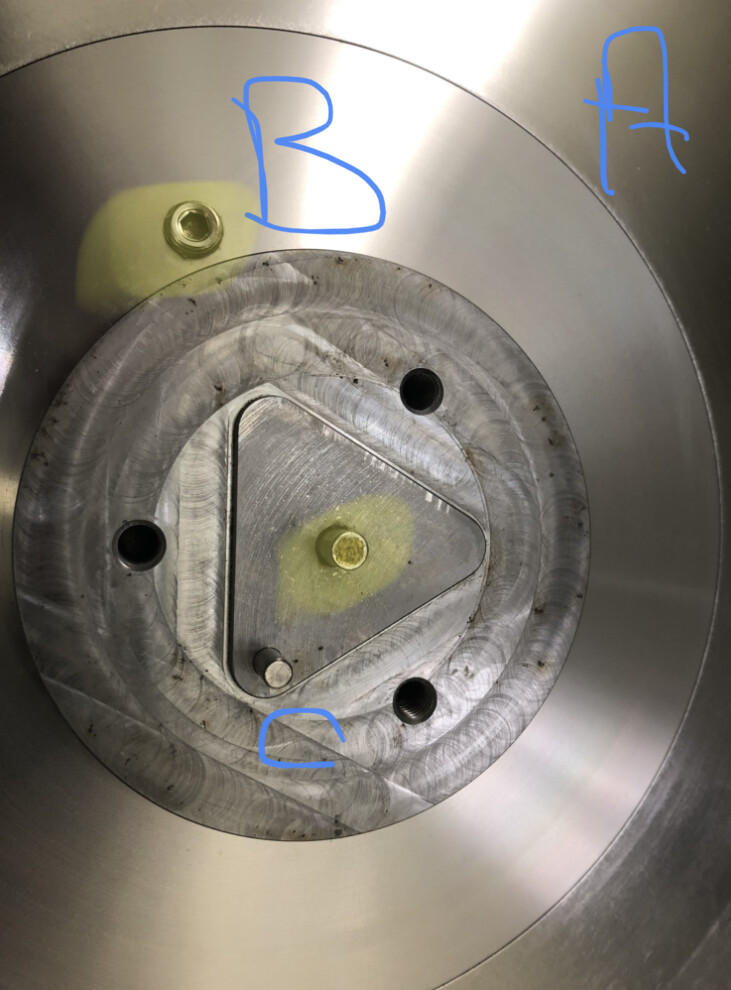
I’m guessing that if I pull the hi-lighted fastener beside “B”, the mechanical seal and shaft head will pull up and leave the rest of the drive behind?

Also guessing WHEN that fastener is removed could change the nature of the task. With removing early making pulling the head off easier?

Am I close?!?

Honestly I need to call my pops. He was the one that handled most this. But you seem correct with your assumptions.

3 Likes