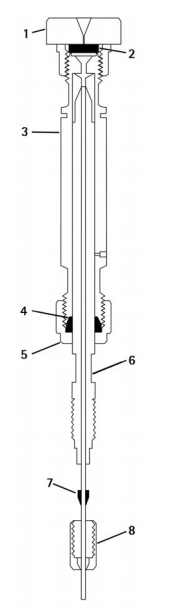
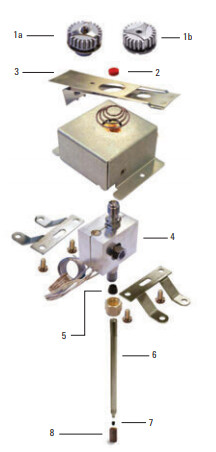
You got the debris stuck from overtightening 5 and the debris is from 4 - and now its stuck in 3.
Cool thing here - you can literally replace 3 very easily - here is the part number. I have also successfully removed debris from tiny places like this (mine where in the TOP not bottom… but its still part 3, right?) by putting this little thing in a sonic bath and letting the bath do its job of shaking and shimmying things out and loose. gotta disassemble it first… I’m making some broad assumptions about your issue. $650 is a lot to replace…
Assuming its stuck inside the tube that is shown in the middle under the square housing (labeled 4)? and not in the tube labeled “6”. Yes?
So yeah - sonic bath is what I have used before for other kinds of debris (broken glass and septum parts…) Usually I was trying these things while waiting for the replacement to arrive. And then I would have a “back-up”.
If its part 6 - sonication works way better than with part 4. And part 6 is also a bit cheaper - and you can get one from Agilent here.
I feel like you have spares of this stuff… I’ve been hunting for a couple of sets of this stuff for a minute now. So when I start this project full bore I’ll have parts to go with.
Yes its in the very tip of part 6. Unfortunately I got tapped to teach some people how to install a floor drain today so I didn’t even see the machine yet.
Your diagrams are extremely helpful and unfortunately no, I don’t have enough spares yet lol. Tomorrow I’ll try disassembling the unit and throwing some ultrasound at it. Then I’ll maybe try throwing a bit more pressure at it. I feel like I should be able to get this fixed, hopefully without having to “buy a solution”. The part seems to be brass, I can’t tell if there’s a coating I need to be afraid of if I just drill it out (somewhere I probably have an .020 drill kicking around).
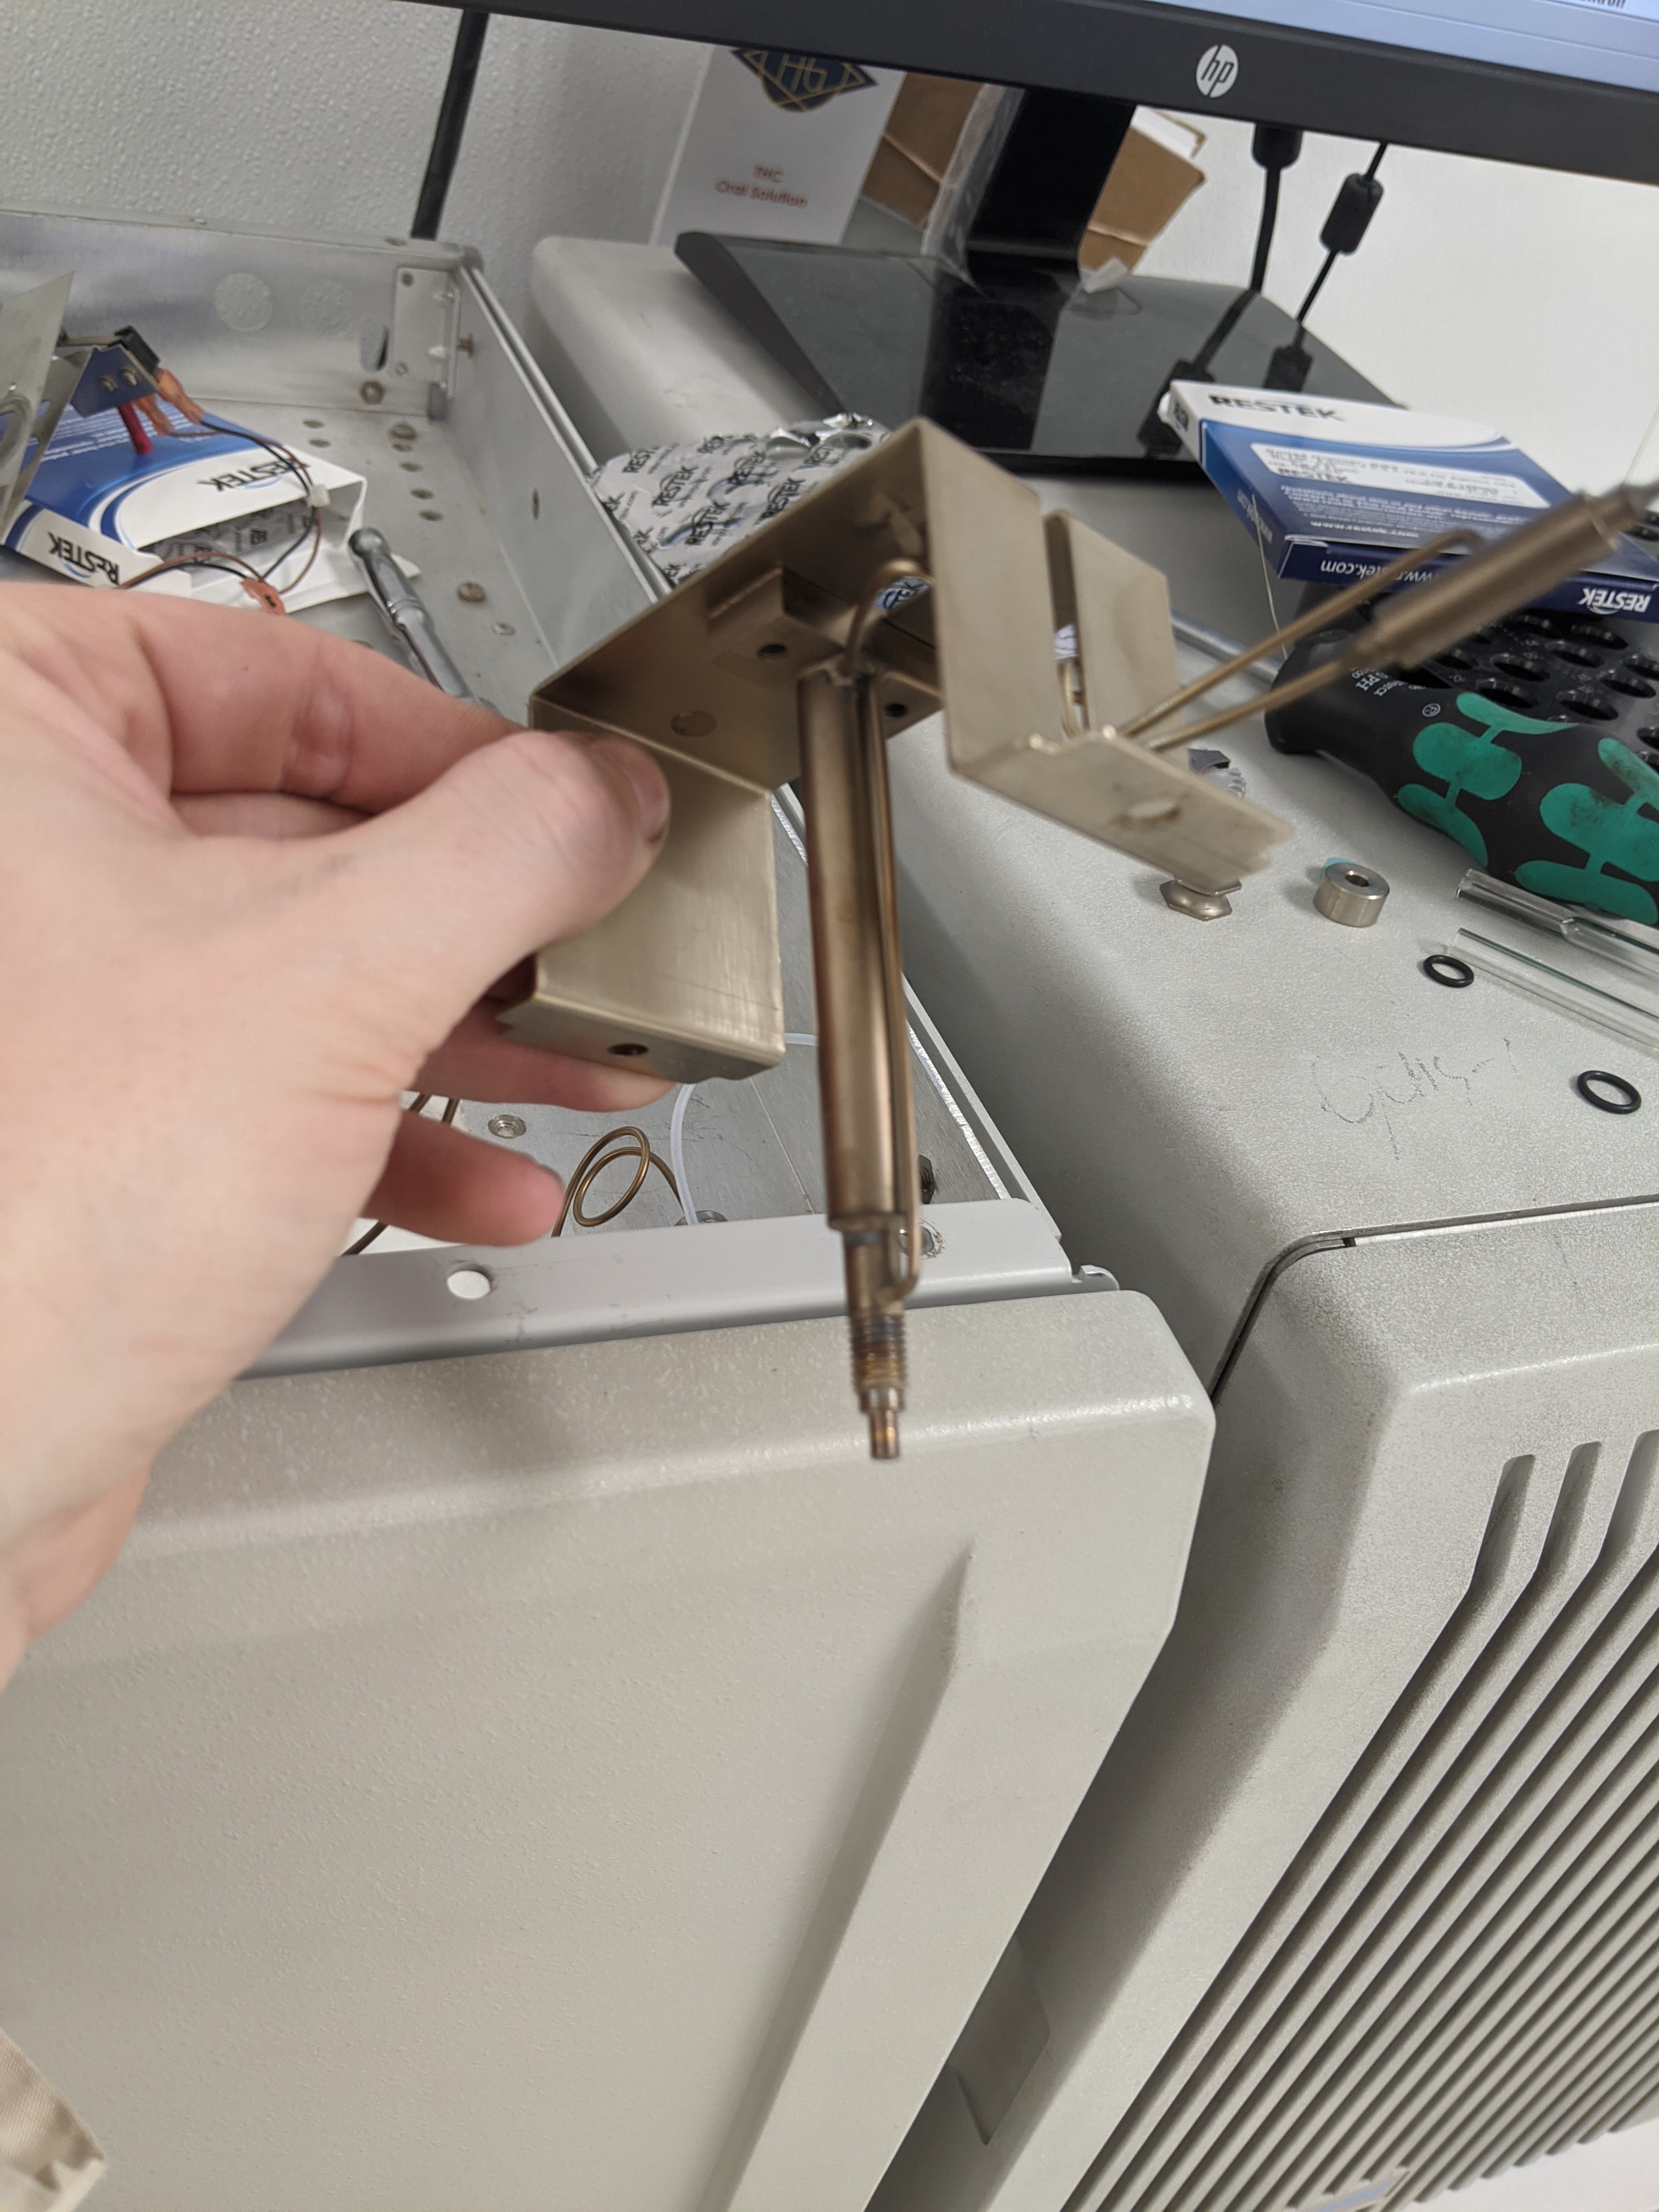
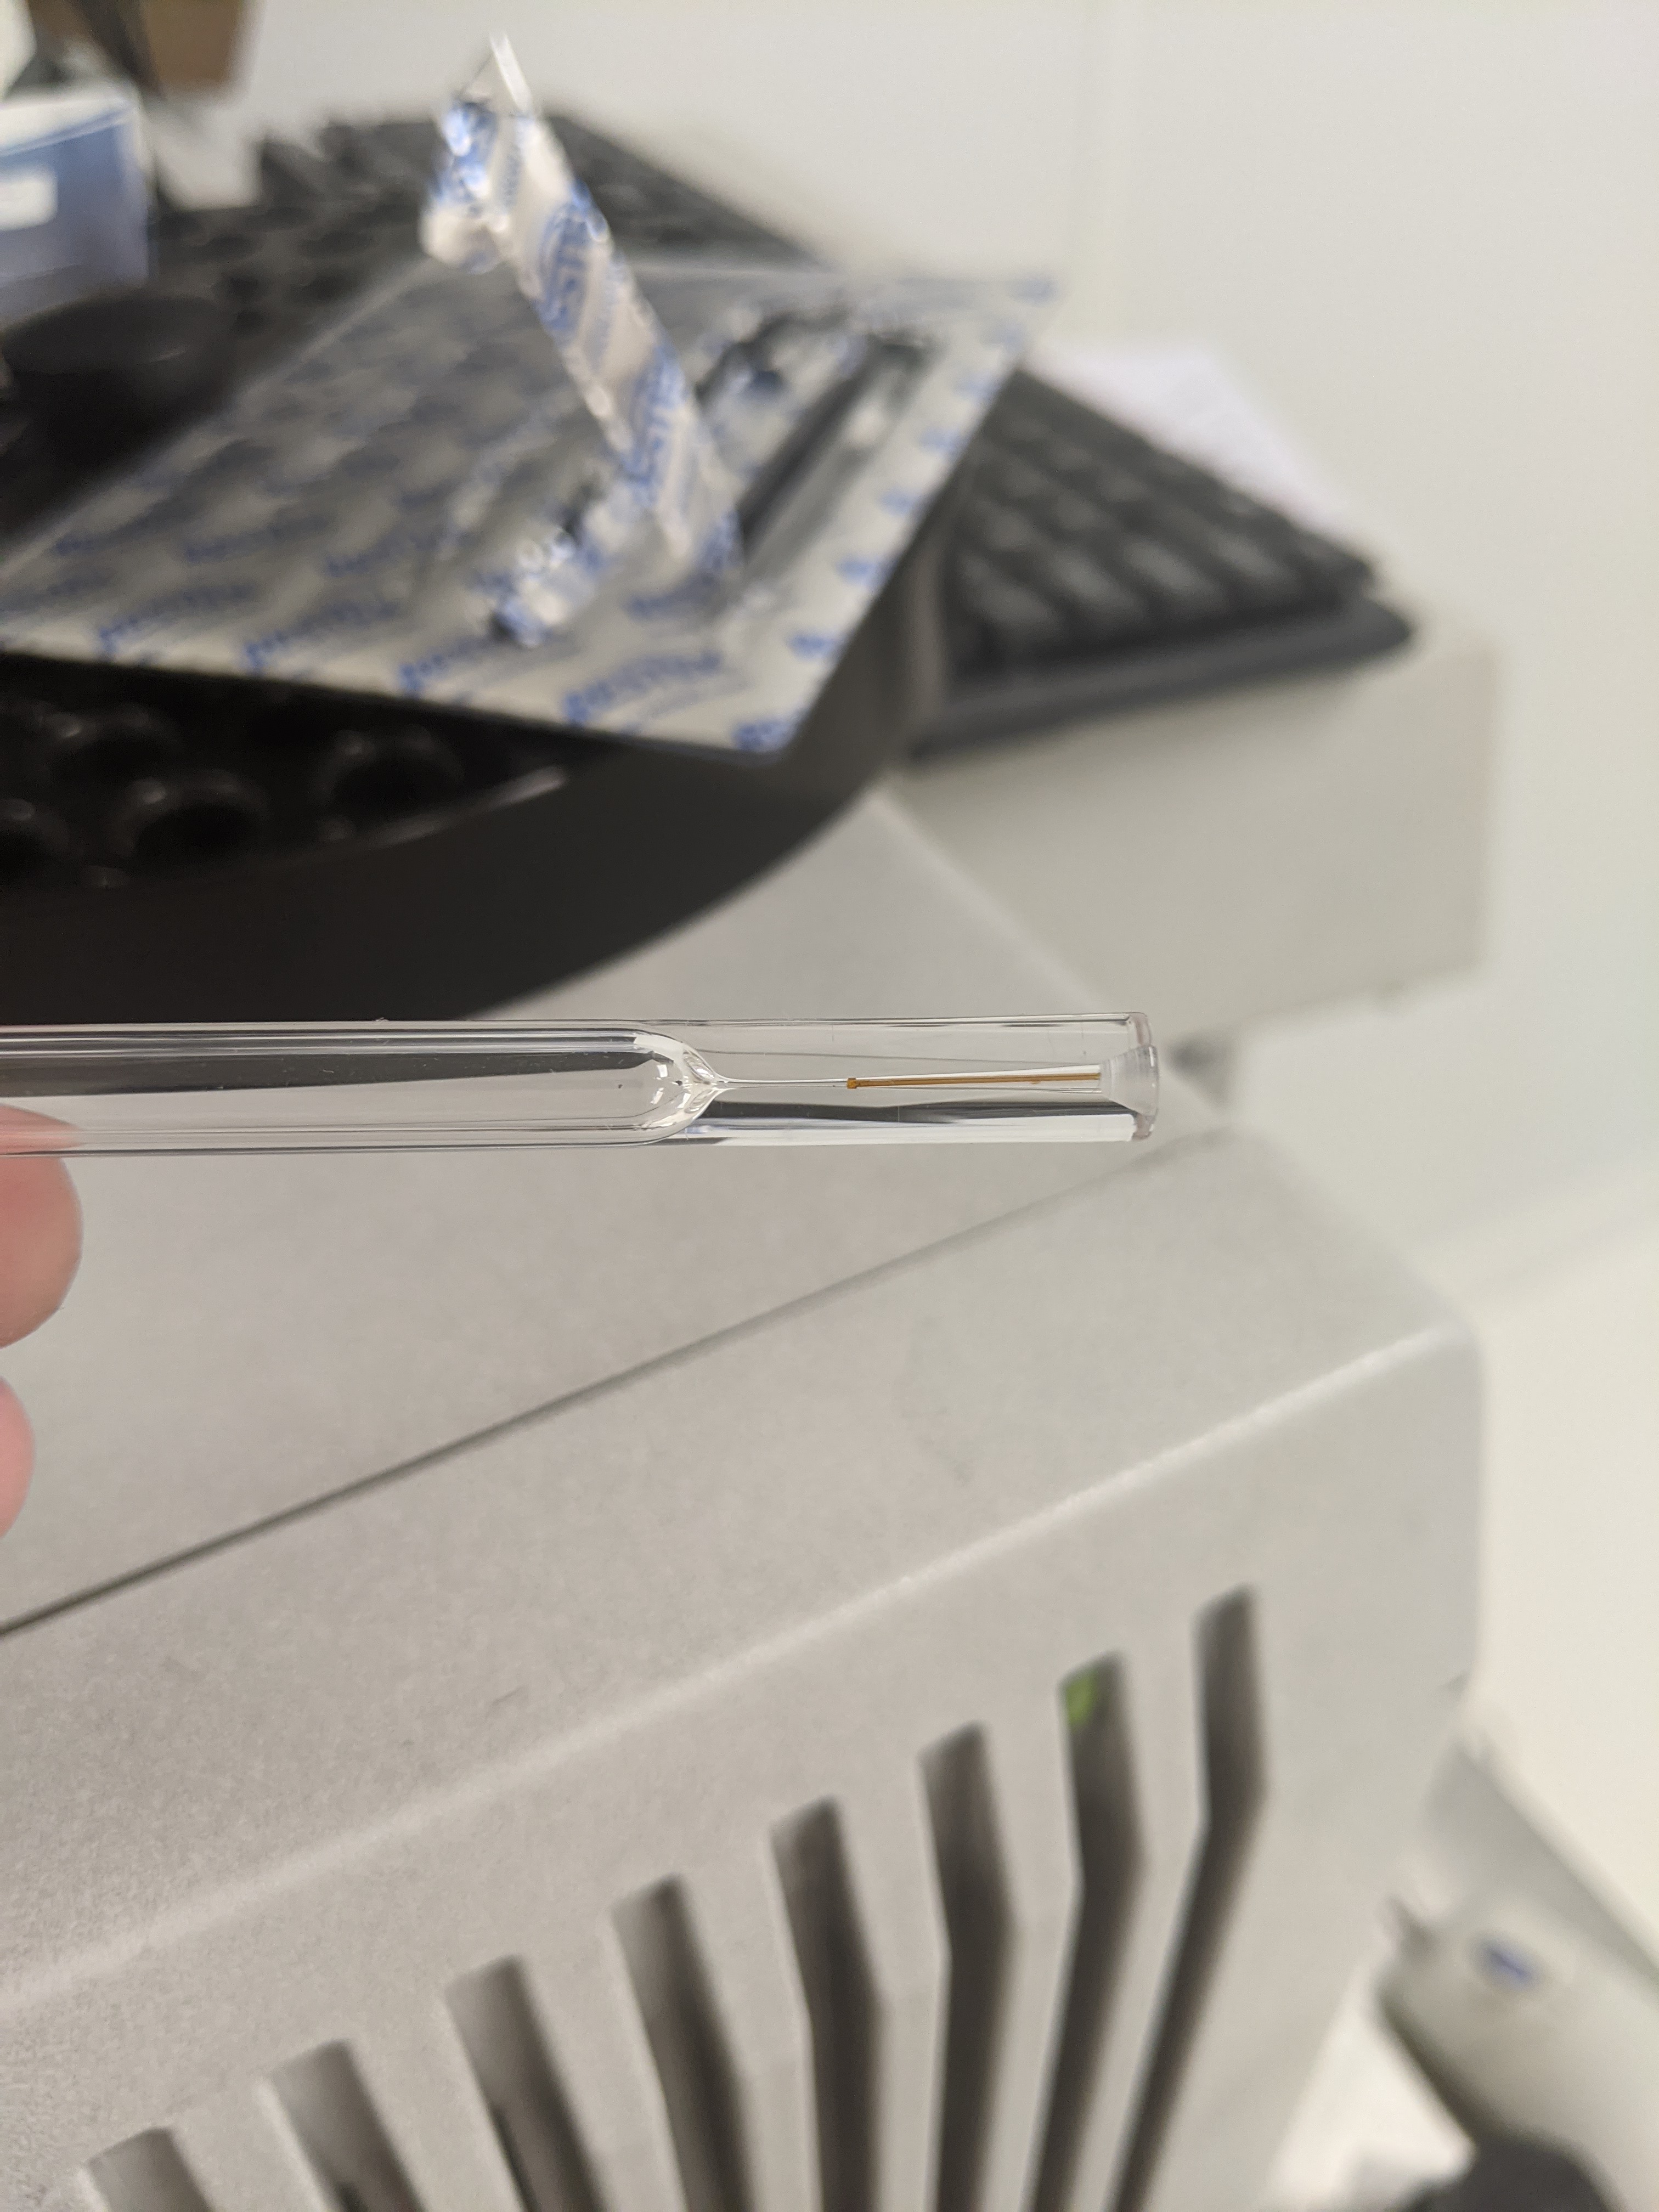
Well, here’s a picture of my fuck up. This does not seem to be assembled how the diagram @Cassin provided would make me think it would be. I wonder if this is actually some other injector
I had tried for about 20 minutes and couldn’t get it. Just got it out a minute ago now. Sonicated in hot KOH and was able to use the plunger from a microliter syringe to pop it out.
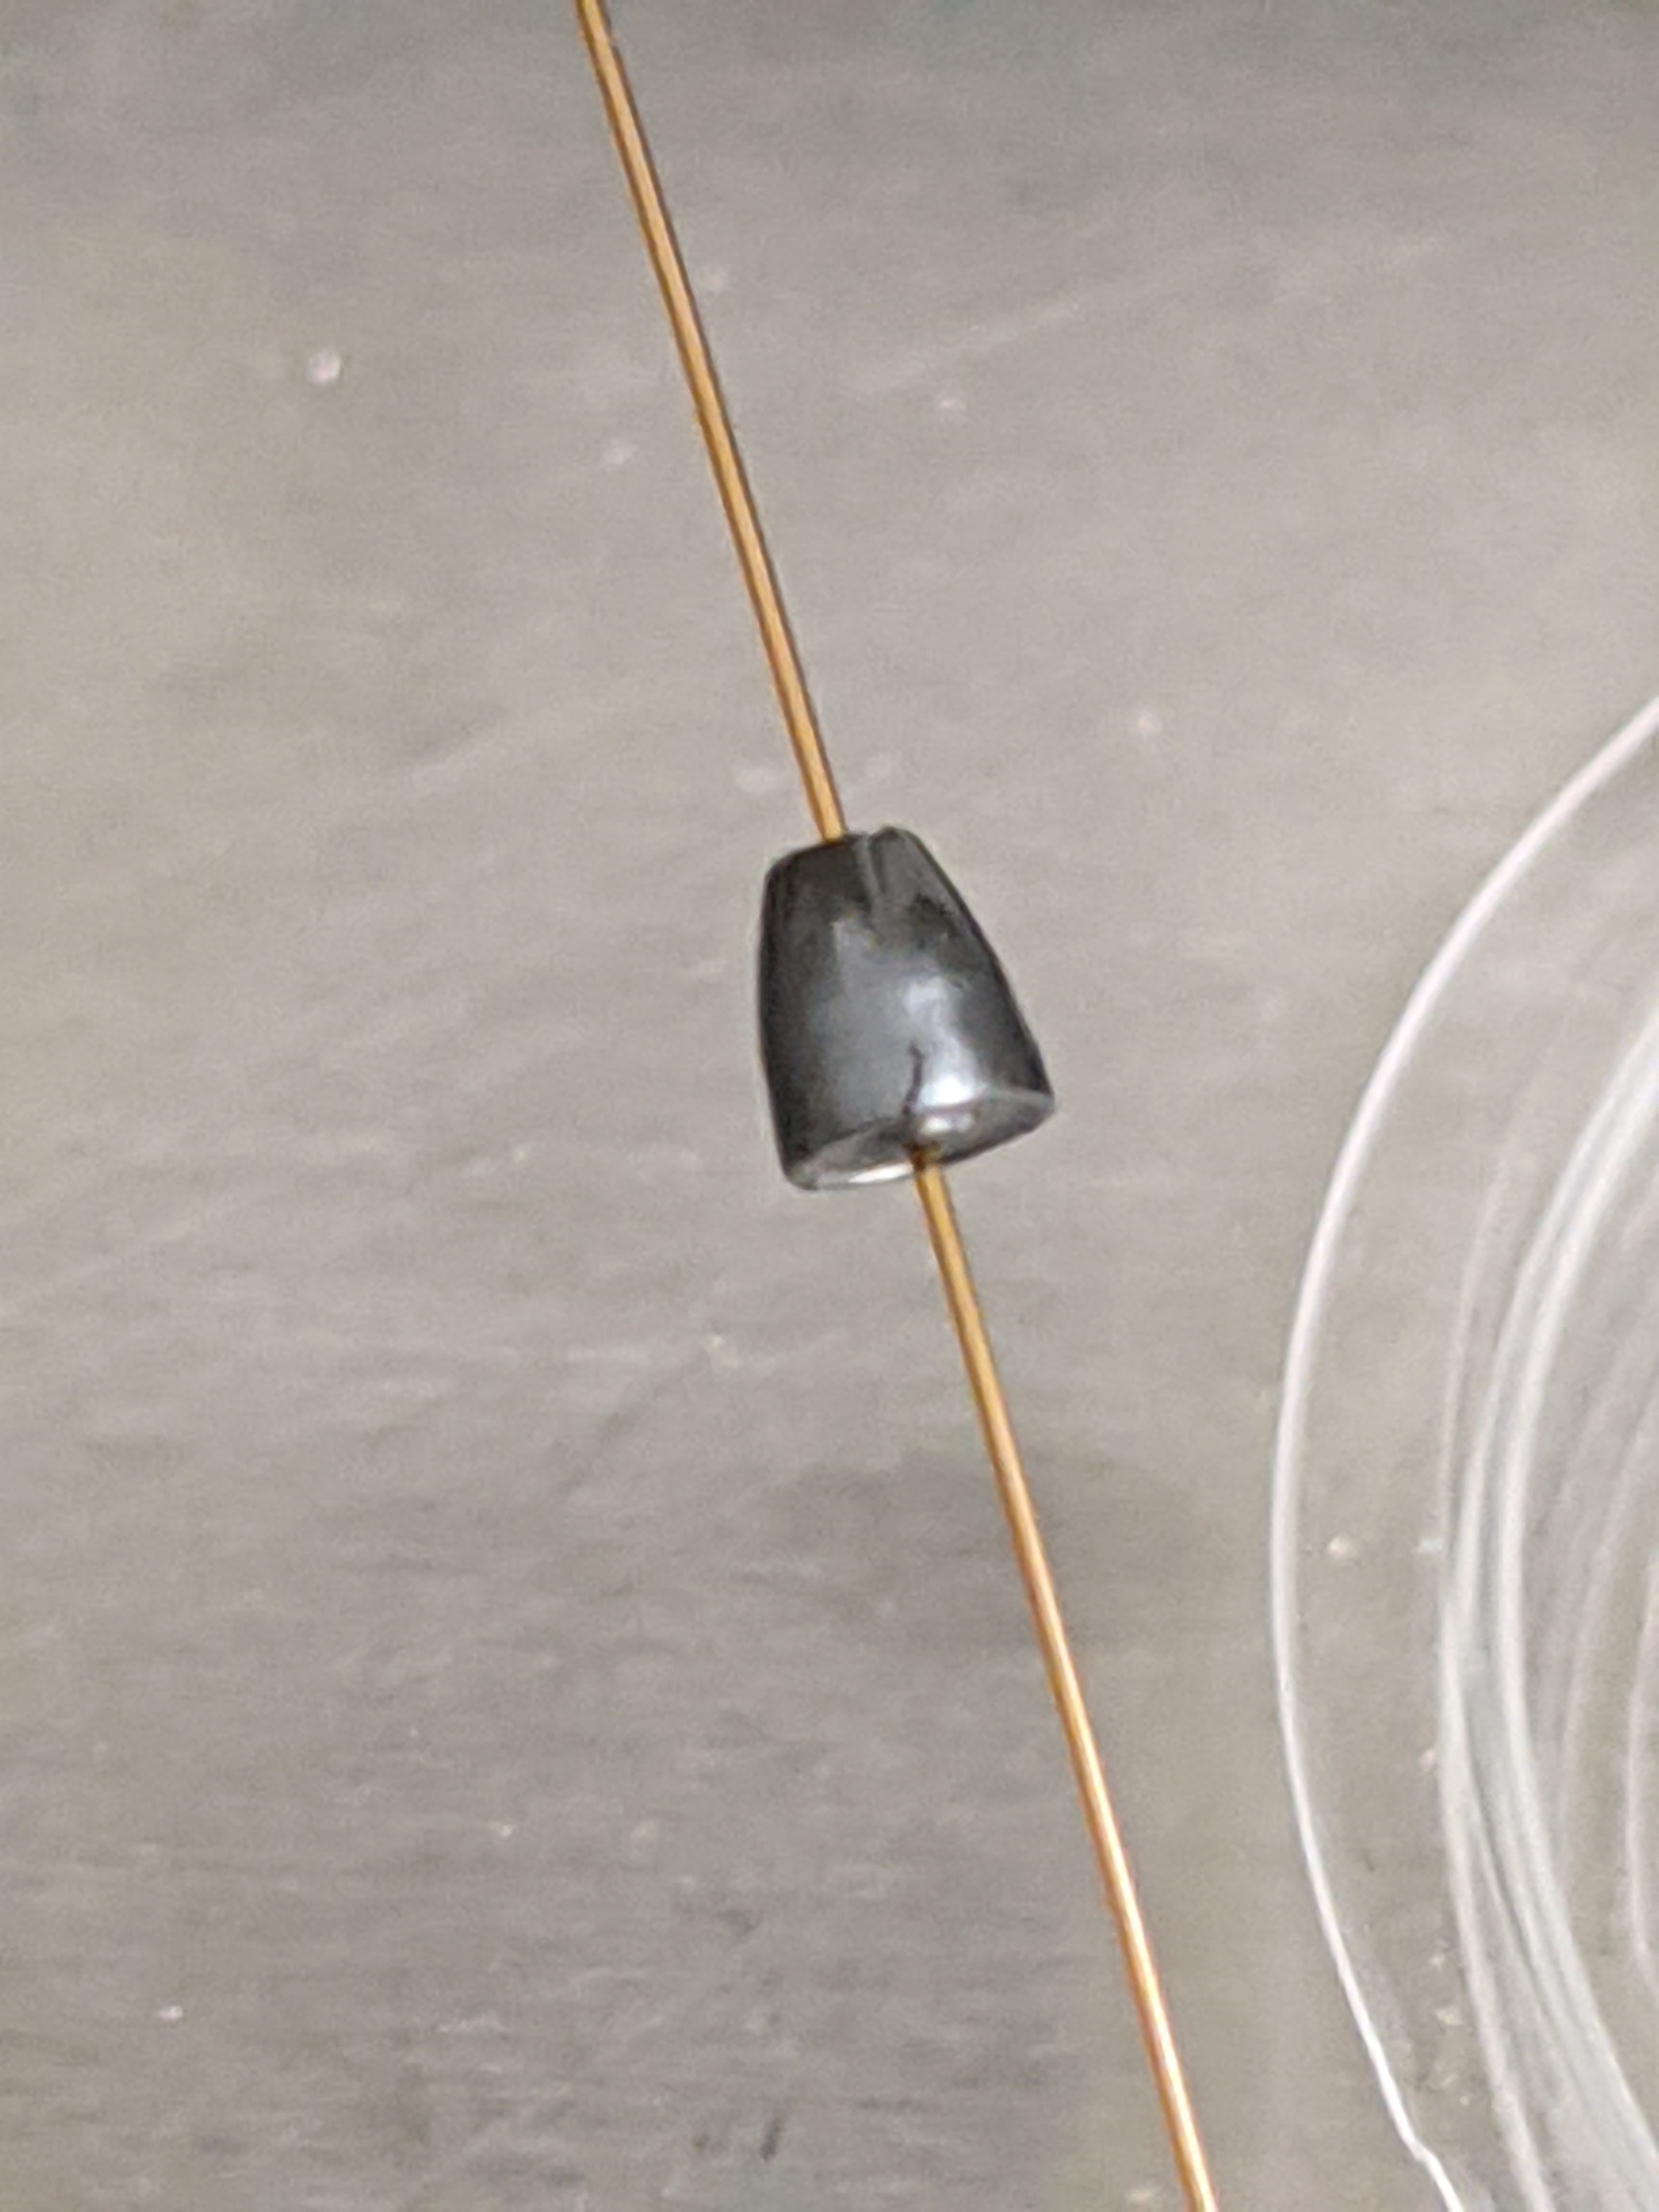
So how far is the column supposed to extend into the injector? I’m thinking that having it wedge into the taper like this is bad because it probably munches up the end of the column, but if it doesn’t then there really isn’t a seal between the column and liner.
Hi - this is based on the type of injector / injection you are going for. Here’s a cool guide from Agilent that talks about the differences. In the discussion below, I assume Split/Splitless - as that’s what I think we have been talking about before.
In general - it should be like 4-6mm or so above the ferrule - so this looks way too long. Make your column, ferrule, nut connection first. Then trim it back. Then insert it. Remember that this is not “sealed” in the way you might think of other things. The top and bottom of the “chamber” are sealed not the insert and the column itself. Some stuff will actually fall below the insert - and you’ll need to take it out and clean it periodically, but below the insert its not sealed and its not sealed to the column.
The insert is more like a guide to make sure that your injection makes it where it is supposed to go by direction. Does that make sense? You should literally be able to pop the insert in and out (not that you should but it is physically possible) without damaging the column.
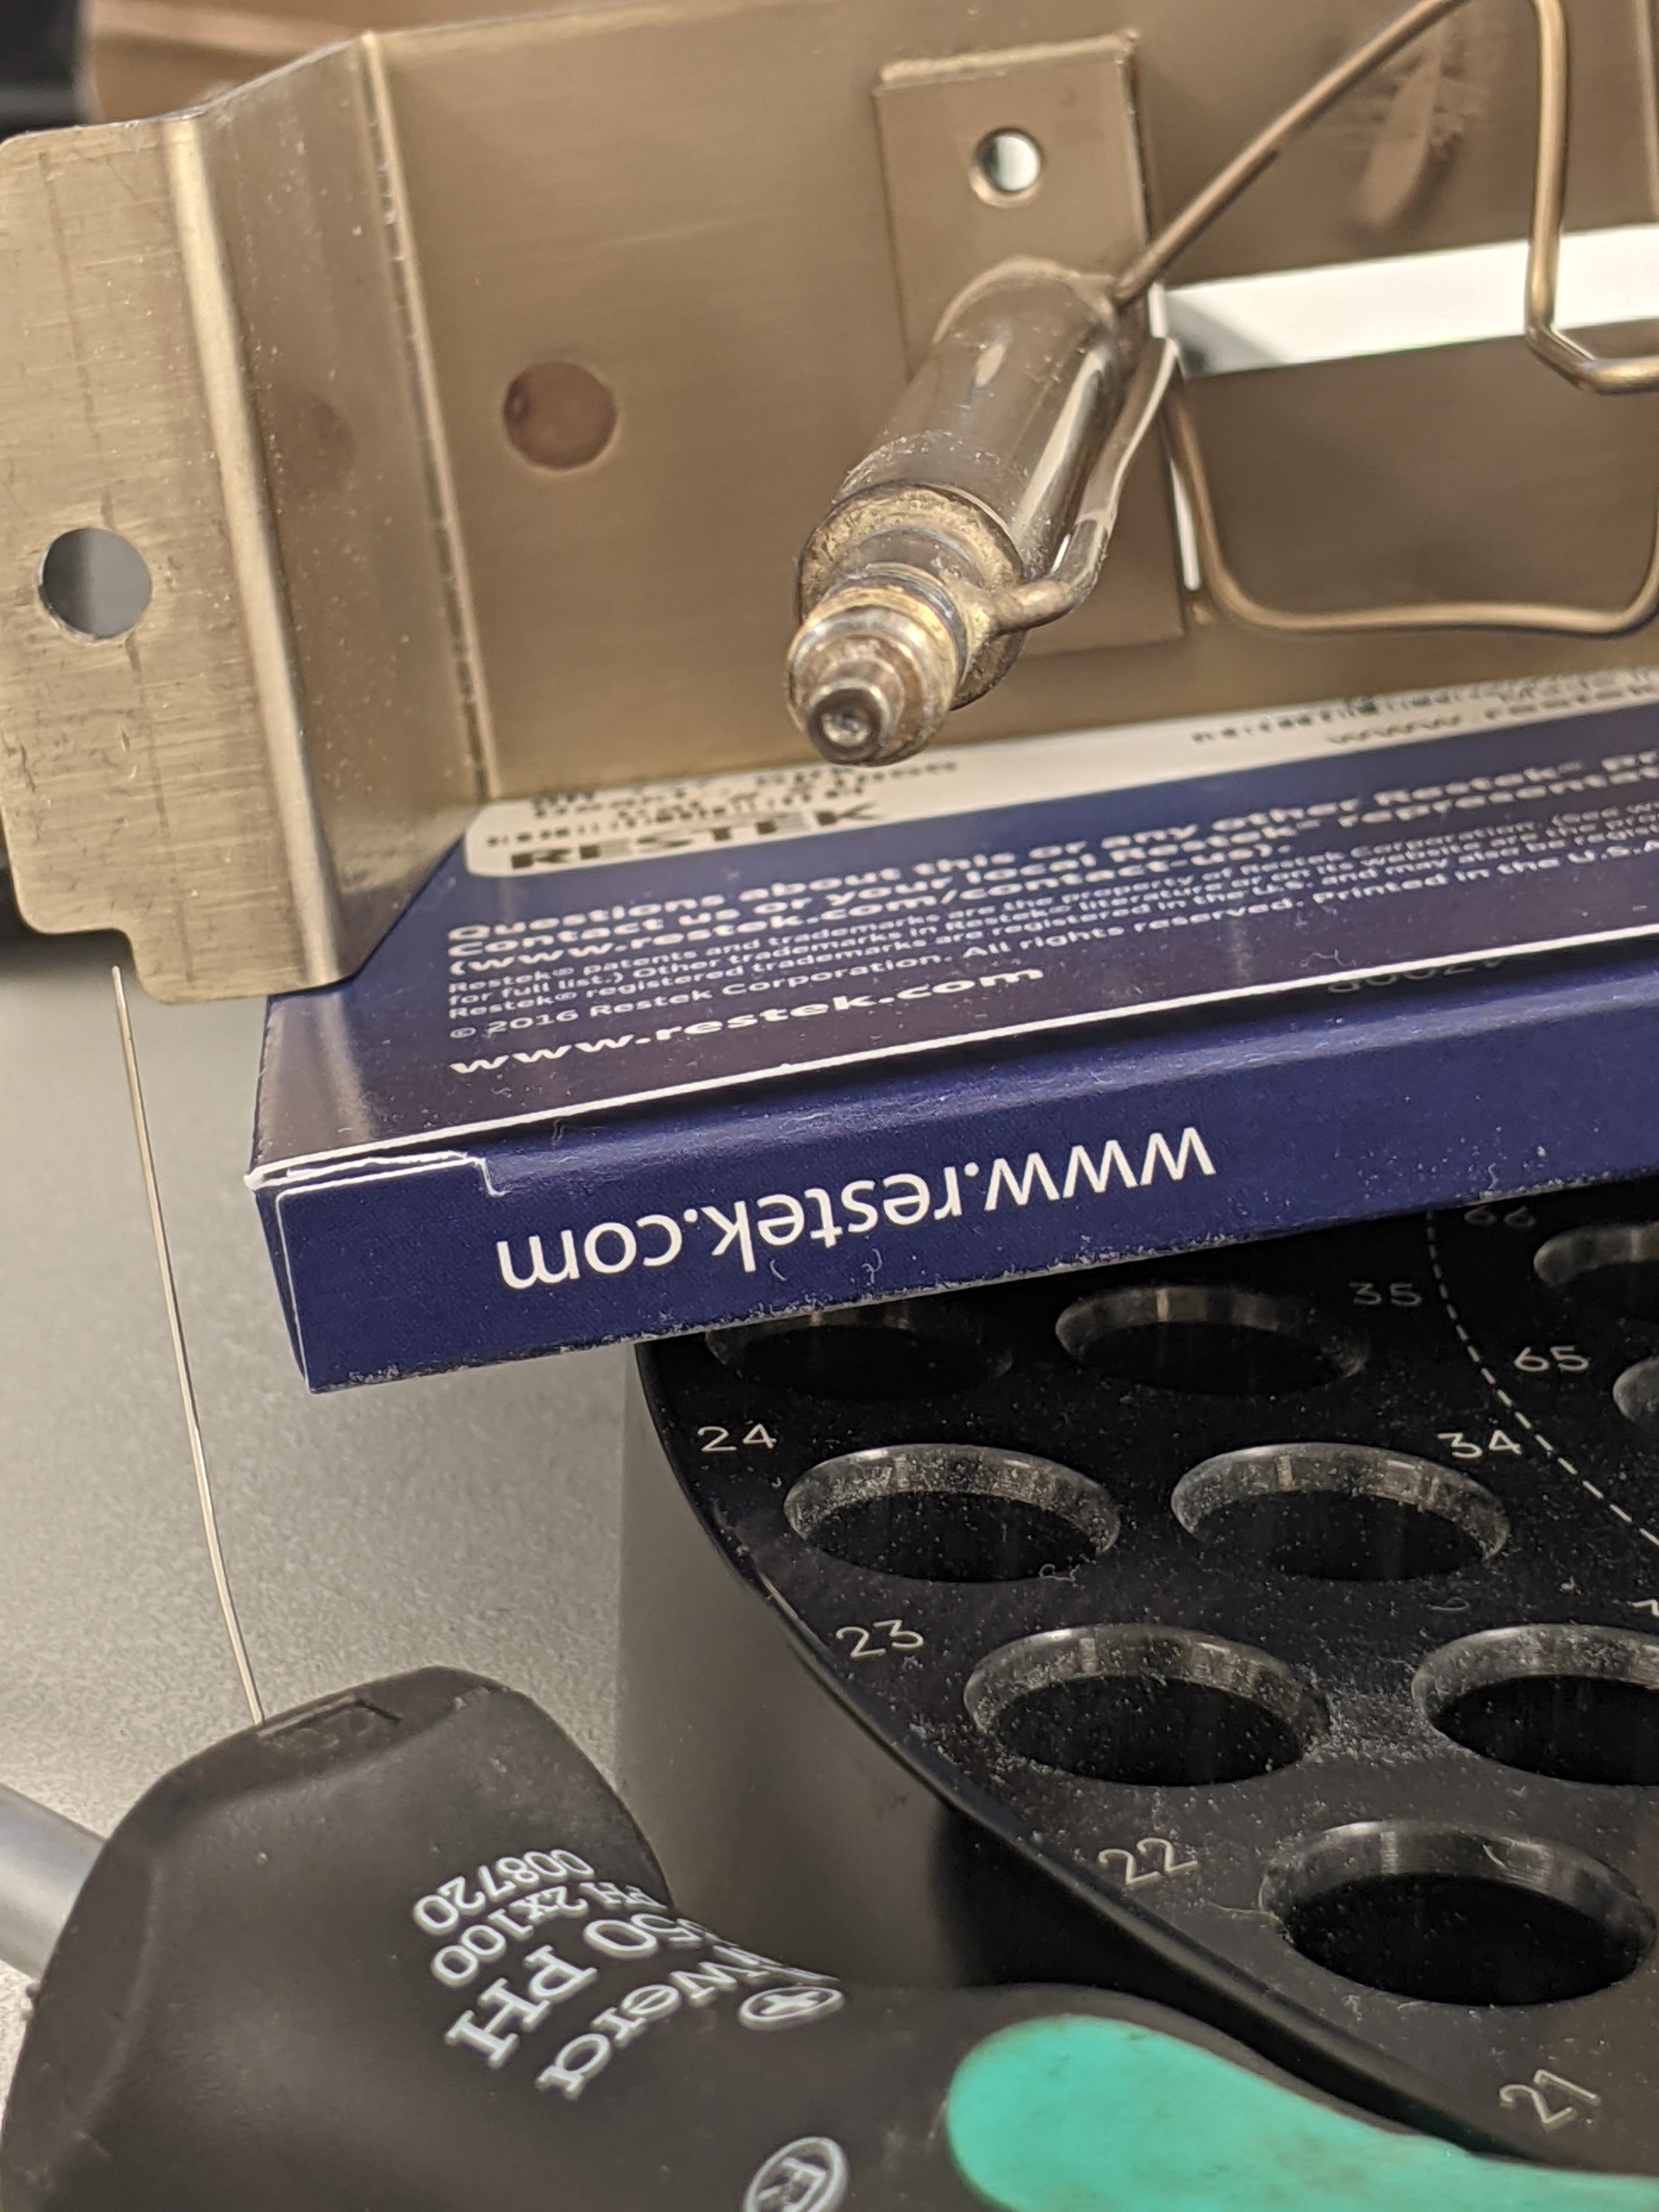
So I’m having issues with the ferrule extruding and I’m getting leaks. It’s my understanding that the ferrule should crimp on just like any other tube ferrule but when I remove the nut, I can slide the ferrule all around even when tightened to the point of getting cracks on the ferrule. I’m pretty sure I’ve got the right size, and I have no issue at the detector end but I’m having a real bitch of a time with the injector seal.
Can you take a look at the end of the inlet inside the machine where you are connecting the column and make sure that the inside of that connection looks flush/smooth? Sometimes that spot gets “tooled” because people have difficulty getting things in and out. If its not flush/smooth - then the ferrule won’t be able to seat correctly.
What column are you using? The size of the column determines the size of the ferrule so that it will crimp down around the column correctly when seating into the injector side of the GC oven.
Also - from this photo I cannot tell which direction you have the ferrule on your column.
Put the column through the nut first. Then insert the column into the ferrule, with the tapered end towards the nut. Then score and break the end of the column (make sure its straight break). Then insert into the injector port in the oven. Then tighten the nut. Should mostly crimp down onto the column (if its the right size and in the right direction).
You should be able to get this mostly “tight” so that the column doesn’t pull through with your fingers and then finish it with a quarter turn with a 5/16th wrench.
Also - ferrules cannot really be reused - and they will leak sometimes after you condition the column. So if that happens, just do another quarter turn and go again.
So I’ve verified that I have 0.4mm ferrule on a 0.25mm column. The tip of the injector glad seems smooth but I may try dressing it slightly. I’ve confirmed the nut is new, matches the column type, and that the pointy end of the ferrule is pointed towards the gland nut. Perhaps I’m overtightening still, I’d say probably went a full turn past the point that the ferrule started grabbing the column.
I’ll call Restek tomorrow I guess. It’s their nut, ferrule, and column. What’s a little strange is that the ferrule going into the MS transfer line seems to be stuck on just fine and not leaking at all. It’s from the same pack of ferrules and nuts. Maybe I’ll try setting the ferrule there first and then switch it up to the detector although that would be counter to the whole “don’t reuse ferrules” thing lol. I also think I overtightened the shit out of that one and you can all see where that approach got me on the injector